


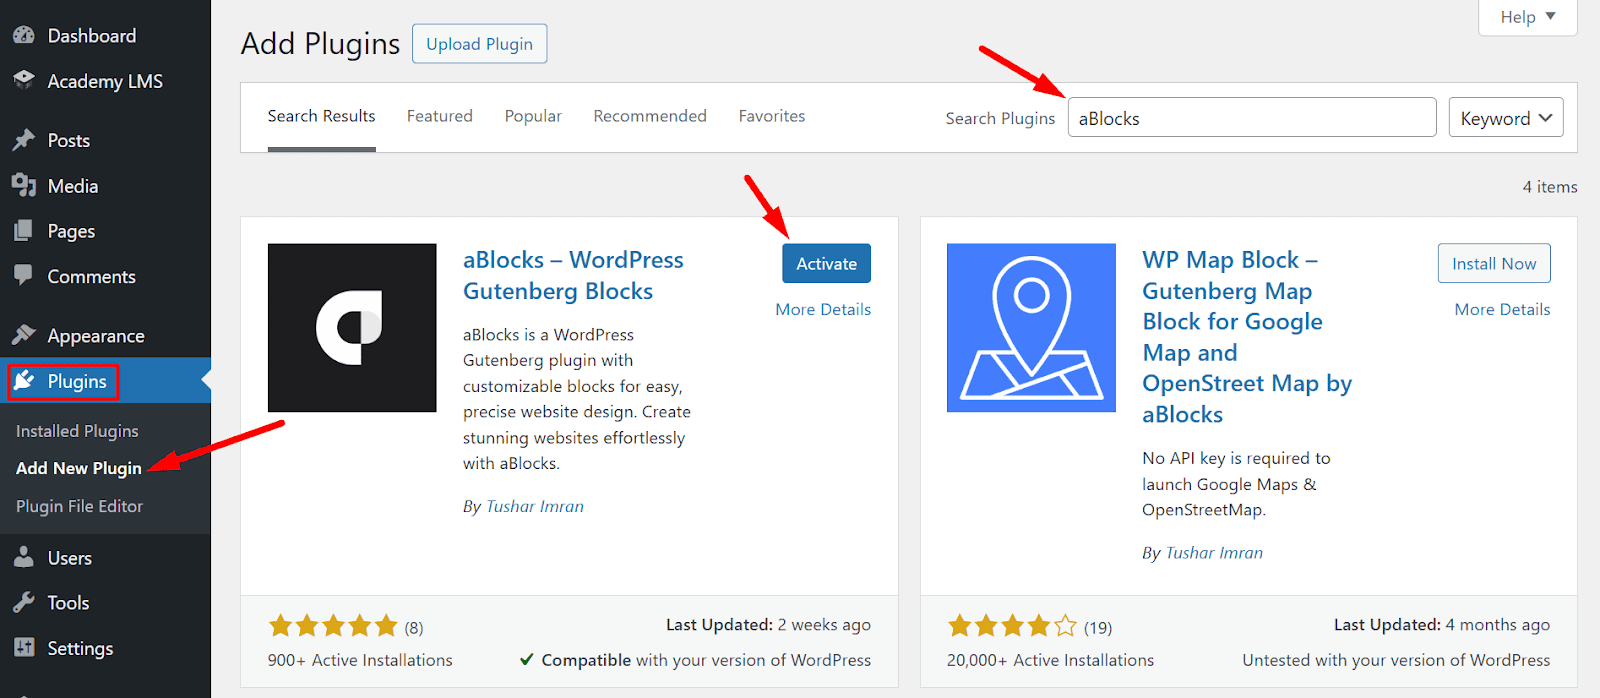
This block is powered by the aBlocks plugin, which is built by the same developers behind Academy LMS. To use this block, ensure the aBlocks plugin is installed and activated on your site. The Enroll Form Block allows you to seamlessly integrate a course enrollment form into your WordPress pages, enhancing the user experience for your eLearning platform. With its intuitive design and customization options, this block is a powerful tool for managing student registrations directly within the Gutenberg editor.
How to Use the Enroll Form Block
Create or Edit a Page:
Open the page where you want to add the enroll form block. This can be done by navigating to your WordPress dashboard, going to “Pages,” and either creating a new page or editing an existing one.
Insert the Block:
Click the Plus (+) button in the Gutenberg editor to add a new block. In the search bar, type “Academy Enroll Form” and select the aBlocks Enroll Form Block from the results. Once inserted, the block will appear on your page.
Configure the Block:
After inserting the block, you need to choose the course you want to feature from the right-hand settings panel. Select the desired course from the dropdown menu or course list provided in the block settings. Once the course is selected, a course start and enrol button will be added to your page instantly, allowing visitors to register for the chosen course directly from the page.
Customizing the Enroll Button in the Enroll Form Block
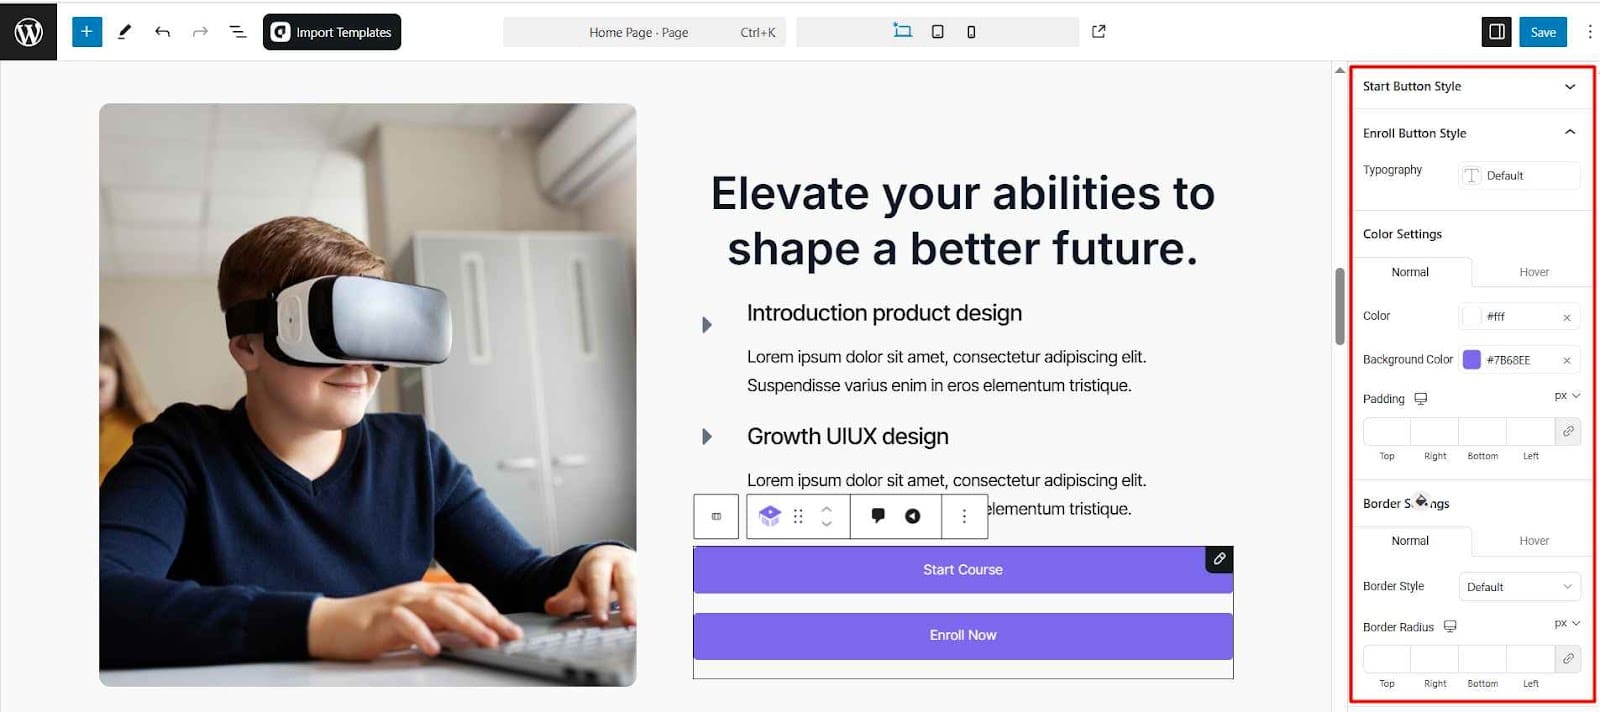
The Enroll Button Style section allows you to fully customize the appearance of the enroll button to match your branding and design preferences. Follow the steps below to modify the typography, colors, padding, and borders as per your needs.
1. Customize Typography
Click on the Typography option. By default, it inherits the global font style, but you can modify the font family, size, weight, and style according to your design needs. Choose a typography setting that aligns with your website’s theme for consistency. For more details on typography settings, check out our aBlocks Typography SettingsDocumentation!
2. Configure Color Settings
You can modify the button colors in both Normal and Hover states.
Normal State:
- Text Color: Click the color box to select a text color for the button.
- Background Color: Click the color box to select a background color.
Padding:
Adjust the padding values in pixels (px) for Top, Right, Bottom, and Left fields. You can set different values for each side or click the link icon to apply the same padding on all sides. Increasing padding will make the button larger while reducing it will make it more compact.
Hover State:
To make the button interactive, customize the Hover State settings. Set a different text color and background color when the user hovers over the button. Keep the hover effect subtle yet noticeable to improve user engagement.
3. Adjust Border Settings
Define the button’s borders to match your design.
Normal State:
Border Style: Click the dropdown to select a style (Default, Solid, Dotted, Dashed, etc.).
Border Radius: Enter values in pixels (px) for Top, Right, Bottom, and Left corners to control the button’s roundness. Click the link icon to apply a uniform border radius to all corners. A higher value (e.g., 50px) will create a more rounded button, while 0px will keep it rectangular.
Hover State:
Customize the border style and radius to change how the button appears when hovered over.
Keep the hover border subtle but noticeable to enhance the user experience.
Finalizing Your Customization
Once you have adjusted the settings, preview the button on your page to ensure it aligns with your design. Make necessary tweaks to typography, colors, padding, and borders for the best visual appeal.
By following these same steps, you can design an attractive and engaging Start Button for the Enroll form block that enhances the user experience on your Academy LMS-powered website.
Conclusion
The Enroll Form Block in aBlocks provides an easy and customizable way to add an enrollment button to your Academy LMS courses. By following this guide, you can seamlessly integrate and customize the enroll button to match your website’s branding. Ensure that the aBlocks plugin is installed and activated for optimal functionality. Happy teaching with Academy LMS!
You can explore our related documentation for further assistance: