


Zoom is a web conferencing software that allows video conferencing and screen sharing with multiple people from any device. Zoom integration is highly useful for online teaching. The Academy LMS now seamlessly integrates with Zoom. Zoom offers great features for live video calling, screen sharing, and video recording, which will significantly increase collaboration between instructors and students.
“If you used a JWT app type to integrate Zoom with Academy LMS, you need to migrate to the server-to-server app type. According to their official announcement, the Zoom JWT app type will be deprecated!
Hence, you must migrate to the new server-to-server OAuth app and update your API setup by September 1, 2023.
The Zoom integration process with the Academy is very easy. You will need these two plugins installed and activated in order to use Zoom Integration:
Although Zoom (both free and pro) can be linked with Academy LMS Pro, the pro version of Zoom is not offered as part of Academy LMS. If you wish to use Zoom’s pro capabilities, you must buy the pro edition of Zoom individually.
All Steps For Connect Zoom With Academy LMS
The following steps should be followed to connect Zoom integration with Academy LMS and migrate from a JWT app to a Server-to-Server OAuth app:
Step 1:
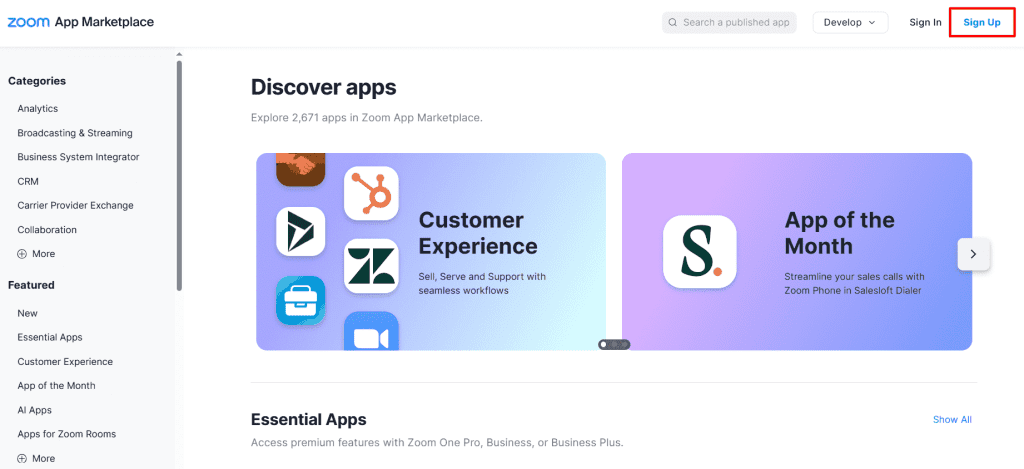
Log in with your Zoom account via the Zoom App Marketplace Developer Dashboard https://marketplace.zoom.us/develop.
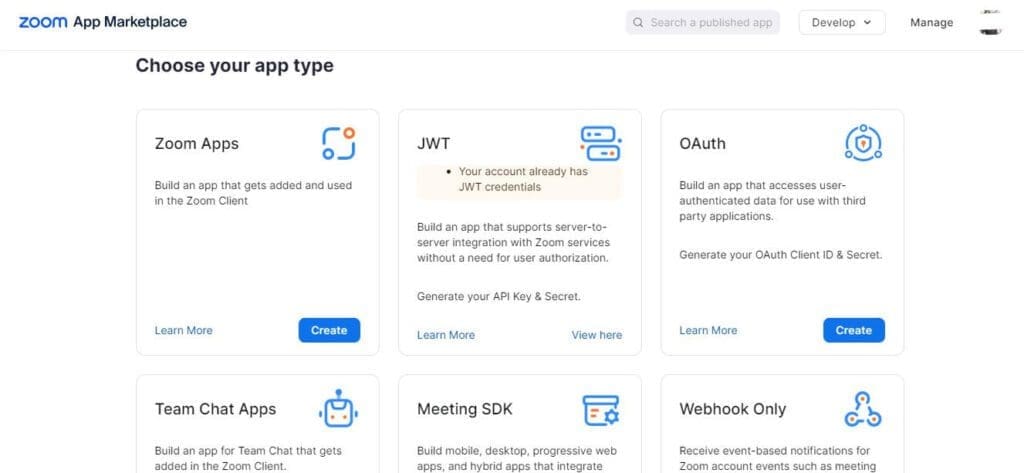
The Create page on the App Marketplace states that “Your account already has JWT credentials” if you already have a JWT app, as demonstrated below:
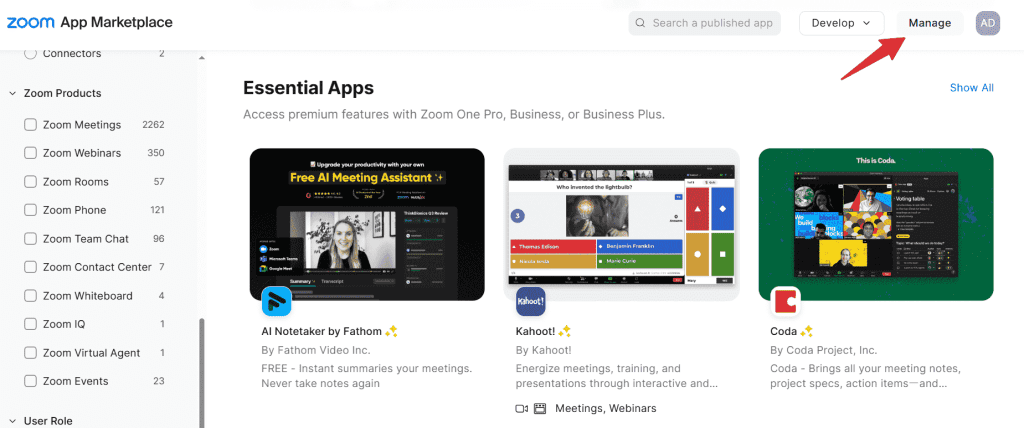
Note: If you are an existing user you can mange your account by click on Manage section.
Now, click the Manage option located at the top right corner.
Step 2:
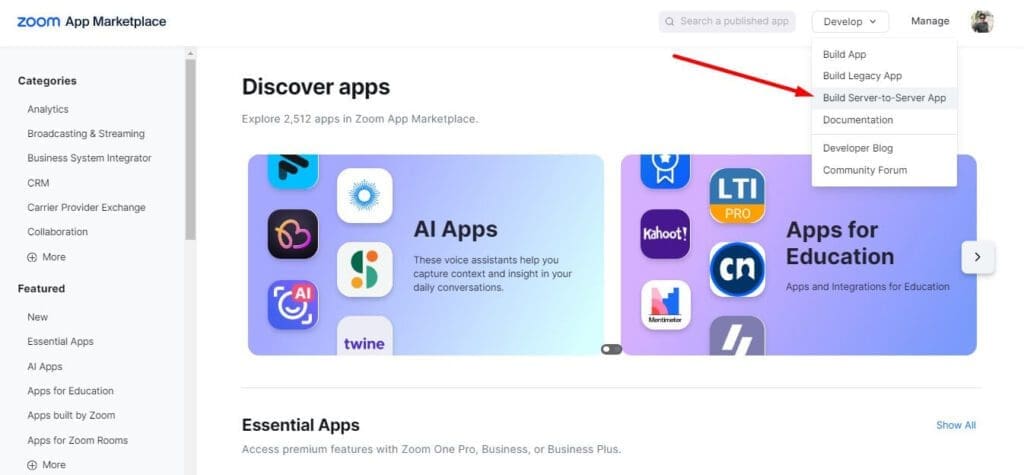
Now click on Develop section, then select and click on Build Server-to-Server App.
You will now see the Server-to-Server OAuth app popup. Set a name for the Server-to-Server OAuth app, then click Create.
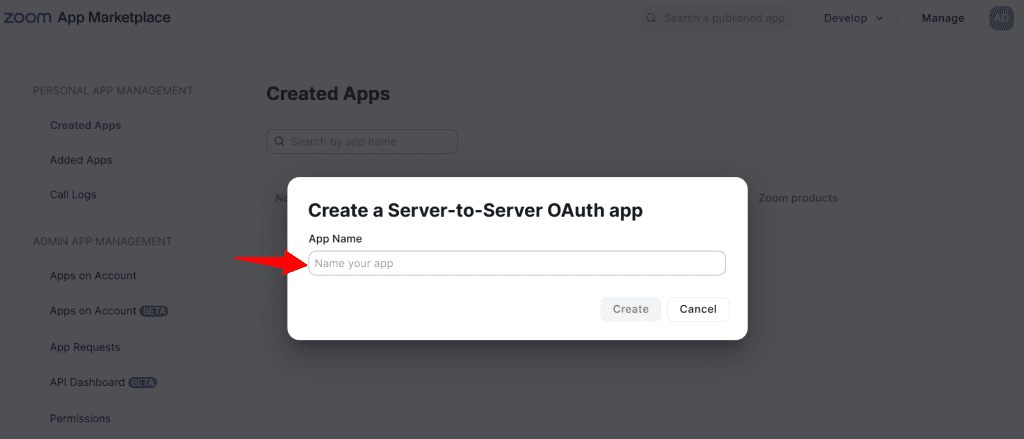
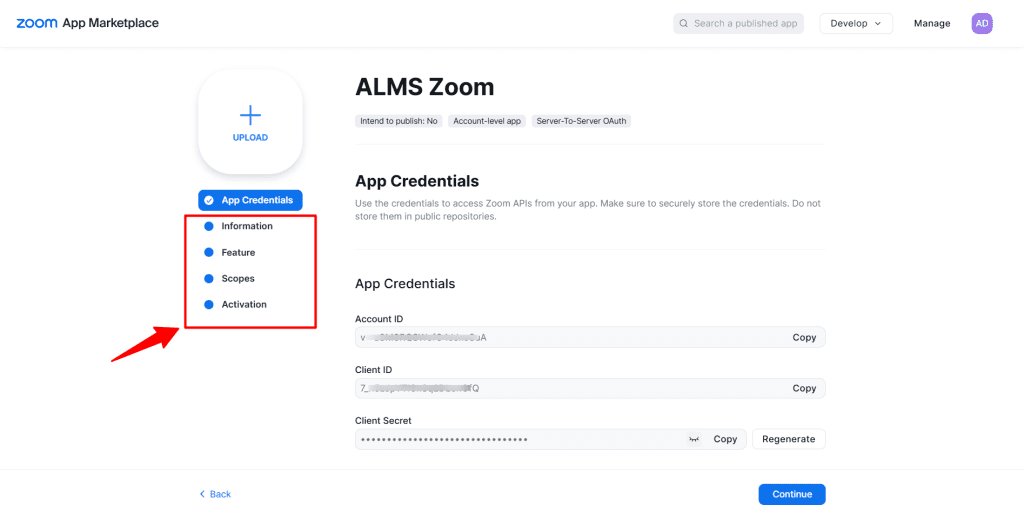
This will take you to the App credentials page. But first, you need to fill in the required Information & Scopes to Activate your app.
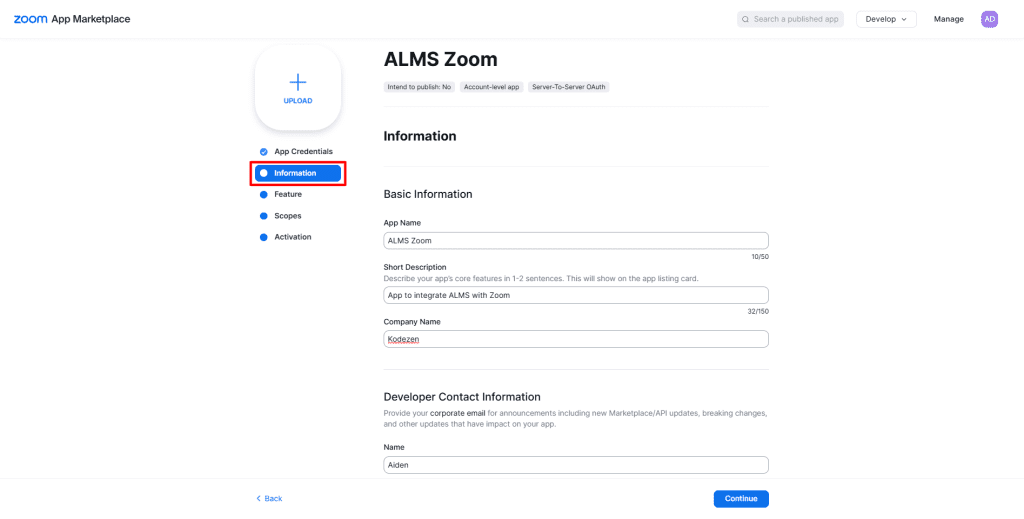
Step 3:
Select the information tab from the left-hand side. Now, provide the basic information, including the App Name, Short Description, Company Name, and Developer Contact Information.
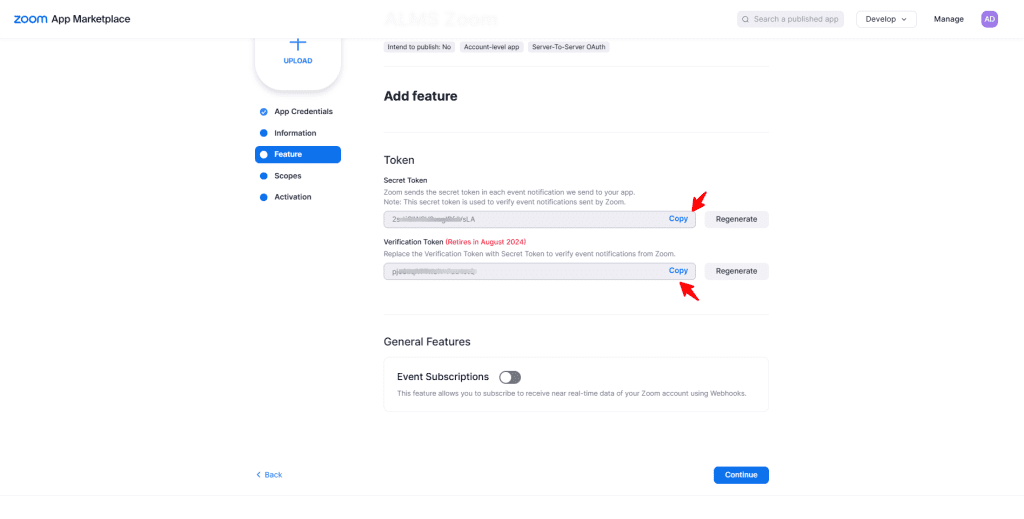
Step 4:
The next stop is at Feature, where you will get the required Secret Token and Verification Token for later use. Simply copy the tokens, save them for later use, and click Continue.
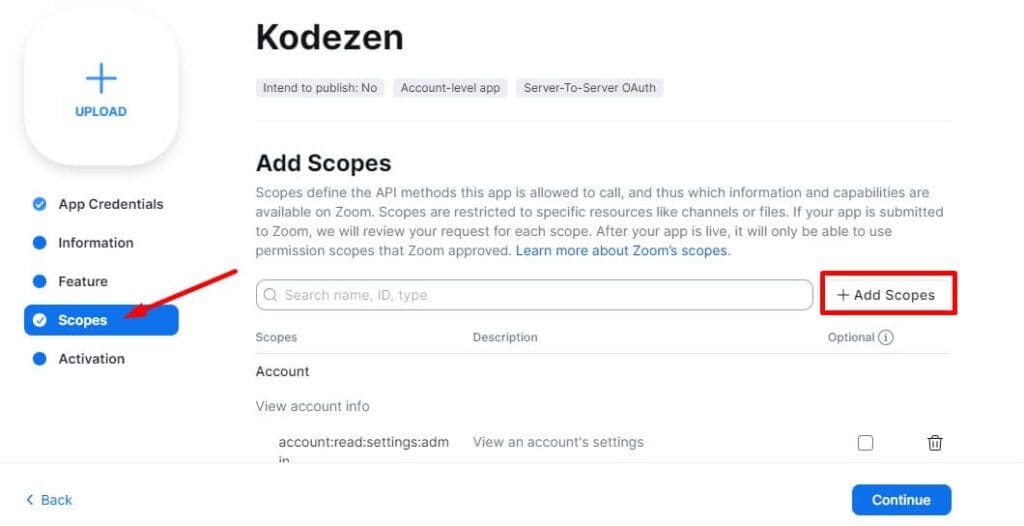
Step 5:
Go to Scopes and set up the required scopes for your app to establish a connection with Academy LMS. You should tick mark every checkbox to all the products available based on your account privileges.
Note: Old app users do not need to change any scopes. New users can find and select their scopes from here.
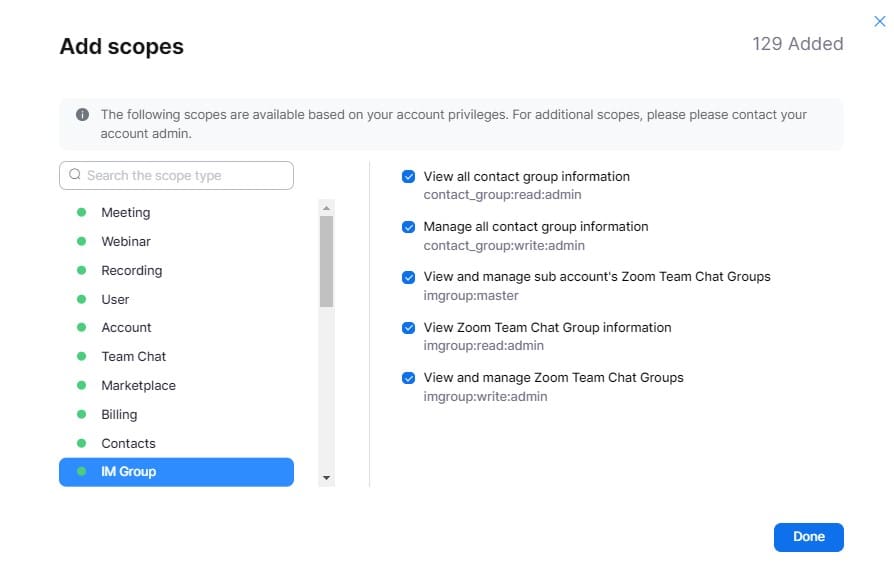
Special Requirements For New App (Zoom Granular Scopes)
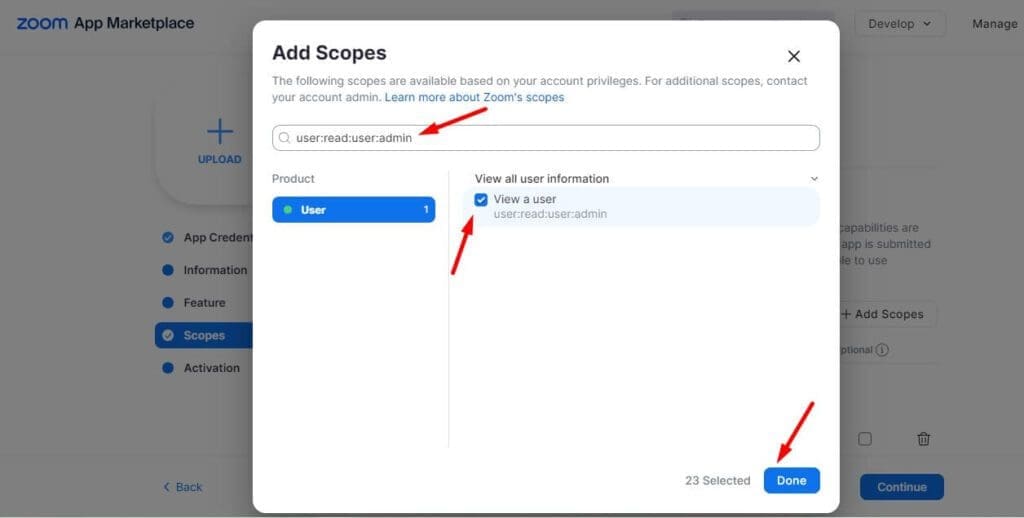
All the above-mentioned instructions will be the same for old app users. But if you are a new app user of Zoom, follow these instructions for Scopes Add to use in Academy LMS. New user cannot add more than 50 scopes. Below are the scopes you need to search for and add to using Zoom with Academy LMS:
user:read:user:admin

user:read:user:master

meeting:read:meeting:admin

meeting:read:meeting:master

meeting:write:meeting:admin

meeting:write:meeting:master

meeting:update:meeting:admin

meeting:update:meeting:master

meeting:delete:meeting:admin

meeting:delete:meeting:master
From the Scopes section, click on Add Scopes.
Now search all those given scopes one by one and add them all. Then follow the rest steps to activate Zoom with the Academy LMS.
Step 6:
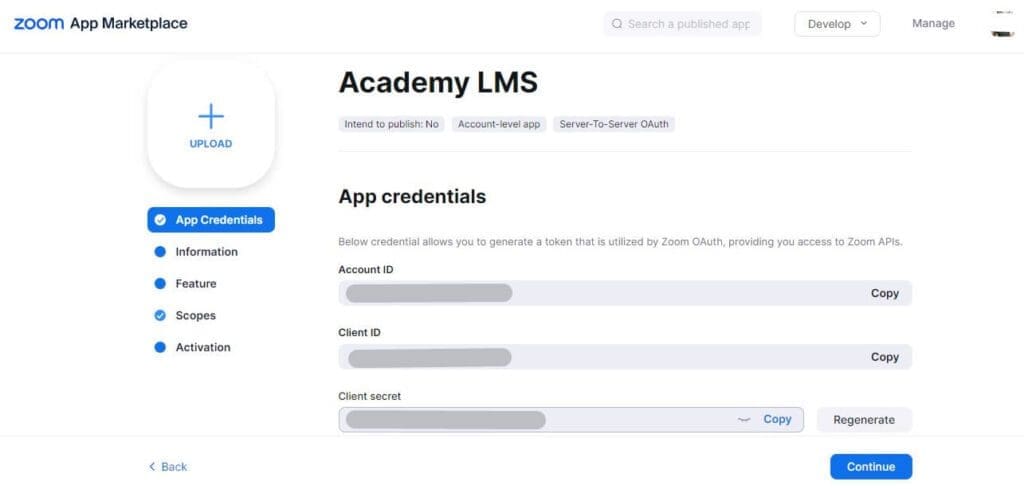
To activate your app, go to Activation.

Get the Account ID, Client ID, and Client Secret by going to App Credentials after your Server-to-Server OAuth app has been launched. You will require these credentials in the next stage, so keep them close to hand.
Link Zoom to the Academy LMS
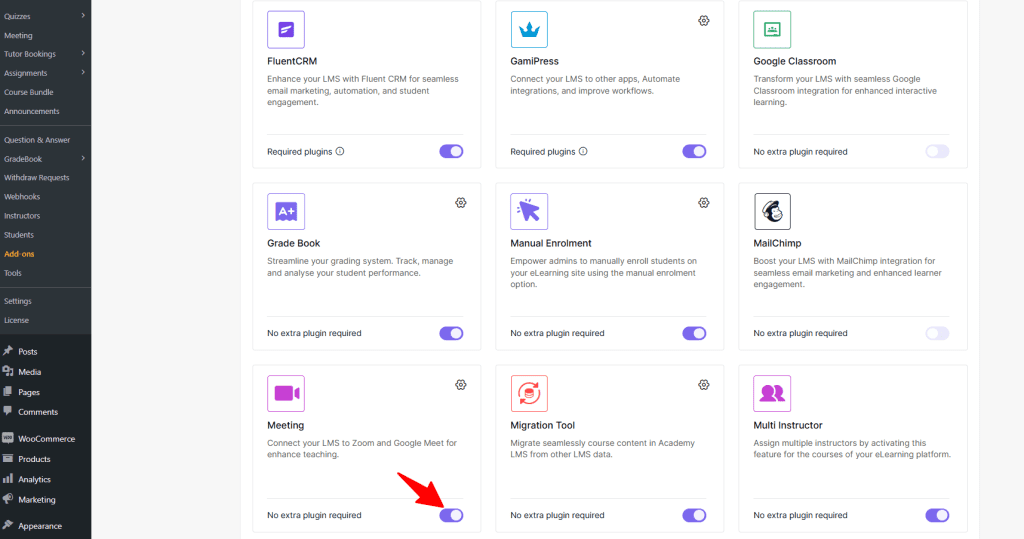
Now it is time to connect Zoom to the Academy LMS. To do that, you have to enable the Zoom add-on. To enable the Zoom integration feature, go to Academy LMS > Add-Ons and enable the Meeting add-on.
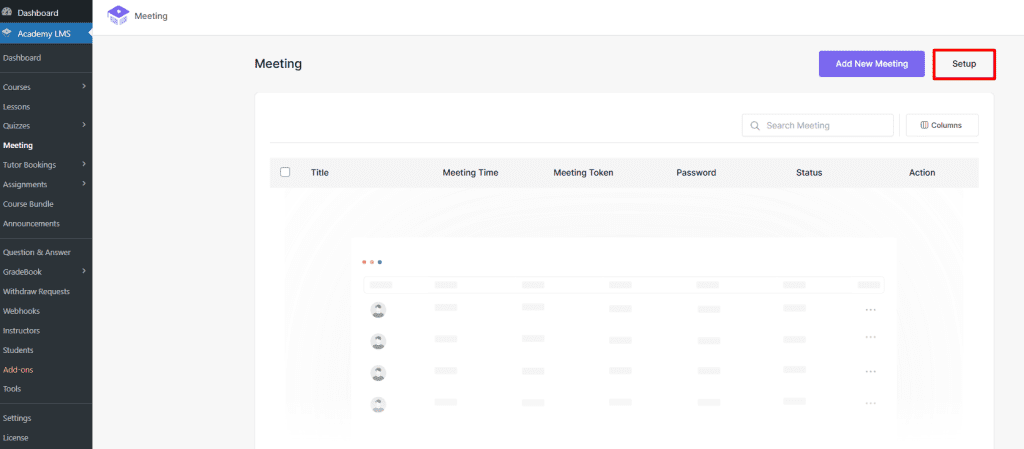
Your Academy LMS now has a Meeting menu. Click Meeting and then the Setup button to configure the Zoom integration setup.
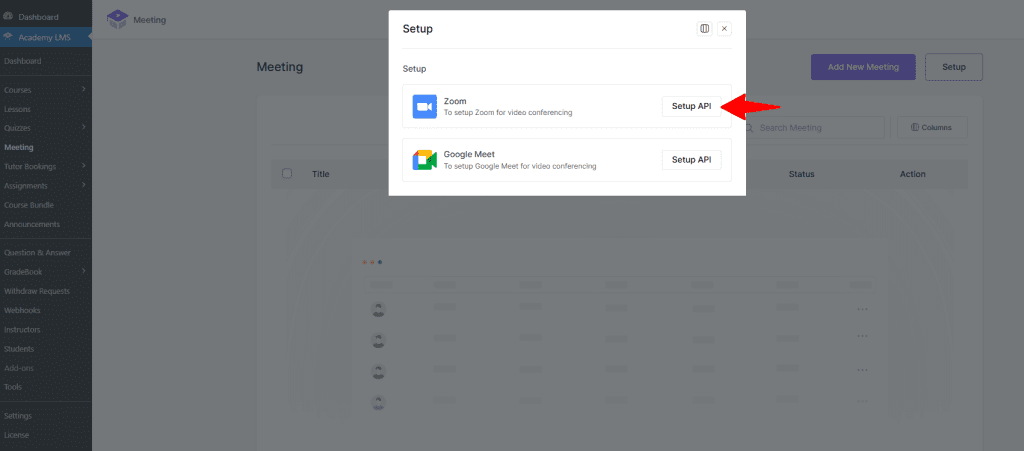
You will now have the option to set up your meeting with Zoom. Click the Setup API button beside Zoom.
Now paste the Account ID, Client ID, and Client Secret from the Server-to-Server OAuth app you just made into the Zoom setup section, then save your modifications.
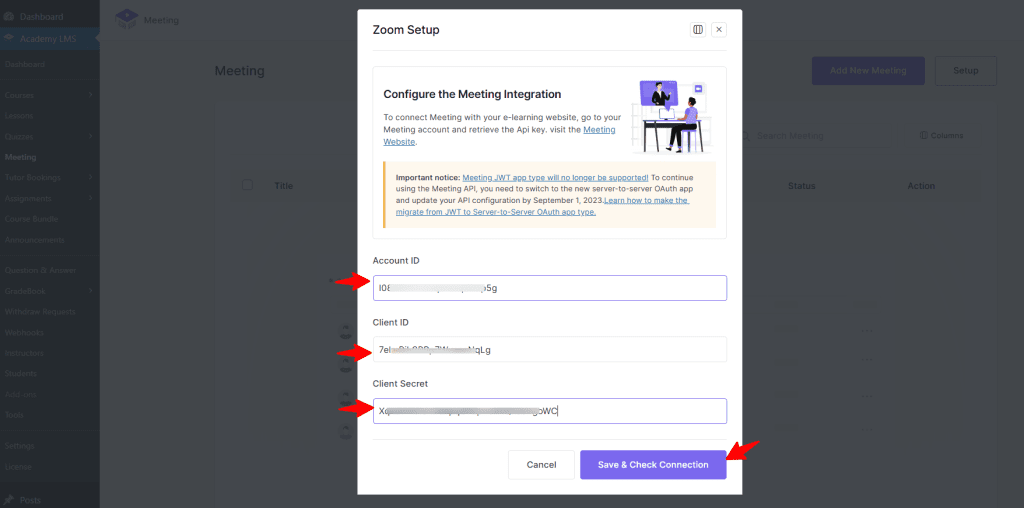
Clicking on “Save and Check API Connection” finished the Zoom integration configuration setup.
Zoom Settings
Now, you have to configure the Zoom settings.
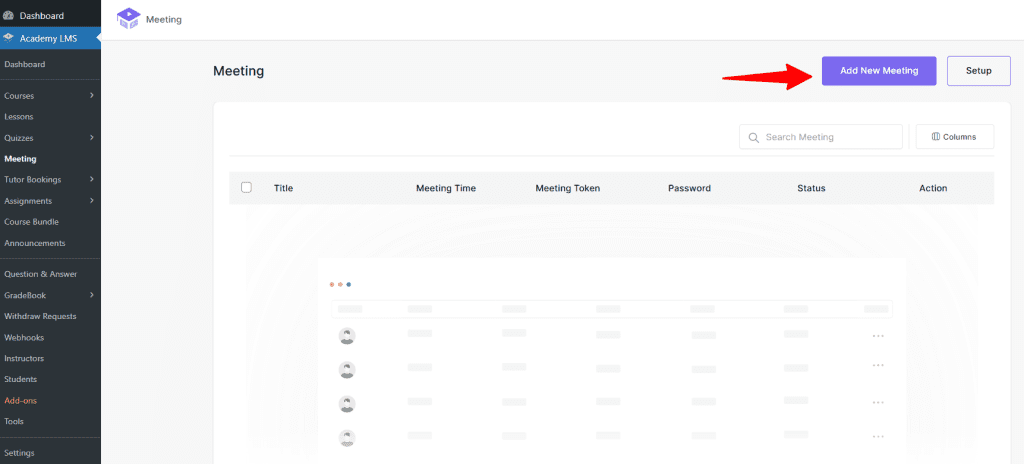
Firstly, go to Academy LMS > Meeting and click the Add New Market button.
Then go
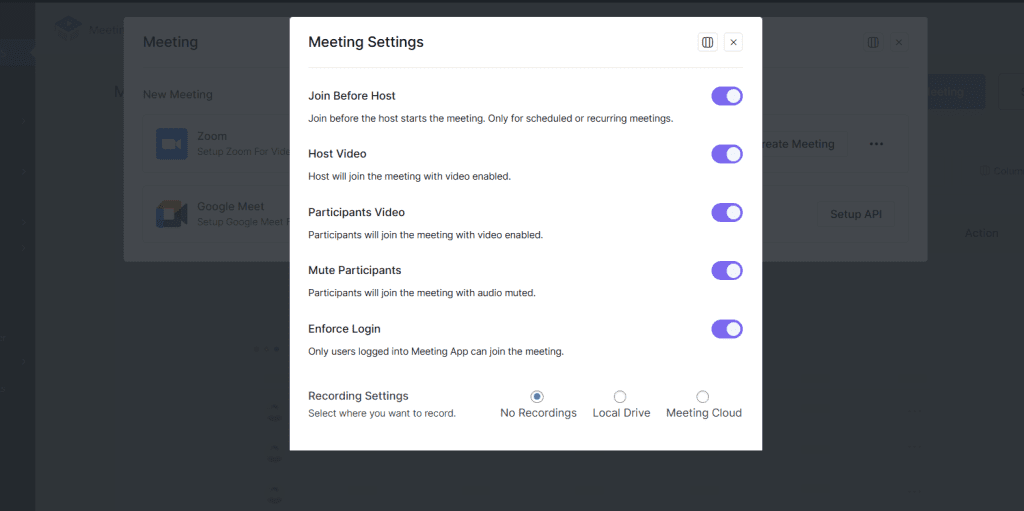
Join Before Host: Students will be able to join before the host in this situation. applies only to regularly occurring or scheduled gatherings.
Host Video: When the host joins a meeting, the host’s video will begin playing.
Participants’ Video: When they arrive at the meeting, participants’ videos will be enabled.
Mute Participants: Will first have their audio muted when they attend a meeting.
Enforcing Login: Will prevent anyone who is not logged into Zoom from joining the conference.
Recording Settings: You can decide what level of student access to recordings you want to grant them. Options consist of:
- Local Drive
- Without Recordings
- Zoom Cloud
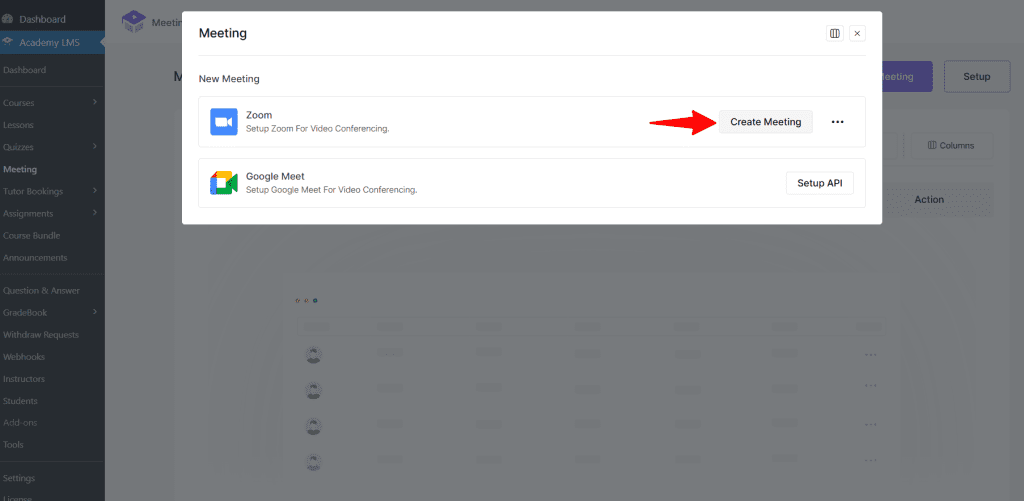
Create a Zoom Meeting
Now that you have completed all the basic things, it’s time to create a Zoom meeting. To do so, click on Create Meeting.
After clicking on Create Meeting the Zoom Meeting form will open for you to enter the meeting information listed below:

Meeting Title: Give the meeting a title here.
Meeting Content: Add your meeting content here.
Meeting Time: Pick here the meeting time and date.
Meeting Duration: Determine how long the meeting will last. Remember that if you use Zoom for free, meetings can only last for 40 minutes.
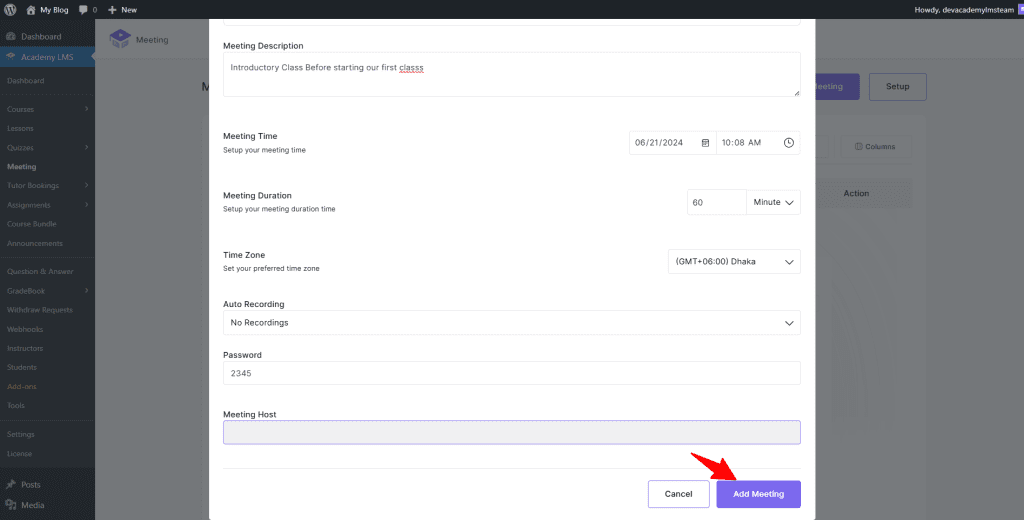
Time Zone: Tell people what time zone the meeting is in.
Auto Recording: Indicate the meeting’s recording type. Local will use the user’s PC to store the meeting, while Cloud will utilize Zoom Cloud Storage. Alternatively, you can choose “No Recording” to simply turn off this option.
Password: Set a password to prevent unauthorized individuals from entering the meeting. Only students with the appropriate authorization will have access to the Zoom meeting.
Meetings Host: Here it will show the email of the user who opened the account on the Zoom website and brings to the API and secret key.
Finish off by clicking on the “Add Meeting” button. You’ll then see this meeting appear under All Meetings in the Zoom Panel.
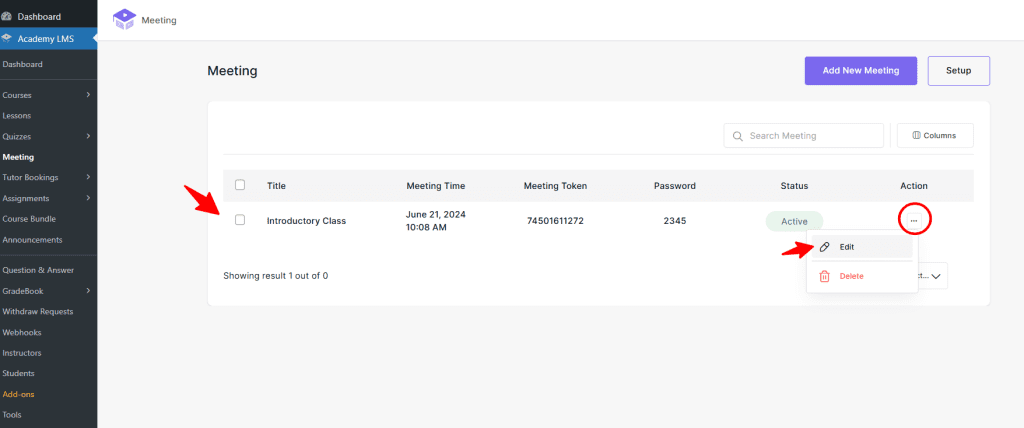
You can edit or delete the meeting information according to your preference.
Add Meeting to the Course
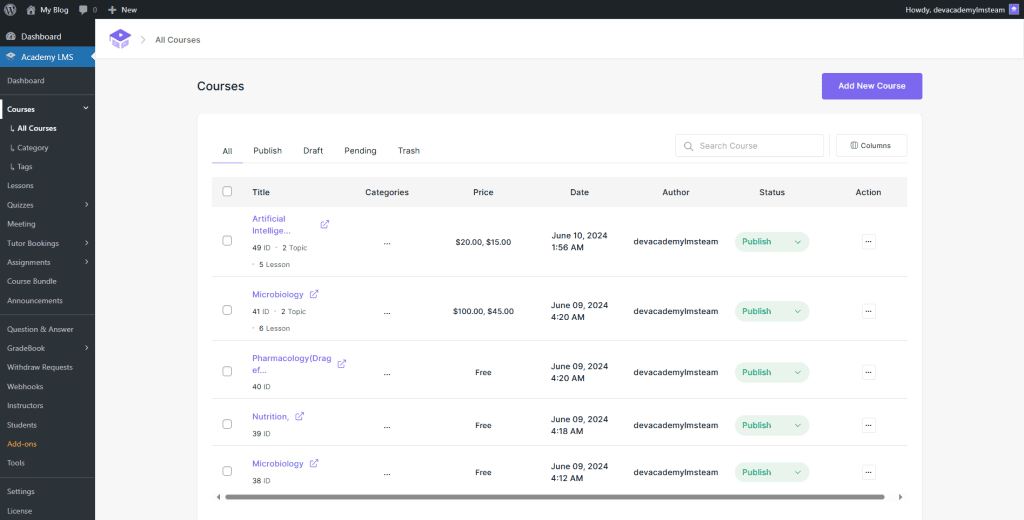
Now you can add your newly created meeting to any of your existing courses. To do that, open the course where you want to add the meeting.
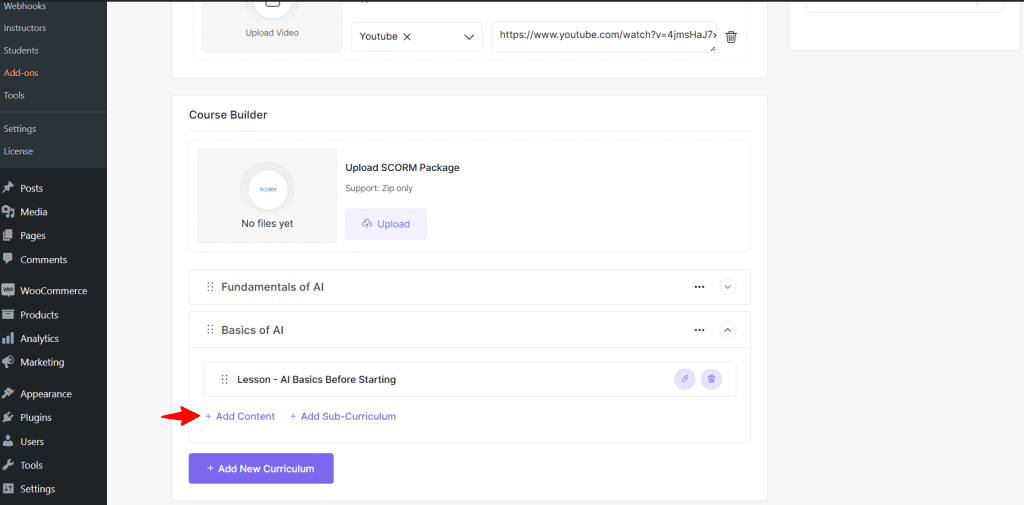
After opening the course, go to the course builder section and click one of the already created curriculum. Then click the Add Content button under the lesson.
Now click Build From Existing to set up a Zoom Meeting for this lesson.
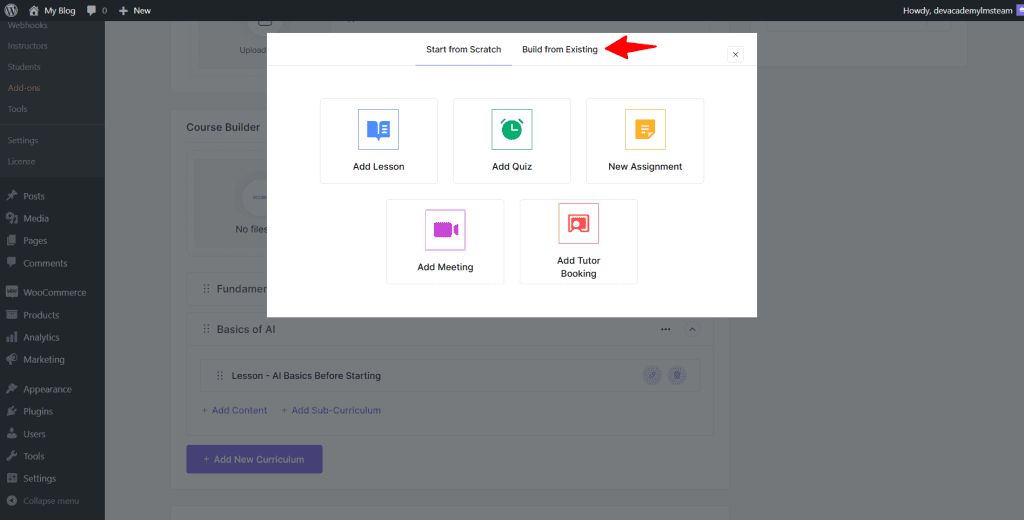
After clicking Build from Existing, select Meeting and put a tick mark on the recently created Zoom Meeting.
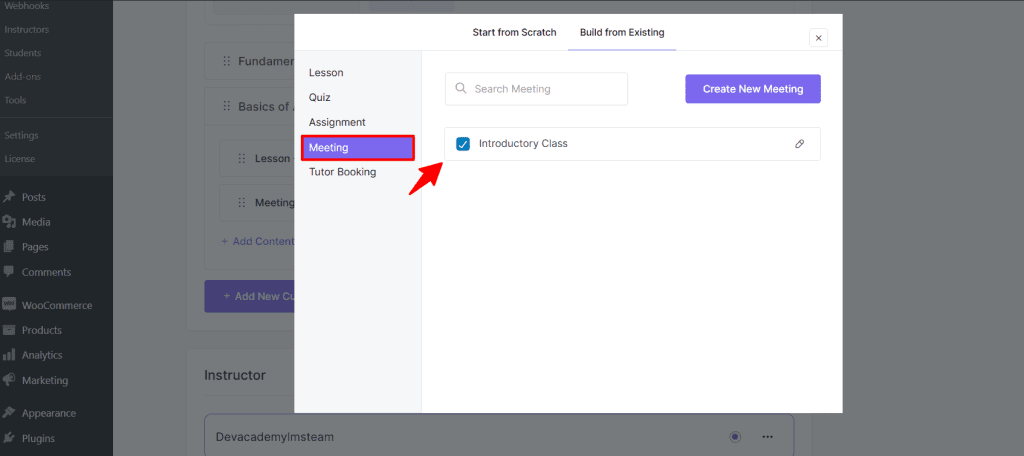
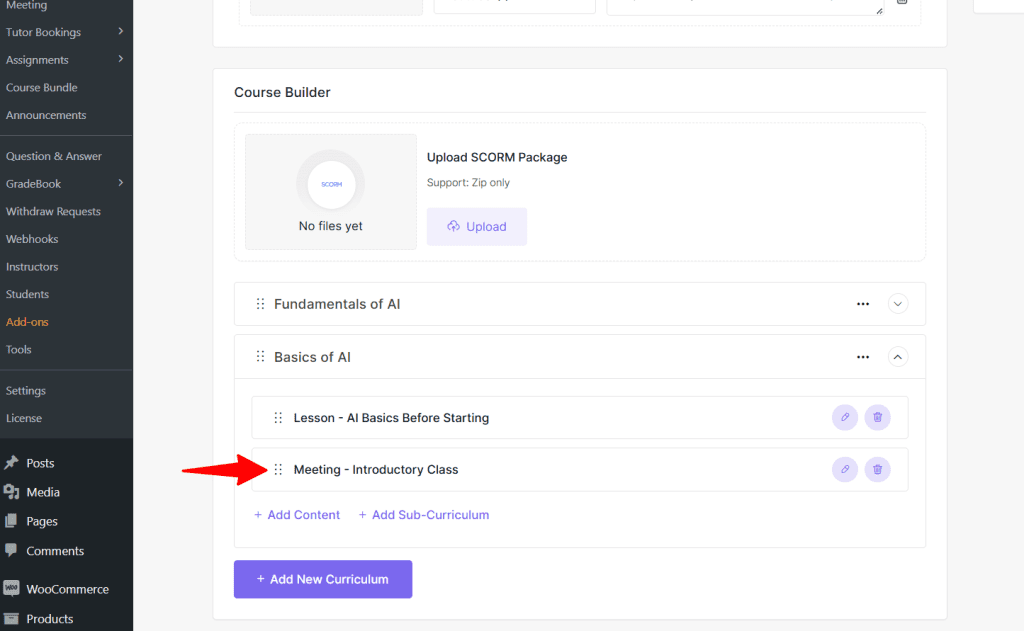
If you go back by clicking the X option, you will see the meeting has been added to the lesson.
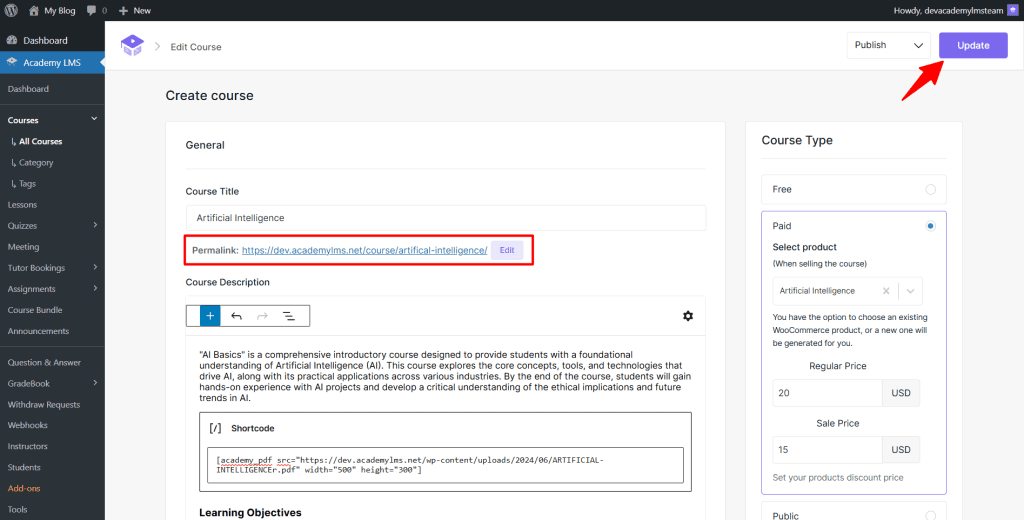
As usual, finish off by clicking on the Update button and click the permalink to view the course details.
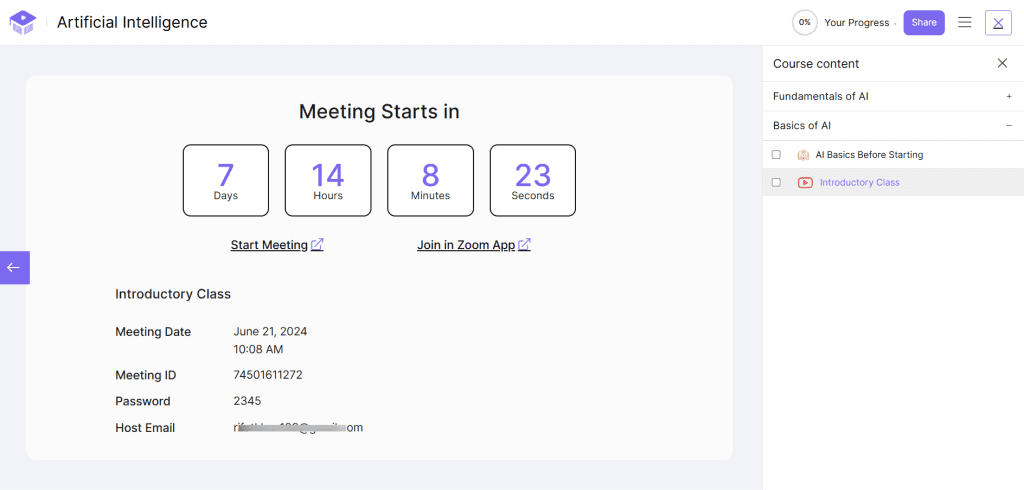
To view the meeting in your course, click on the Permalink and launch the course by clicking Start Course. You will notice that you added a meeting, which will appear as a lesson and display the meeting’s start time.
Important Notice: It is important to note that no Live Zoom classes are automatically uploaded as recorded lessons to the Academy LMS.
This is all about Zoom integration, if you need to know more about Zoom meetings, then join our Facebook community to ask questions and follow our Twitter account for our all-new update.