









The Meeting add-on runs live classes inside your courses. You connect Zoom or Google Meet once, create a meeting, and add it to a course like a lesson. Enrolled students join from the course. Meeting is a Pro add-on.
Turn on Meeting {#turn-on}
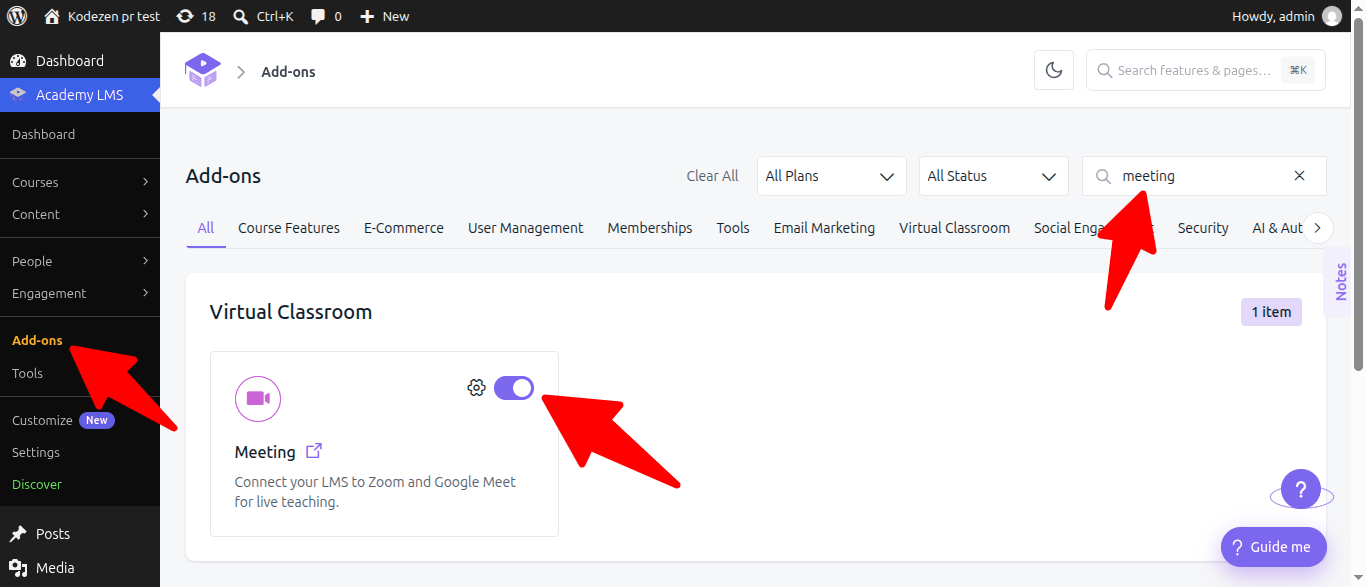
Go to Academy LMS → Add-ons, search for Meeting (under Virtual Classroom) and switch it on. A Meeting item appears in the Academy LMS menu.
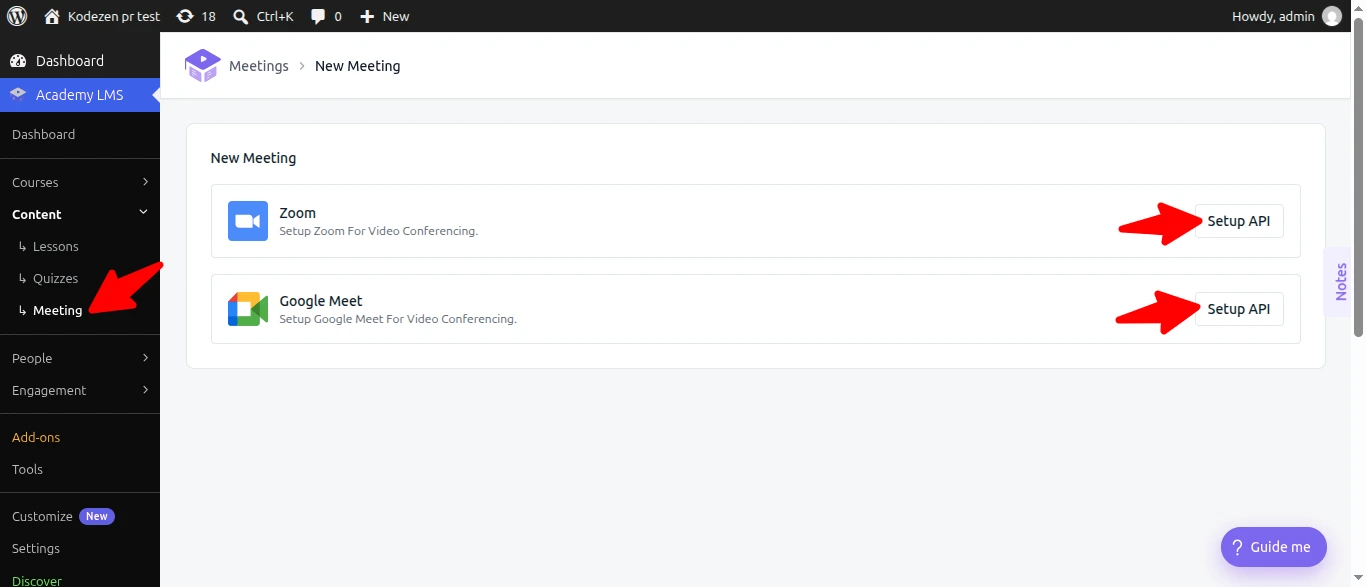
Go to Academy LMS → Meeting and click Add New Meeting. Pick a provider and click Setup API on its card. You need at least one connected provider before you can create meetings.
Who connects the account {#api-mode}
Decide this before instructors connect anything. Go to Academy LMS → Settings → Pages → Dashboard Page and set Meeting API Mode:
|
Mode |
What happens |
|
Individual (default) |
Each instructor connects their own Zoom or Google account. Meetings belong to them. |
|
Globally |
One account for the whole site. Only an admin can set it up. |
Click Save. If you switch later, credentials saved under the old mode stop being used.
Connect Zoom {#zoom}
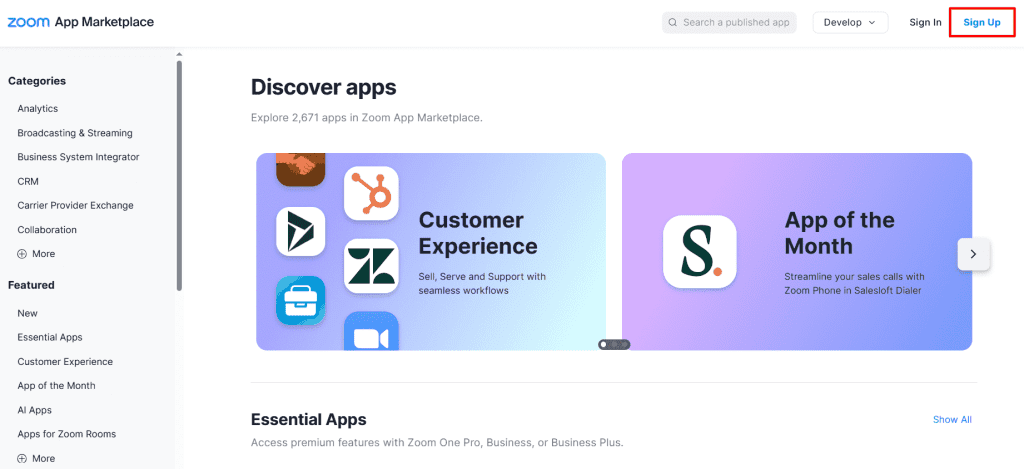
Academy LMS needs a Server-to-Server OAuth app from Zoom. Old JWT apps no longer work.
In Zoom
In Academy LMS
In the Zoom Setup dialog, paste the Account ID, Client ID and Client Secret, then click Save & Check Connection. Academy LMS checks the values with Zoom before saving, so a mistake shows straight away.
Moving from a JWT app? Create a Server-to-Server OAuth app as above and save its credentials over the old ones. Existing meetings keep their links.
Connect Google Meet {#google-meet}
Academy LMS creates Meet links through the Google Calendar API. You set up a Google Cloud project once and upload its credential file.
Keep Academy’s Google Meet Setup dialog open. It shows the Redirect URI you’ll need.
In Google Cloud
In Academy LMS
Drag the JSON file into the Google Meet Setup dialog (or click to upload). Sign in with Google and allow calendar access.
Admins connecting from the admin and instructors connecting from the frontend dashboard get different redirect URIs. Add both to your Google client if both will connect.
Create a meeting and add it to a course {#create}
Students see the meeting in the curriculum with the join details and a countdown.
The Meeting list shows each meeting’s Title, Meeting Time, Meeting Token, Password and Status.
Troubleshooting {#troubleshooting}
The Meeting menu or a meeting page is missing. Reload the admin. If a meeting page shows 404, go to Settings → Permalinks and click Save Changes.
Zoom: saving fails. Zoom rejected the credentials. Check the app is Server-to-Server OAuth, is activated, and that all three values come from the same app.
Zoom connects but no meetings are created. The app is missing its meeting scopes.
Google: “Wrong File Format! Please import JSON file.” Download the credentials again as JSON. Don’t copy values by hand.
Google refuses sign-in with a redirect mismatch. Copy the Redirect URI again from Academy’s dialog and paste it unchanged.
Google connects but no Meet link appears. The Google Calendar API isn’t enabled on the project.
“Google Meet needs to be reconnected.” Access was revoked or a test user’s consent expired. Publish the app to stop this repeating.
An instructor can’t use the account the admin connected. Meeting API Mode is Individual. Switch to Globally to share one account.