


Create engaging and customized forms for your Instructor and Student with Academy LMS form builder. In this documentation, we will show you how to use the Academy LMS form builder from scratch in step-by-step instructions. Let’s get started.
Accessing Academy LMS Form Builder
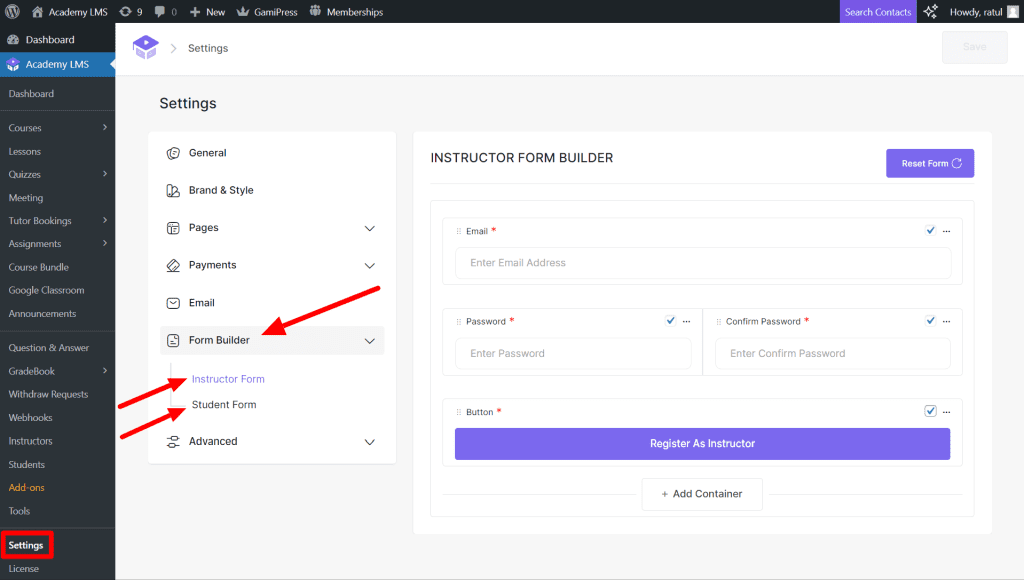
To access the Form Builder, follow these steps:
- Go to Academy LMS.
- Navigate to Settings.
- Select Form Builder.
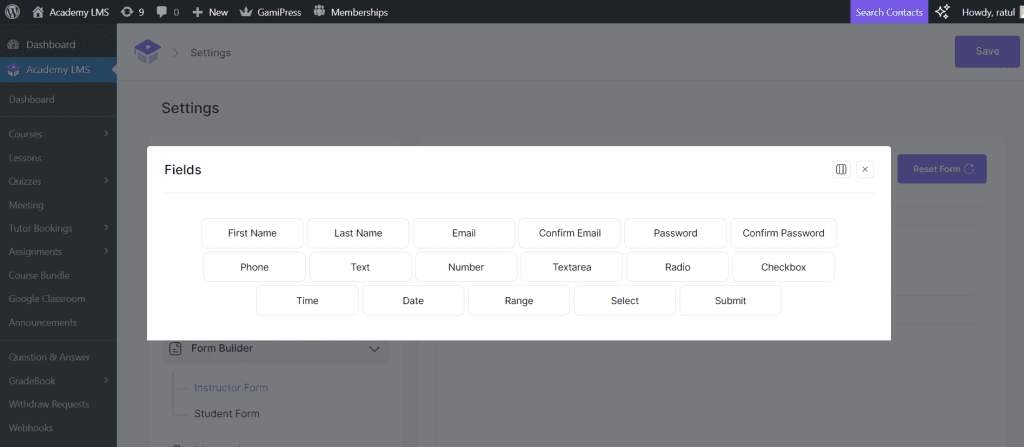
Available Fields for Form Builder:
The Form Builder provides a range of fields to choose from:
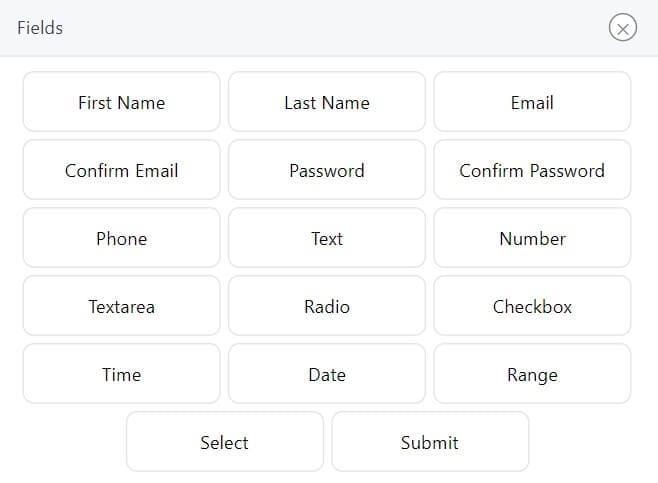
- First Name
- Last Name
- Confirm Email
- Password
- Confirm Password
- Phone (Pro)
- Text (Pro)
- Number (Pro)
- Textarea (Pro)
- Radio (Pro)
- Checkbox (Pro)
- Time (Pro)
- Date (Pro)
- Range (Pro)
- Select (Pro)
- Submit
Start Utilizing Form Builder
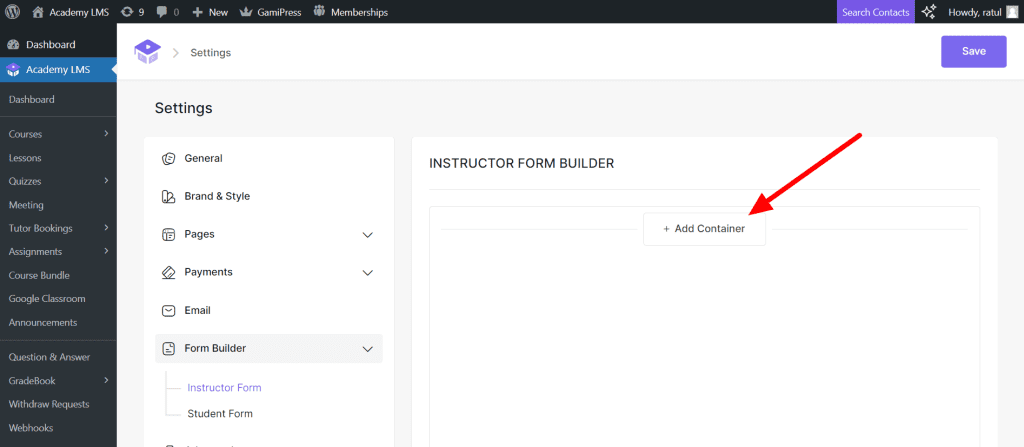
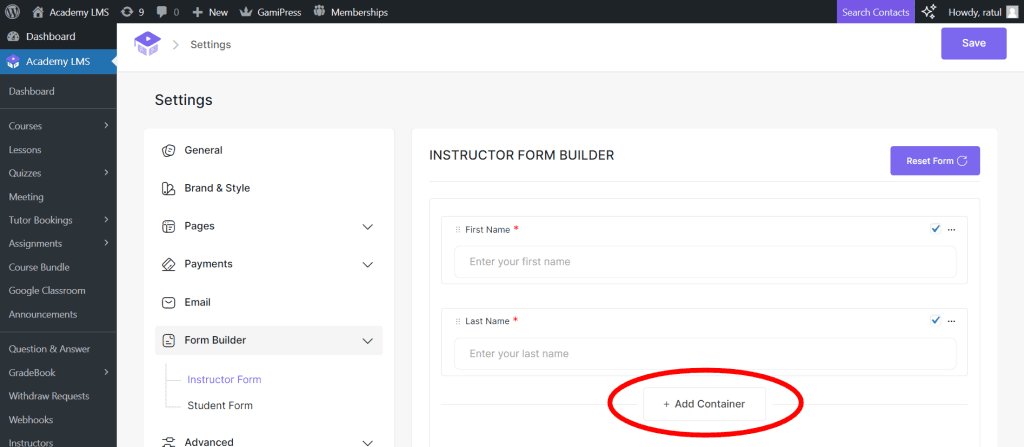
In this tutorial, we will guide you through the process of constructing a form from the ground up. Begin by choosing a form type, either Instructor or Student and proceed to customize and construct your form using the provided builder tool. For this particular demonstration, we will be utilizing the Instructor Form Builder. You can initiate the column selection feature by simply clicking on the +Add Container option.
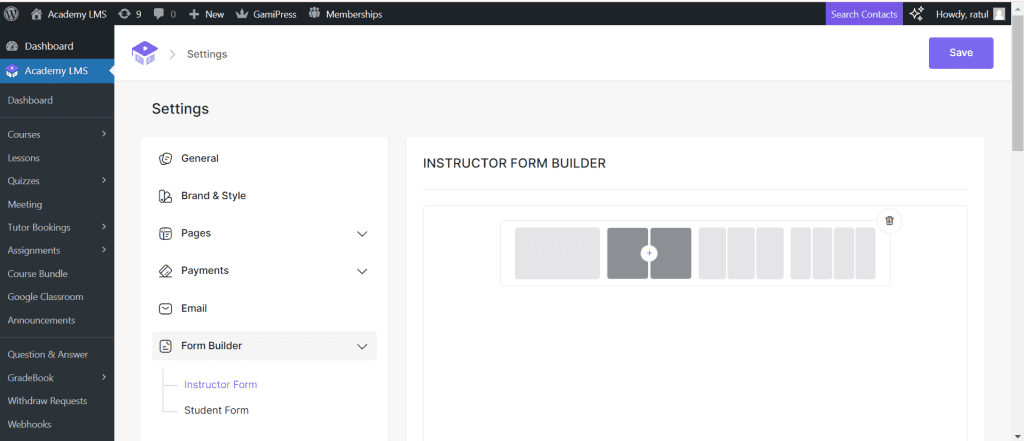
Click the Plus (+) icon to select the number of columns you need.
Add Fields to Columns
Click Plus (+) again to choose fields for each column.
Example: Select First Name and Last Name.
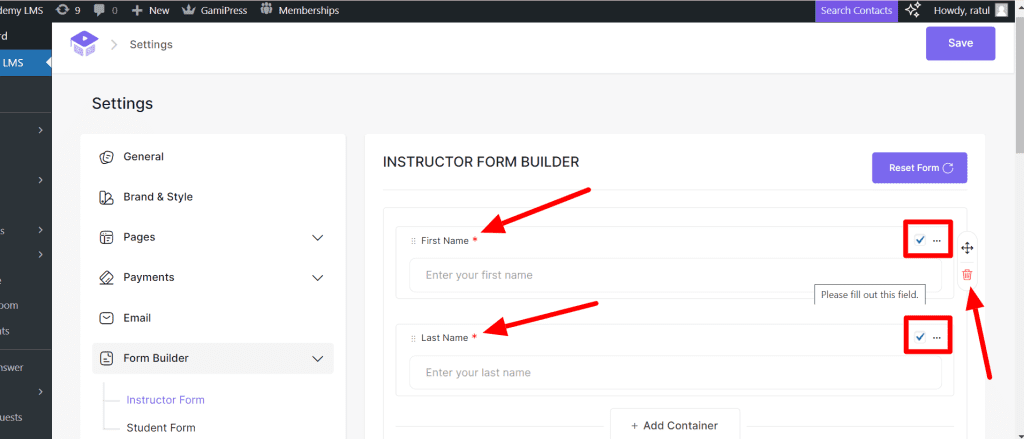
Customize Fields
After inserting all form fields, you can check and uncheck the box to make the fields mandatory or not. By clicking the Pen icon beside the check box, you can edit and customize the fields as per your requirements.
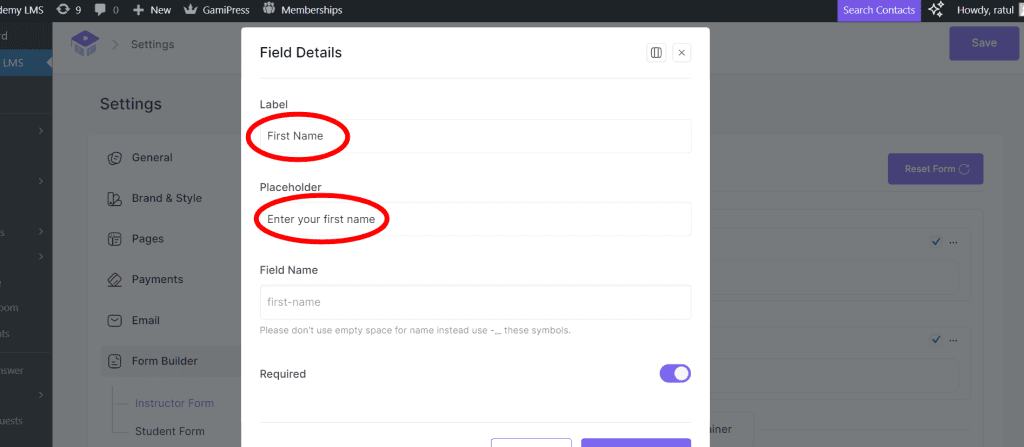
You can change the Label and Placeholder of the Fields. Also, you have the option here to make these fields Required or not. After customizing, click on the Update Field.
Continue Adding Fields
To continue, click on the Add Container once more. This will allow you to specify the number of columns required for your form layout. After determining the desired number of columns, proceed to select the fields that are necessary for your form. Should you require any further customization, feel free to modify the fields according to your specific requirements.
In this way, add all the fields you need for your instructor registration form. When you select the fields, you may need a field that is not available. Don’t worry, because you have the option to customize any fields as per your needs. And with the Academy LMS Pro version, you have the option to use all pro fields multiple times.
Submit Button
At the end, select the Submit Button fields and customize them as per your need.
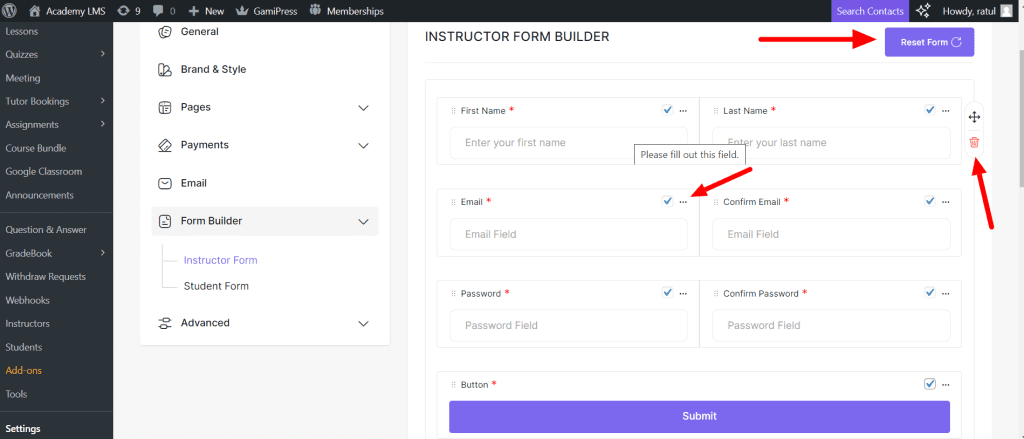
Field And Column Deletion
After completing all the fields, if you think you need to delete any fields or any column, you can do that. Click on the delete Icon for any fields inside the column, and then the fields will be deleted. Or you can click on the delete Icon beside the column, and the column will be deleted.
Reset Form
By clicking on Reset Form, the form builder will reset, and it will be the default form of the Academy LMS form builder.
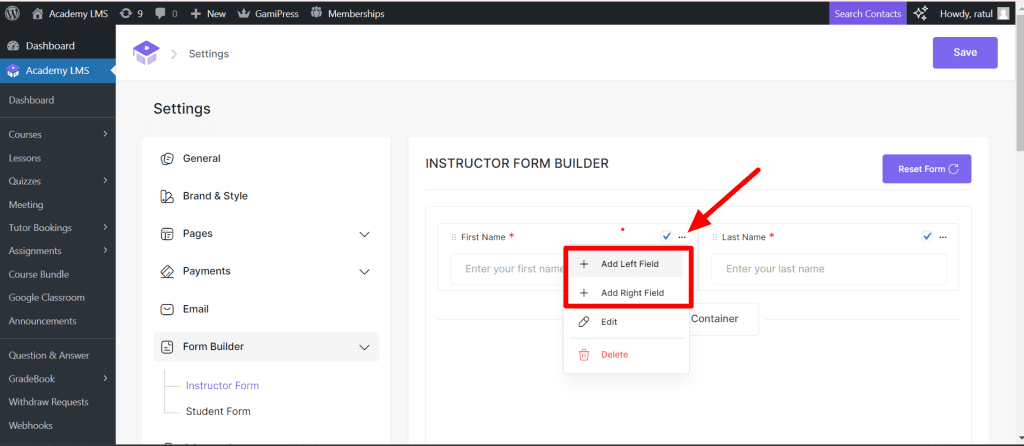
Add New Columns Inside Column
If you need a field in the same column, you can add a new column to add a field. Just click on the three dots, and you can see the options Add Left Field and Add Right Field. Select an option that you need. The field will be created.
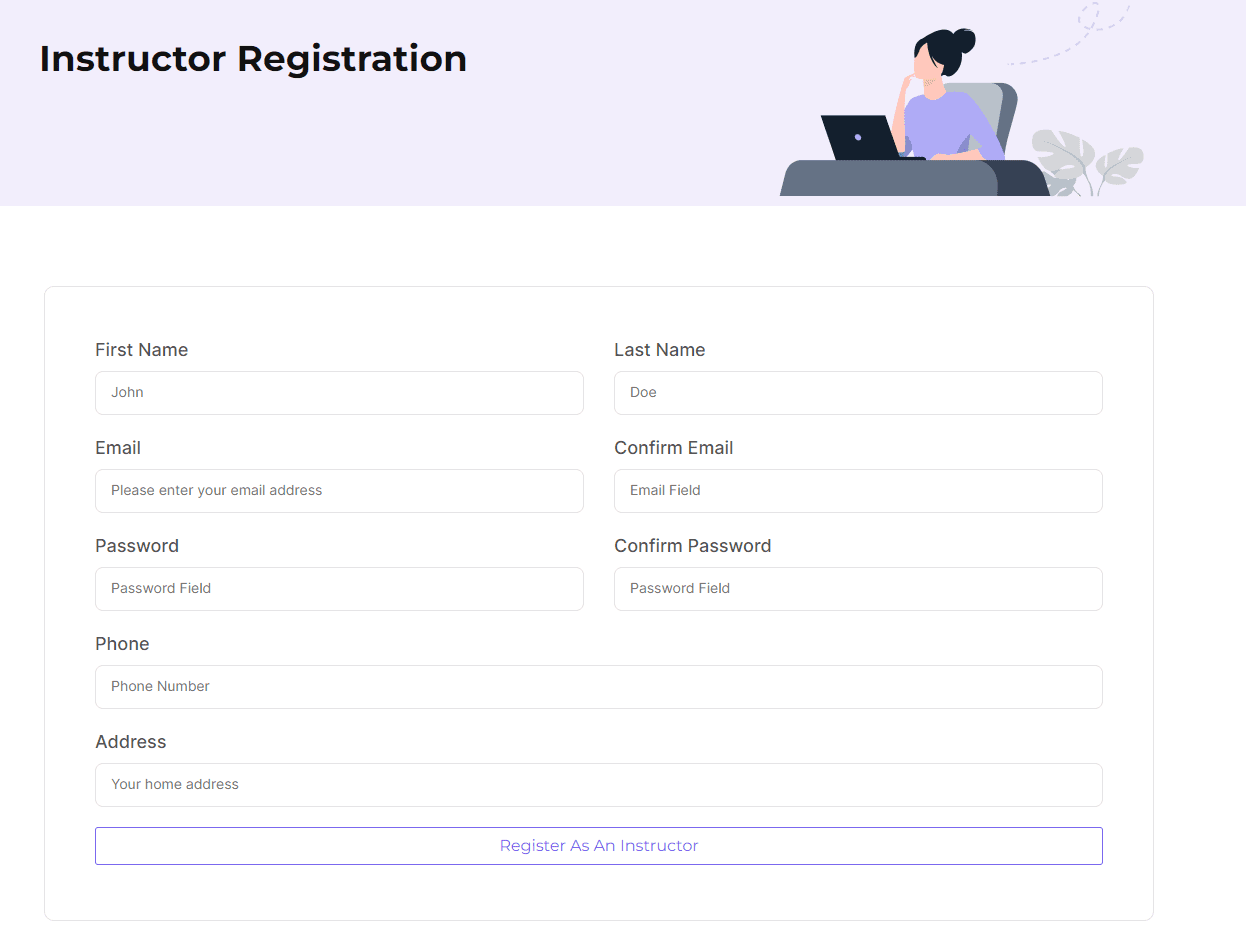
Form Preview
Upon completing the process of customizing the form builder, your form builder interface will undergo a transformation, assuming a new appearance that reflects your modifications. The form builder will now showcase the selected fields, arranged according to the specified number of columns. Each field will be displayed in a structured manner, tailored to your preferences and needs. This enhanced interface provides a comprehensive overview of your customized form, allowing you to proceed with confidence in its accuracy and functionality.
Student Registration Form
Using the Academy LMS form builder, you can create a customized student registration form for your e-learning website. There, you can add the required form fields and customize them as you need. You can get any information you need from a student while a student registers on your website using the Academy LMS form builder.
Following the above similar process of instructor registration form builder, you can make your own customized registration form for Students with the Academy LMS form builder. You just need to select the form type, student, and then you can start creating the form for the student registration form. Adding columns, field customization, and other things is the same as the instructor registration form.
This is all the process, if you have any questions about Academy LMS Form Builder, please ask them in our live chat or in our Facebook community by joining there. Follow us on Twitter, and subscribe to our YouTube channel for our video tutorials.