


With the Academy LMS Assignments add-on, instructors can give students tasks depending on each course topic. You can create as many assignments as you like and drag and drop them to be placed at the conclusion of each topic or in between courses and quizzes. The assignment is a pro feature of Academy LMS.
You must first enable the add-on from Academy LMS > Add-ons > Assignment in order to use the assignment feature. To use this addon, you need to install and activate Academy LMS Free 1.5.0 or higher and Academy LMS Pro 1.3.0 or higher.
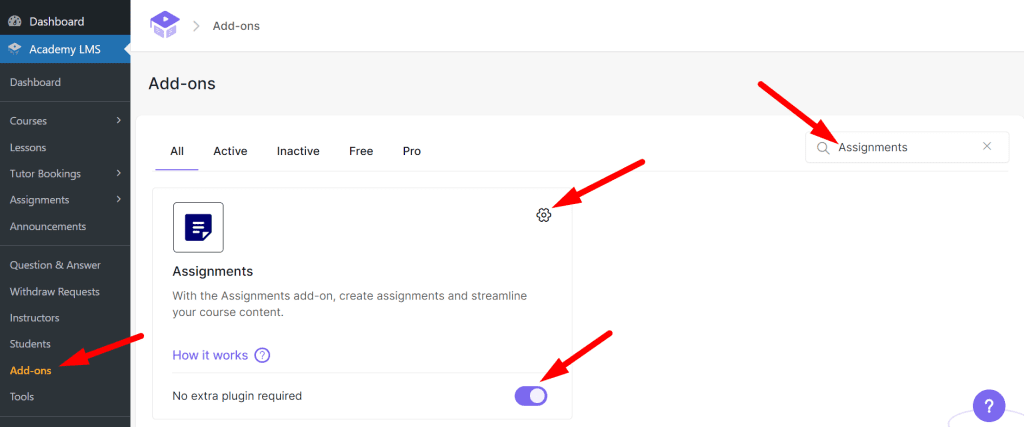
When you enable the addon, you will see the assignments menu under the Academy LMS WordPress dashboard, Click on assignment or click on the setting icon beside enabling the option to explore assignments.
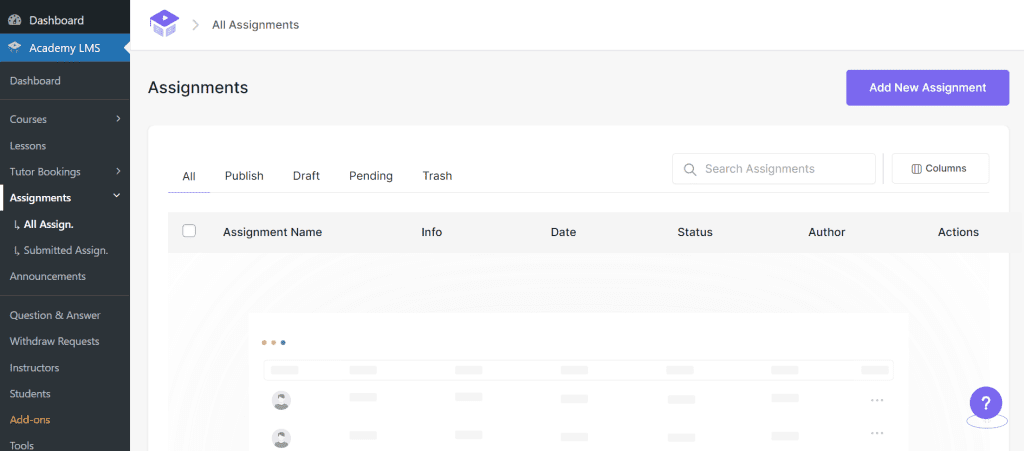
There will be no content on this menu at first. Once the students begin turning in their assignments, the system will start producing data.
By clicking “Add New Assignment,” you can add new assignments from here.
Now let’s see how to add an assignment to a course and how to add a new assignment.
Adding Assignments And Submitting Assignments
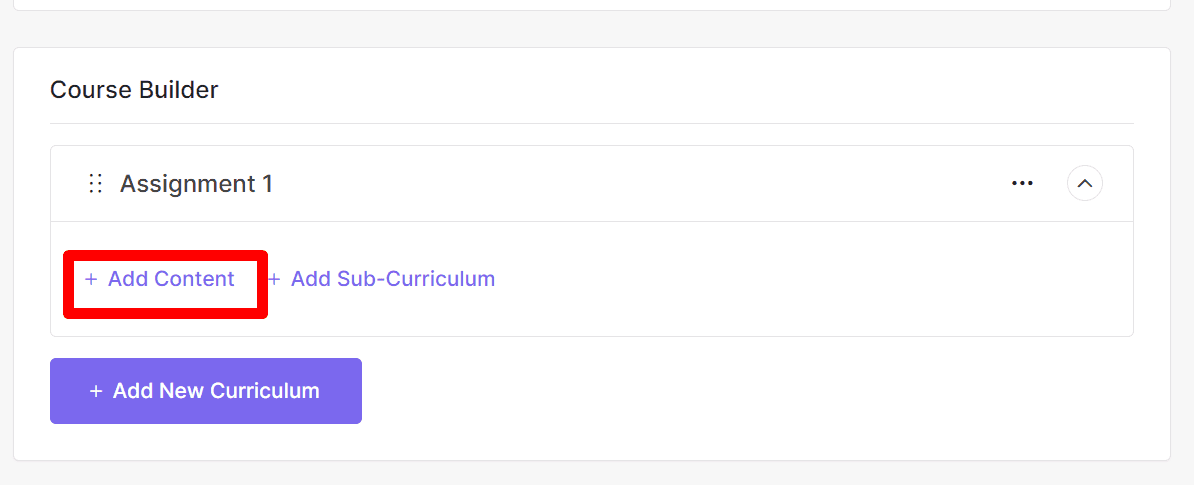
Open an existing course where you want to add an assignment, go to the course builder section, and click Add Curriculum.
Click on the Add Content button.
Now click New Assignment to add an assignment to your course.
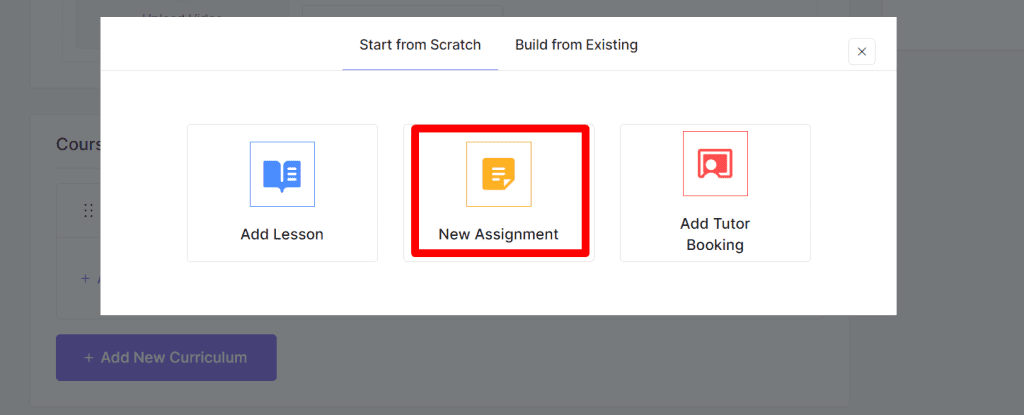
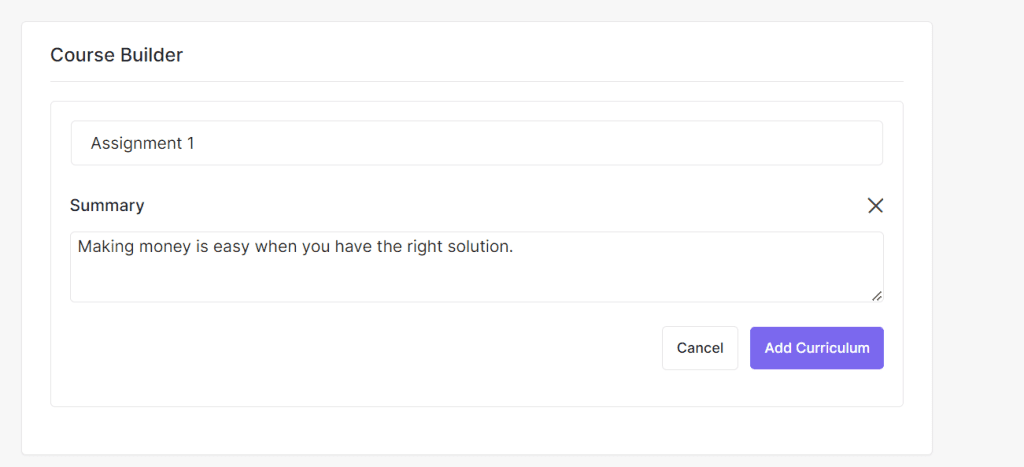
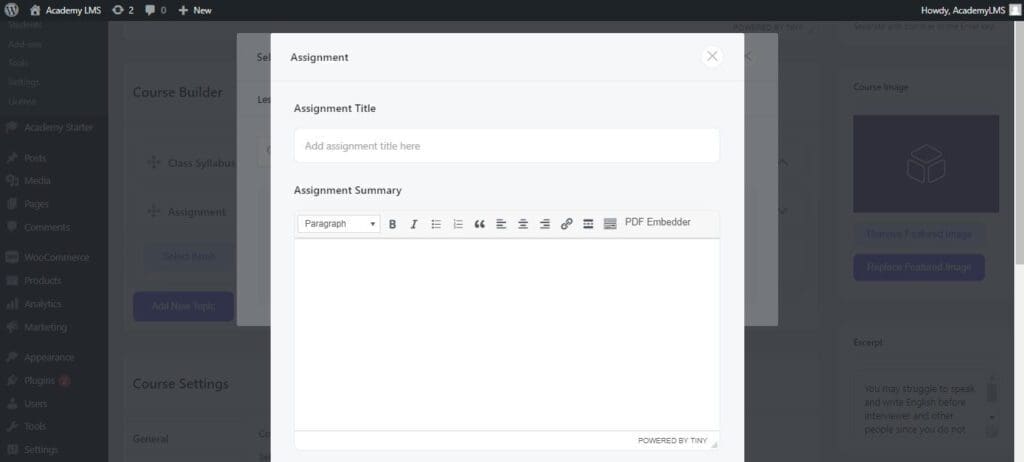
A pop-up window will display after selecting the New Assignment button, allowing you to provide the required information. First, add a title for the assignment and a summary.
Now scroll a bit and fill in all these details for your assignment.
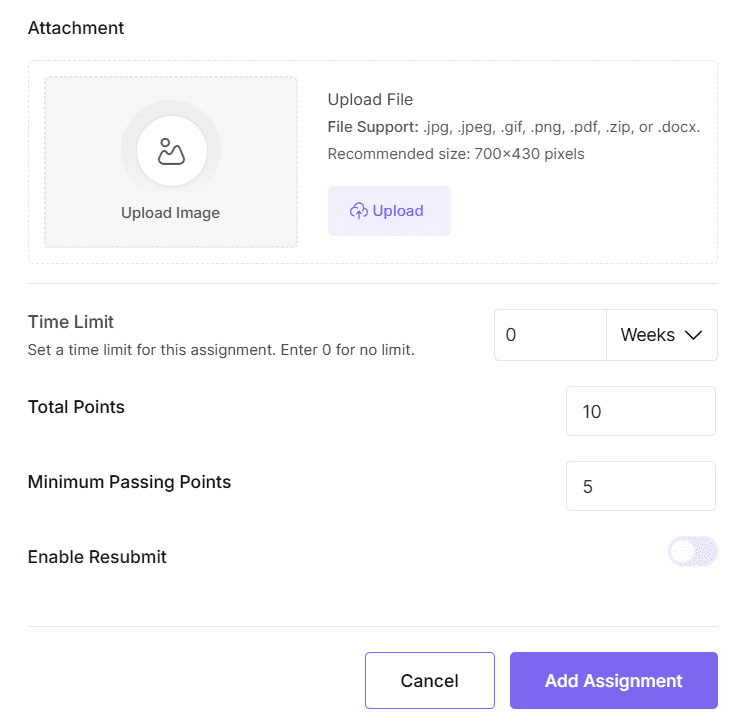
Attachments: You can submit a file in this part if you wish to provide example questions, a research paper, or any type of drawing as instructions.
Time Limit: The Time Limit field allows you to set a deadline for completing this assignment. Enter the number of weeks (e.g., 0 for no limit) to specify the duration. This setting helps manage assignment submissions effectively within your desired timeframe.
Total Points: The overall score must be stated here. Any integer greater than zero may be entered. The minimum score required to pass an assignment is known as the “passing mark.” Any value greater than 0 that is less than or equal to the total mark may be entered.
Minimum Passing Points: Specify the score that must be met in order to pass this assignment. Any value greater than 0 that is less than or equal to the previously specified Total Points may be entered.
When you have finished setting up the assignment, click on the Add Assignments button and close the pop-up.
Adding Existing Assignments to the Course
To add an existing assignment to your course, click on the Add Contennt button from the Course Builder section.

You may find a button labeled “Assignments” by clicking on Add Content button. Now click on Build For Existing and select Assignment.

From this assignment section, you can add a new assignment by clicking “Add New Assignment,” or you may check the box to add an existing assignment. Now check the box next to your existing, previously created assignment and close the pop-up.
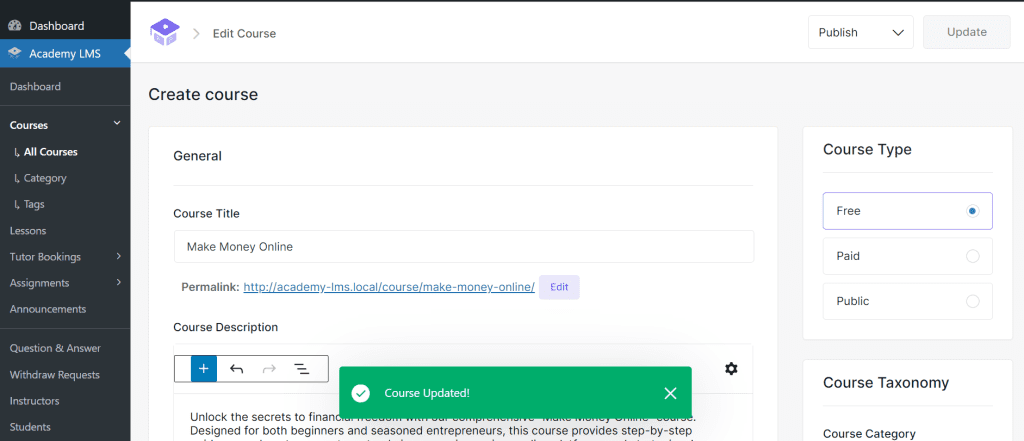
Now scroll up and click on “update the course” to add the assignment to your course. To see the assignment overview, click on the permalink and start the course.
Now on the course lesson page, you will find the assignment section added, and by clicking on that, you can see a detailed overview of your assignment. You may see the assignment name, duration, due date, overall grade, passing grade, and description here.
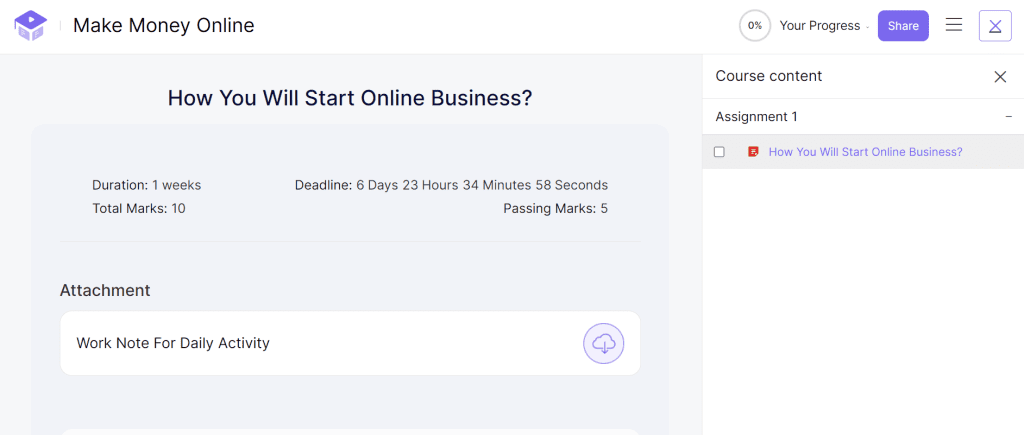
You only need to click the “Start Assignment Submit” button to submit an answer.
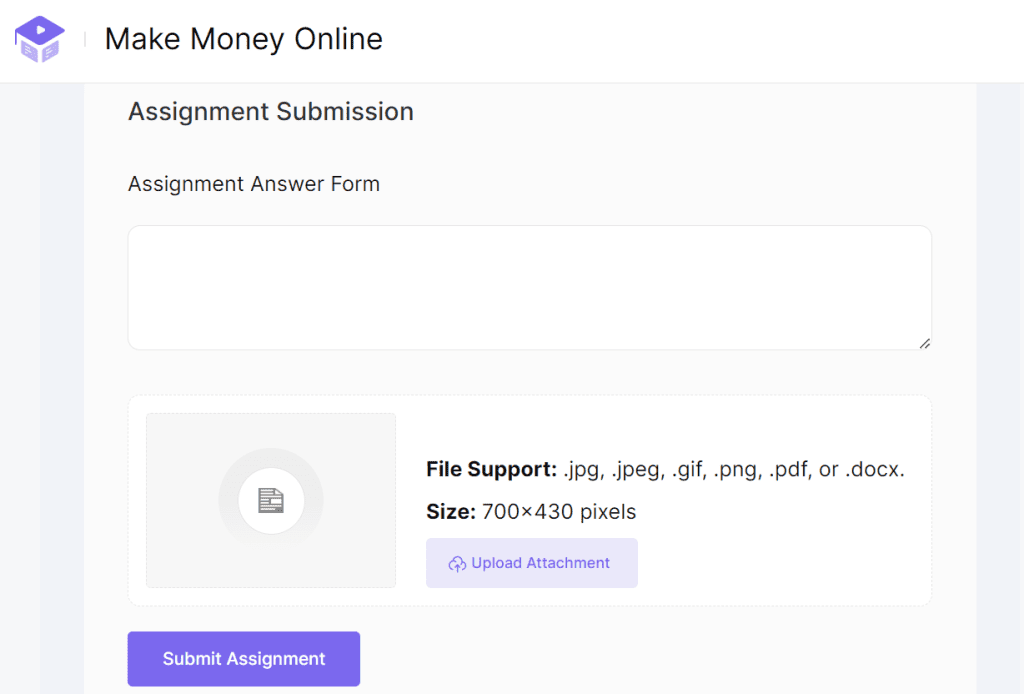
When you do this, a form for submitting assignments will appear that resembles the one in the image above. The assignment submission area is where you may type your answer. Click the Choose File button to access the File Manager and choose the file you wish to upload.
By selecting the Submit Assignment button, you may complete your submission. A new table with the Date of Submission, Total Marks, Pass Marks, Earned Marks, and Results will show after your page has been refreshed.
Resubmitting an Assignment
While some students do well on their assignments, others perform poorly. If their initial evaluation results are unsatisfactory, some students may opt to resubmit their assignment work in the latter scenario.
To enable this, navigate to WP Admin > Academy LMS > Assignments, and click the Delete button next to the pending submission. This will remove the submitted assignment.
Once a job has been deleted, it can be submitted again as long as it is done within the allotted time frame.
This is how the Academy LMS assignment works. If you have any concerns or questions, please join our Facebook community to ask questions and follow us on Twitter for the most up-to-date information.