


Academy LMS offers multi-instructor options for your eLearning website. This means it enables a single person or group of professionals to manage a single educational platform or run an entire educational institute.
With the multi-instructor platform, instructors collaborate uniquely, like in a real-life educational institution. When numerous parties or organizations are involved, this creates concerns such as sharing commissions, managing money, and continuous distribution among all channels.
In this documentation, we will guide you on the money management of Academy LMS and make the overall process as smooth as possible. So, let’s get started.
Prerequisite
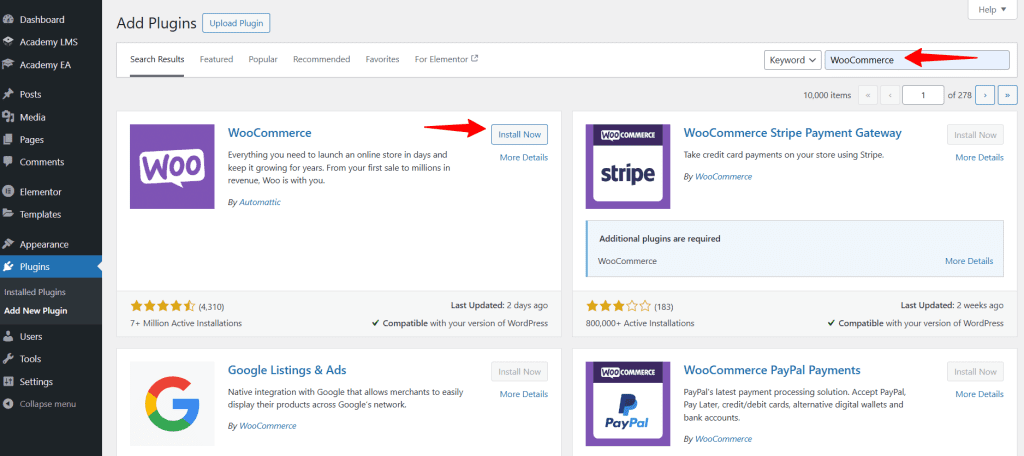
First of all, go to the plugin section and search WooCommerce in the search bar located on the right side. When WooCommmerce appears on your screen, click the install now button & activate it after the installation.
Now, head back to the dashboard, click Academy LMS > Settings, and select Payments. In Payments, you will see the eCommerce Engine, WooCommerce, Earning, and Withdrawal options. You can use these two options to manage money.

Keep in mind that you will require the money management option for the following reasons:
- If you are allowing instructors to manage (Publish and sell) their courses through your site
- To distribute the money or earnings properly between the instructors while managing a multi-instructor site
The end result is simple: You will get a commission by selling their courses through your site. Besides, you have to share the income with the instructors and authors since you are selling their courses using Academy LMS.
Earning
First of all, explore the money management options available on the Earning tab.
Enable Earning
If you turn on Enable Earning, it will allow you to share the earnings from the courses you are selling and maintaining using the Academy LMS plugin.
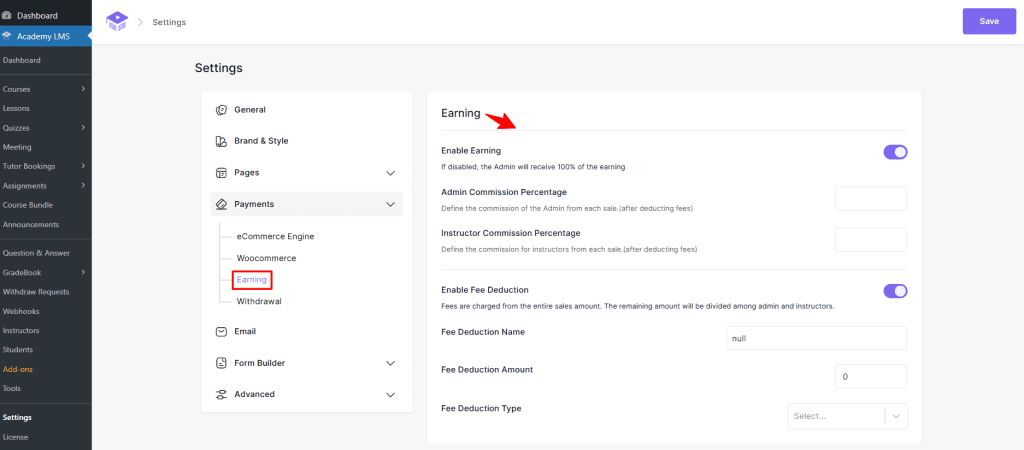
If you don’t enable the Enable Earning option, your earnings will not be shared, but the Admin will get 100% of the earnings. Enabling Earning also activates the withdrawal option on the frontend dashboard. You should always turn on this option to collect your earnings accordingly.
Admin & Instructor Commission Percentage
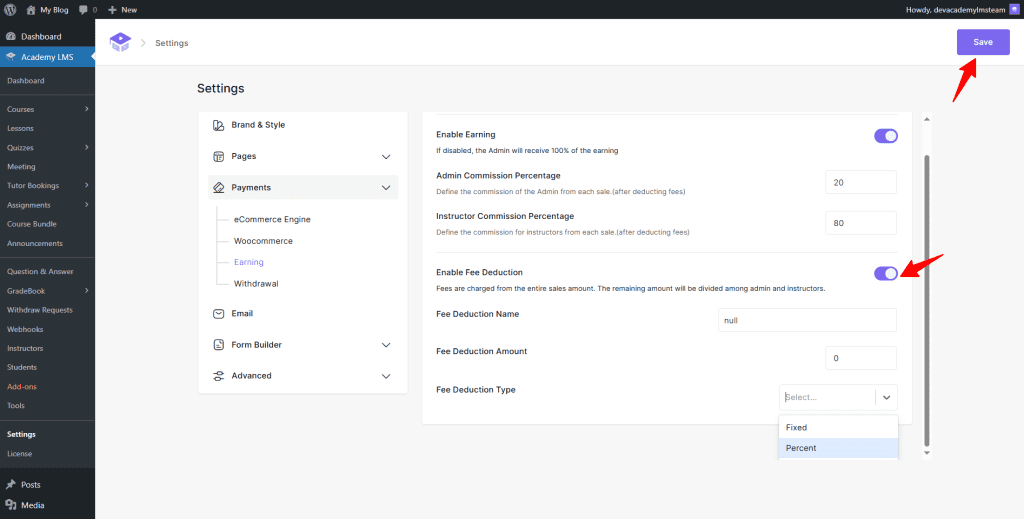
This option designates the percentage you wish to share with the Admin and instructors. As you can see, The Admin commission percentage is set to 20. Therefore, the admin will get 20% from each sale after deducting the fee.
Similarly, the Instructor Commission Percentage is set to 80. Therefore, the instructor will get 80% from each sale after deducting any additional fees.

Note: This amount is set according to the deal between the Admin and the Author (instructor).
Enable Fee Deduction
Put a checkmark beside the Fee Deduction box to collect fees charged from the entire sales amount. The remaining amount of earnings will be distributed among the admin and instructors.
Within Fee Deduction, you will get three options:
- Fee Deduction Name: The purpose of deducting the fee should be defined in this section. You can define or name the reason for deducting the fee in the box beside the option. Let’s say you are deducting the service fee from your total earnings. So, put the Fee Deduction Name as Service Fee and then save the settings.
- Fee Deduction Amount: You want to deduct this fee from the total sales amount.
- Fee Deduction Type: Click the dropdown menu for the Fee Deduction Type and select whether you want to collect the fee as a fixed or percentage.
Note: After setting up all the options, please click Save Settings to apply the changes.
Managing Fake Orders
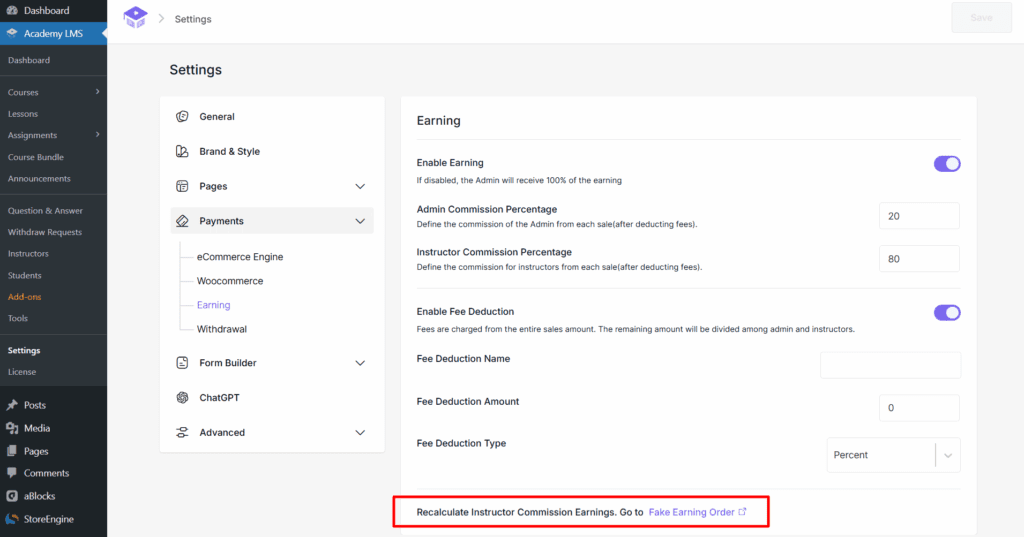
To ensure accurate instructor commission earnings in Academy LMS, you can recalculate them as needed. If you want to check for any fake orders in your sales history, click on “Recalculate Instructor Commission Earnings. Go to Fake Earning Order” link. This will redirect you to the Tools > Fake Earning Orders settings page.
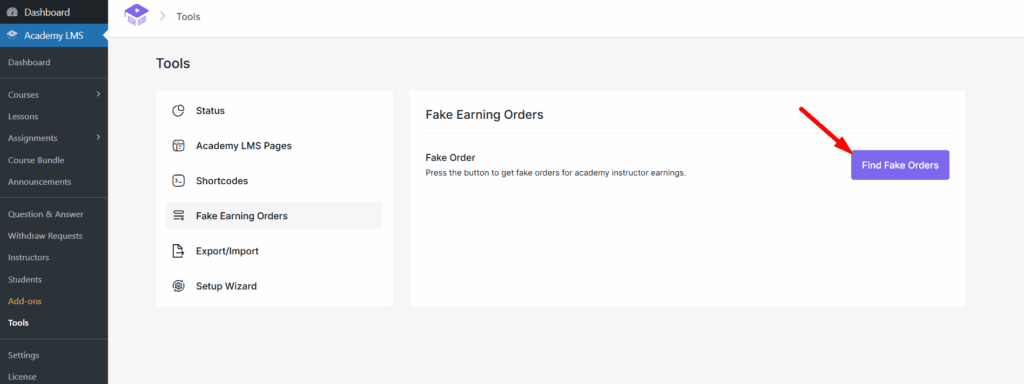
Once there, click the Find Fake Order button to view a list of all fake orders associated with your sales. This feature helps you identify and manage any discrepancies, ensuring your earnings data remains reliable.
Withdrawal
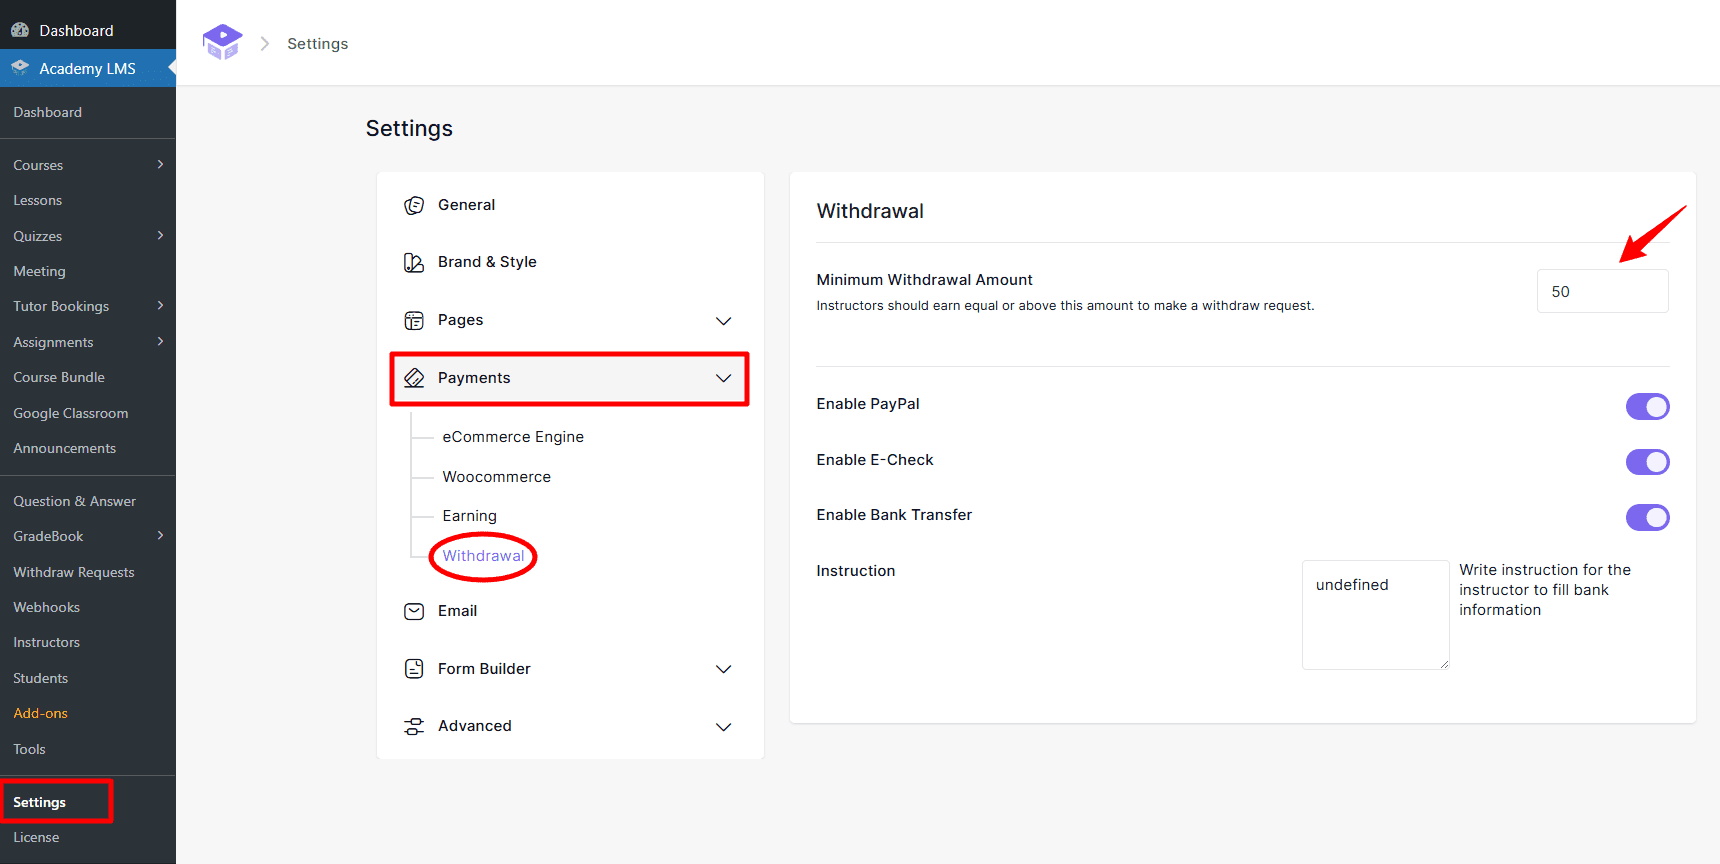
From Settings, go to the Withdrawal tab to explore the options in this section. You will get the following options in this tab:
- Minimum Withdrawal Amount
- Enable / Disable (PayPal)
- Enable / Disable (E-check)
- Enable / Disable (Enable Bank Transfer)
Minimum Withdrawal Amount
For this option, you can set the minimum withdrawal amount. Instructors must earn equal to or above the mentioned amount to withdraw their earned money.
In the following example, the minimum withdrawal amount is set to 80. The instructor must earn this amount before being eligible to withdraw the specified amount.
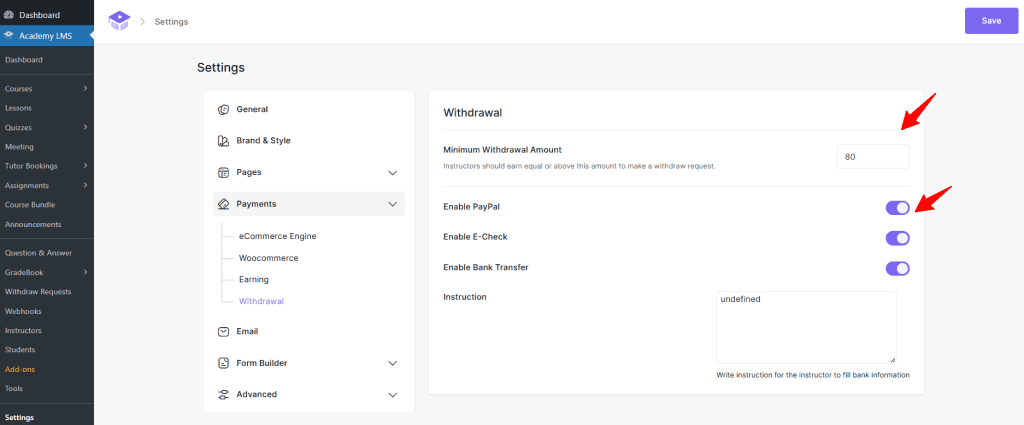
Academy LMS provides several withdrawal options for users’ convenience. You can withdraw money using PayPal, E-check, or Bank Transfer. You simply need to turn on your preferred payment option. However, you can turn on all the payment options if all those options are available.
Note: At least one withdrawal method must be selected before sending a withdrawal request. After setting up all the options, remember to click Save Settings to apply the changes.
Withdrawal Via Front End Dashboard
Now, we will show you how instructors can withdraw their payments from the front-end dashboard. First, Click on your site name from the dashboard and then click Instructor Dashboard. When your dashboard appears, click the Withdrawals option.
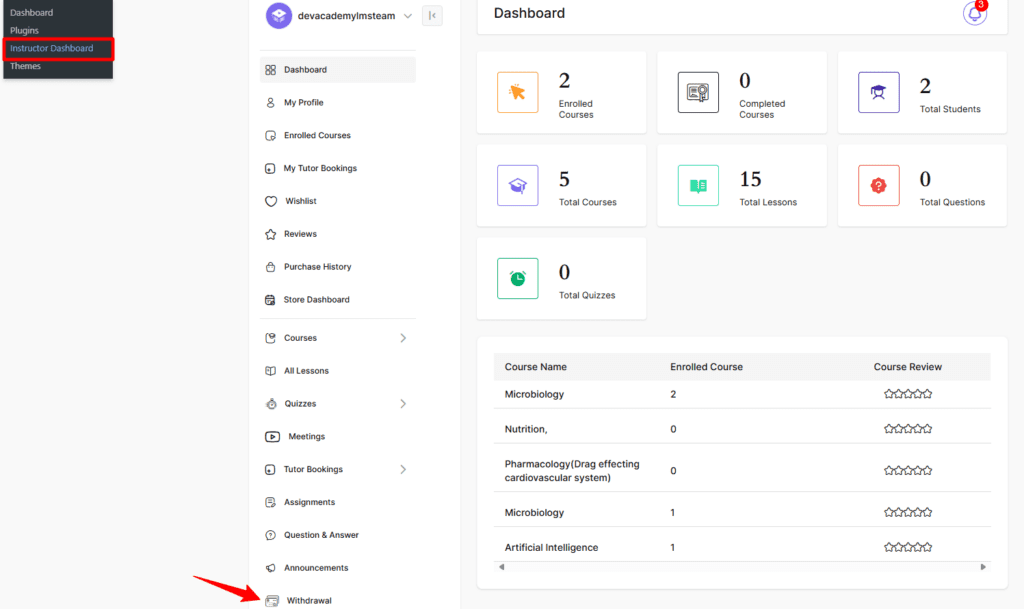
After entering the Withdrawal section, you can see your Current balance, Withdrawal Method, Requested On, Amount, and Status.

In the Current Balance section, there is a Withdrawal Request. But before requesting money withdrawal, you need to set the withdrawal methods. Below the Current Balance, you will get a Withdrawal Preference that will take you to the Withdrawal methods. So, let’s click the withdrawal preference.
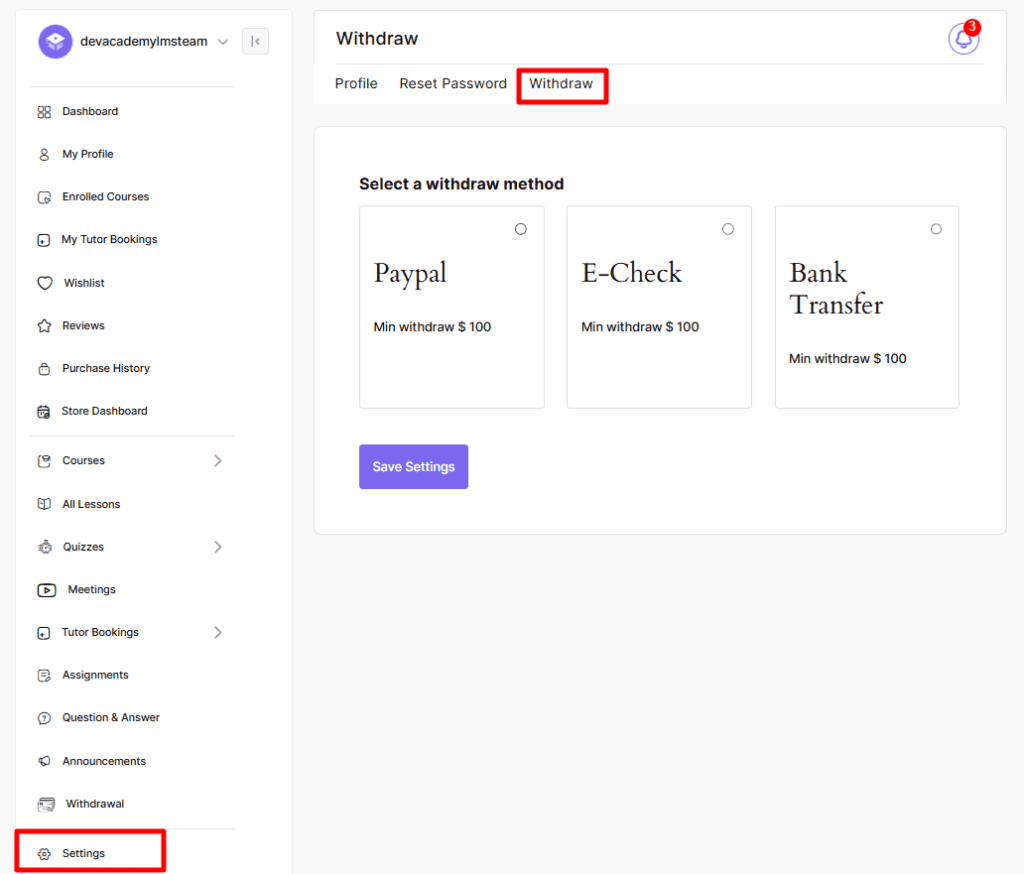
There are three withdrawal methods: PayPal, E-check, and Bank Transfer. You can simply select one of your preferred methods.
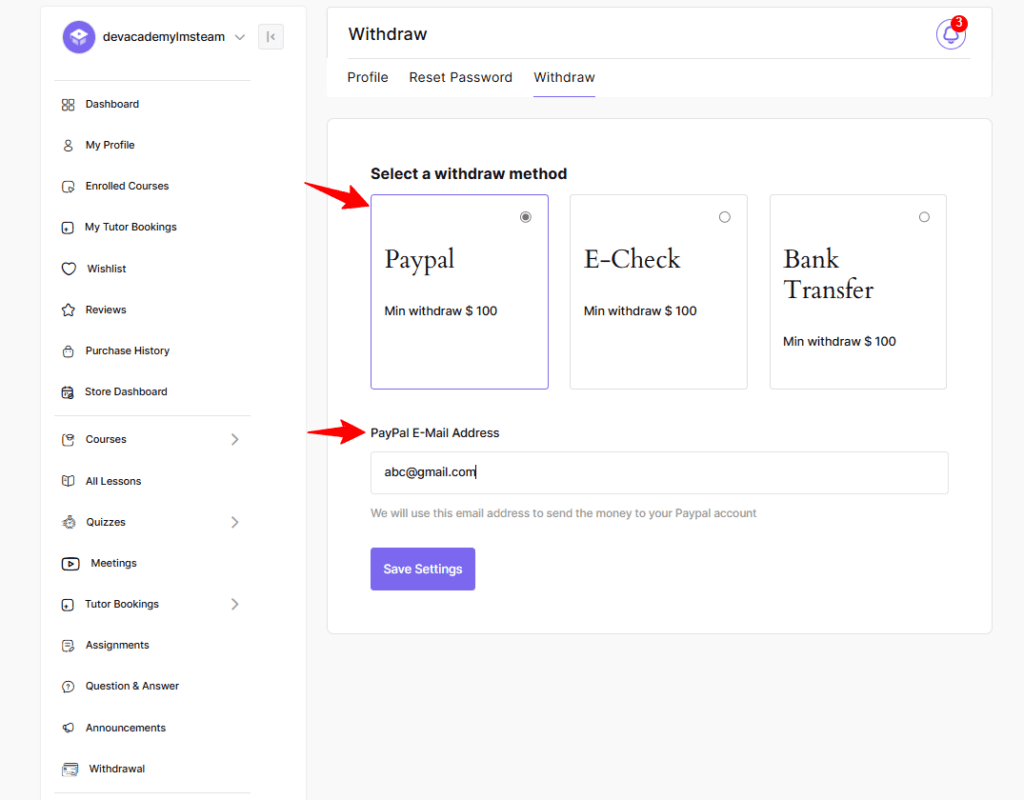
If you choose PayPal as your withdrawal method, you must provide the PayPal Email Address and click Save.
But if you want the E-Check as your withdrawal method, click the E-check option. For the E-check withdrawal method, you must fill in the physical address and save it as your withdrawal method.
Select the Bank Transfer as your withdrawal method if you prefer it. After clicking, you will have to provide your account information such as Account Name, Account Number, Bank Name, IBAN, etc.
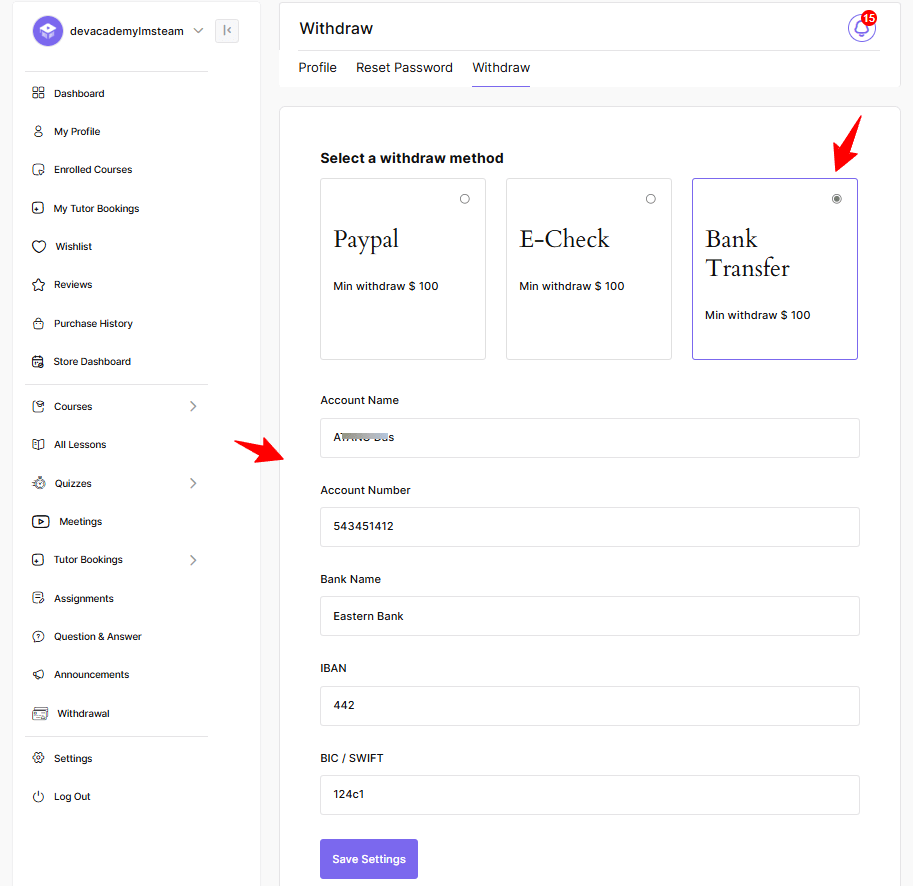
Lastly, click Save to select the Bank Transfer as your withdrawal method.
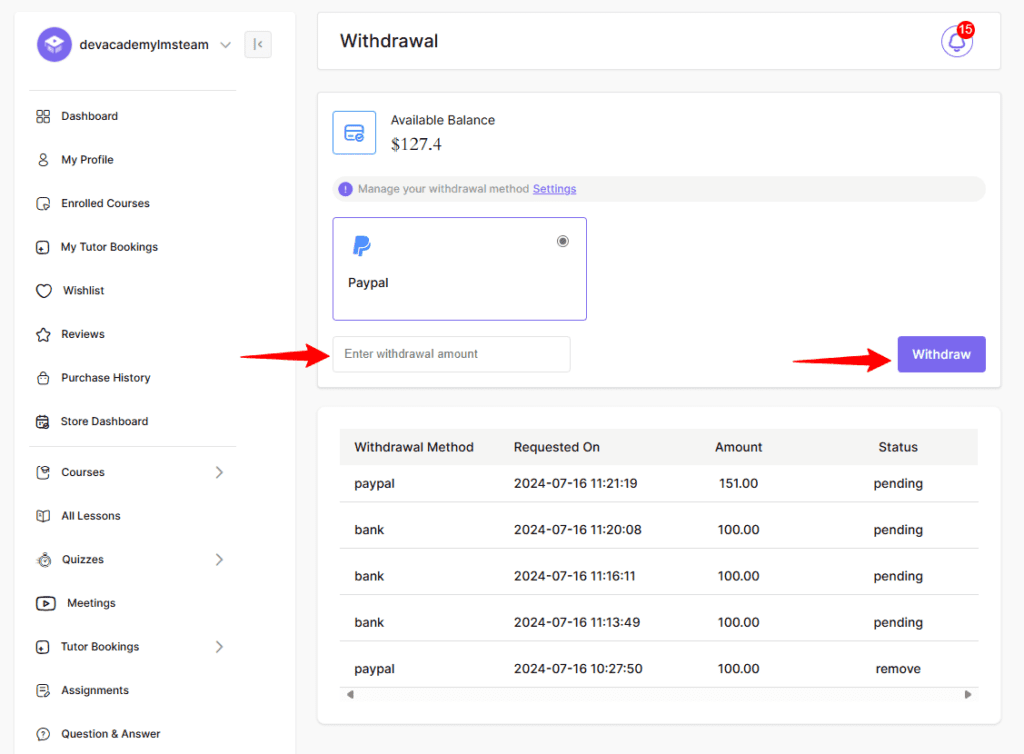
When you are done setting up your preferred withdrawal method, get back to the Withdrawals option. Now put your withdrawal amount and click on the Withdraw button. As you can see the withdrawal request is now in pending status.
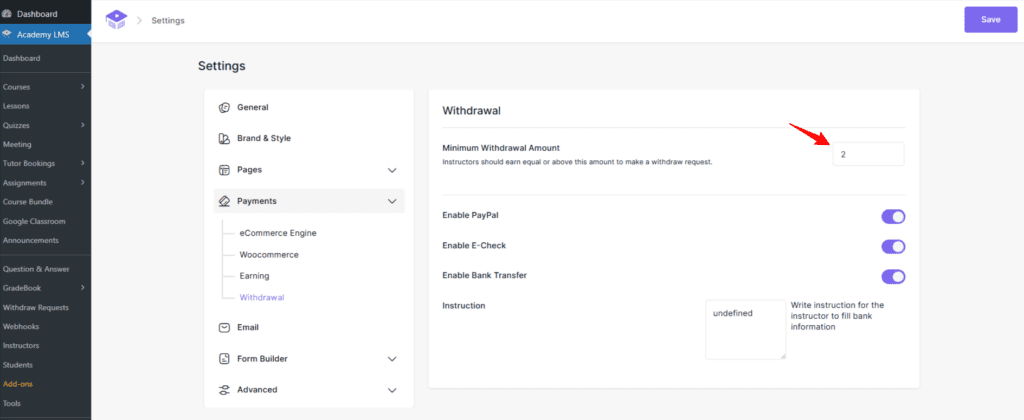
You can withdraw money only if the amount is greater than the minimum withdrawal amount. So, let’s see where you can set the minimum amount. Go to Academy LMS > Settings > Payments > Withdrawal.
Go to Settings >Payments> Withdraw and set the Minimum Withdrawal amount. You can also enable/ disable a payment method here. In this example, the minimum withdrawal amount is set to 2. This means that if your current balance is less than $2, you cannot withdraw money from your account. Click the Save button when you are done.
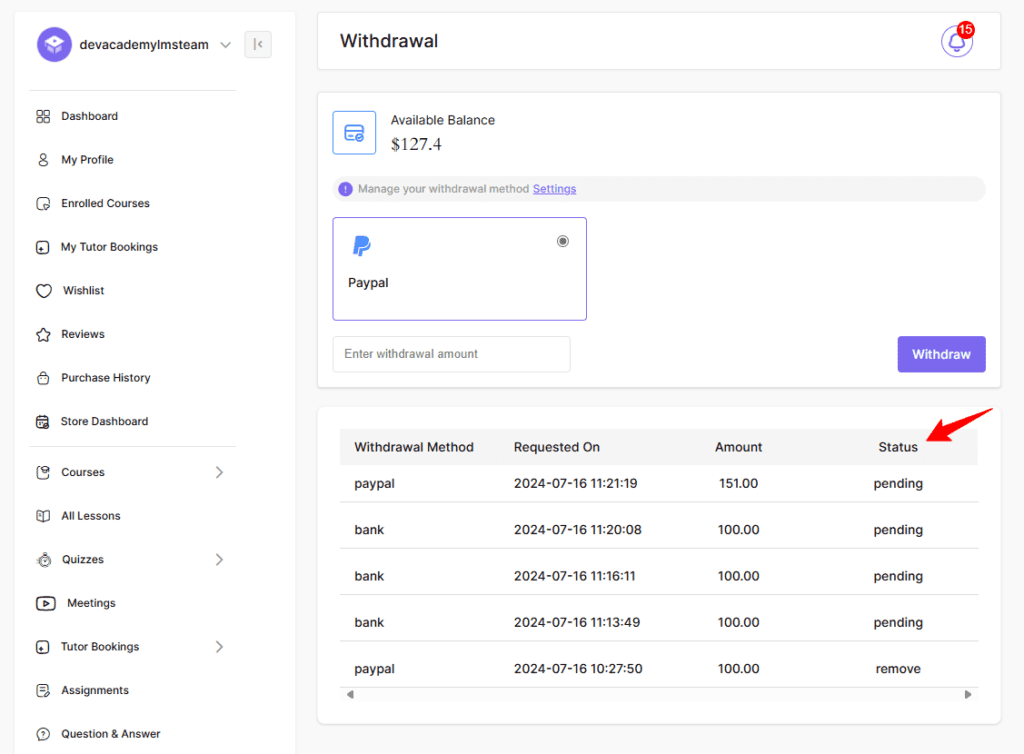
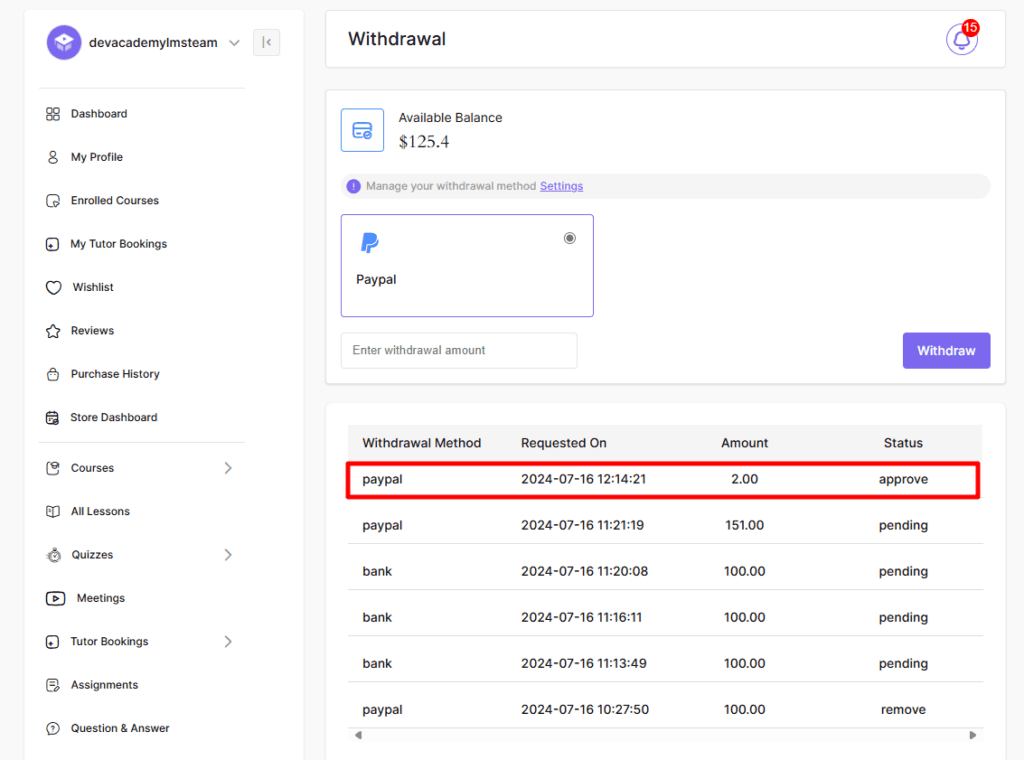
Now, return to the Withdrawal Request window, set the withdrawal amount to 2, and click Withdraw. The status of the withdrawal history will be updated, and you will see every detail related to the latest withdrawal request.
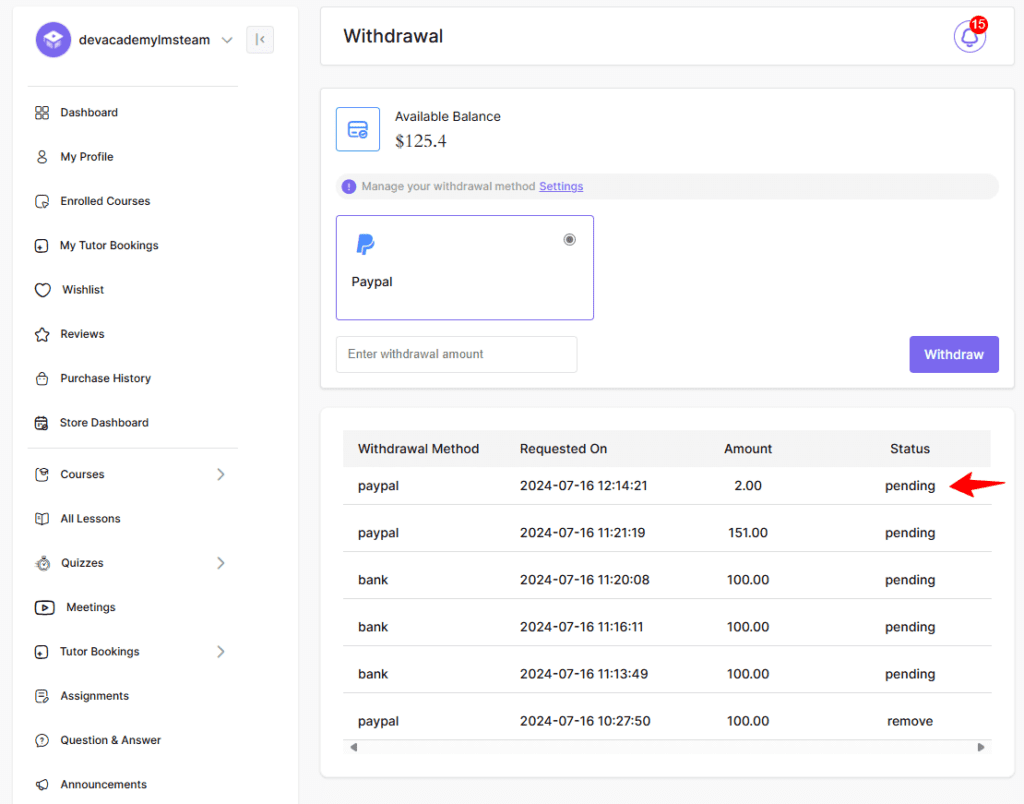
Go to Academy LMS > Withdraw Requests. The status of the latest withdrawal request is pending. When the admin approves the request, the amount will be transferred to the user’s account.

Admins can go to the Withdraw Request option and view all the withdrawal requests in one window. Admins have to select a payment withdrawal request and then click approve at the bottom of their screen.
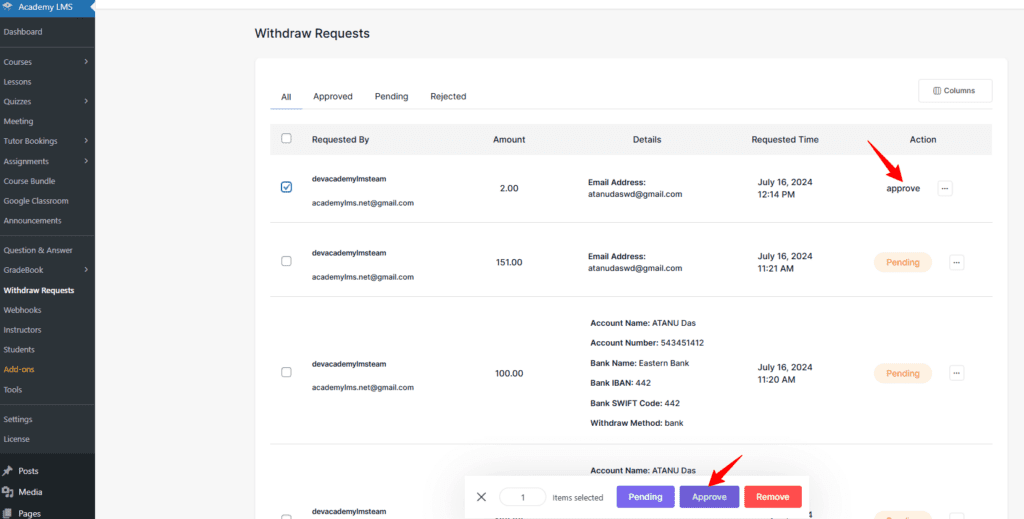
There you go! The requested payment is now approved. Go back to the Withdrawal option from the dashboard, where you can see that your payment status has changed to Approved.
This is how the money management process is done on Academy LMS. If you still have any confusion or questions about the Money Management Process, feel free to knock us on our support by placing a ticket or chatting with us at Academy LMS. For video Tutorials, subscribe to the AcademY LMS YouTube channel.