


A learning management system called Academy LMS makes use of Paid Memberships Pro to control subscriptions. Through membership levels that correspond to various levels of access to course content, this integration enables website owners to sell access to their courses.
Ultimately, the connection between Paid Memberships Pro and the Academy LMS may give site owners a strong opportunity to commercialize their course content and give their users a more personalized learning experience.
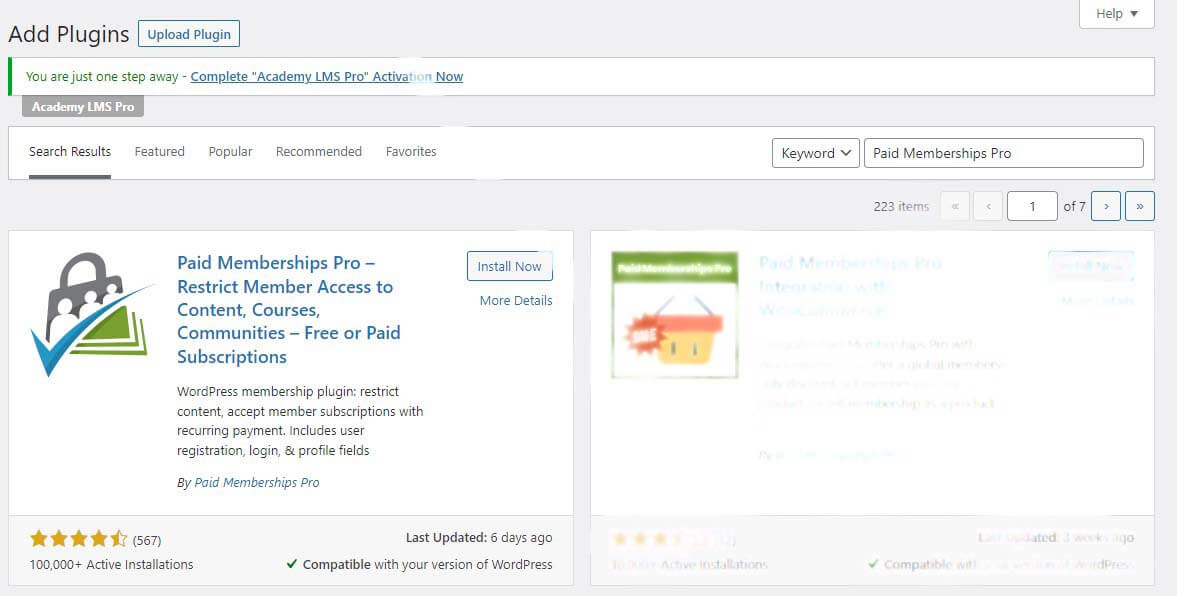
Essential to Use Paid Memberships Pro Plugin
If you want to use the paid membership plugin with Academy LMS, you need to have the following plugins installed and activated
Create a Membership Level
Follow all these steps to create a membership level.
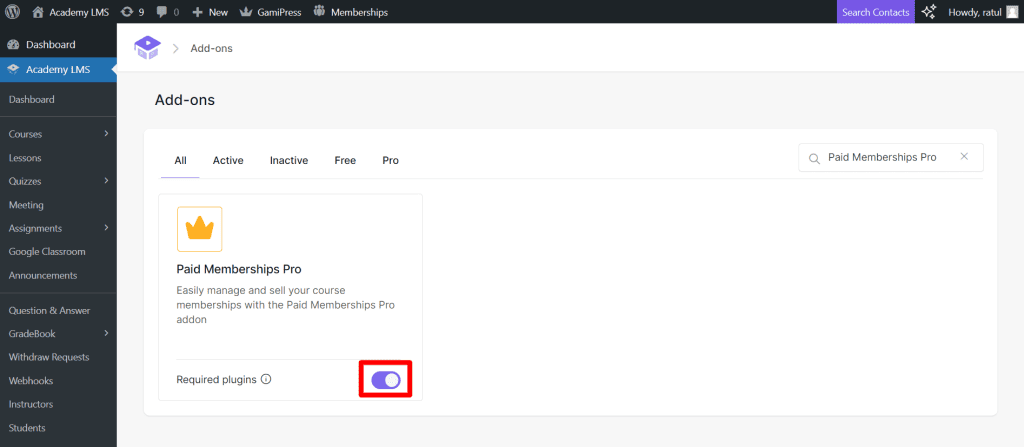
Step 1:
Find the Paid Memberships Pro addon by going to Academy LMS > Add-ons. Afterward, turn on the add-on by using the adjacent toggle switch.
Step 2:
You must first allow eCommerce payments before you can establish a membership website. From Academy LMS > Settings > Payments, you can access the Payments option. Choose Paid Memberships Pro as your eCommerce Engine here, and then click the top-positioned Save Changes button.
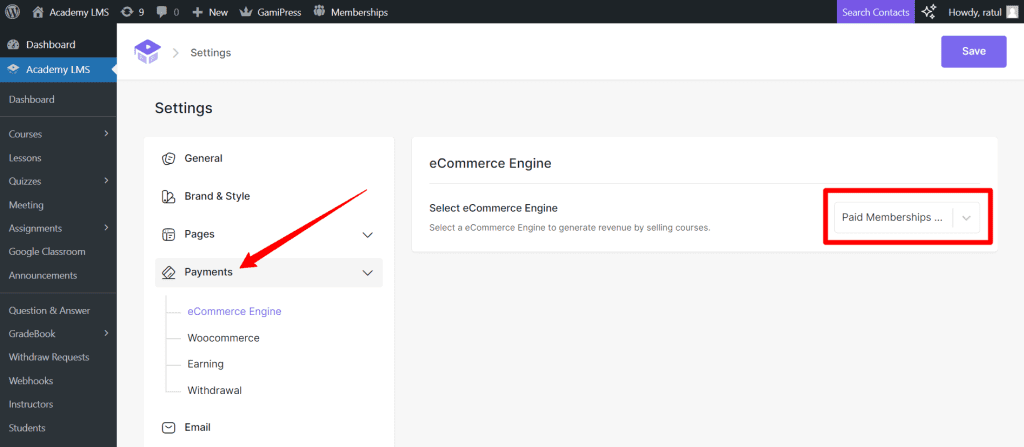
Note: Your paid courses will become free ones when you switch your main means of generating a payment. To finish this procedure, be sure to read the document all the way through. All of the preceding settings will revert to their original state if you want to use your old payment strategy once more.
Step 3:
Go to Memberships > Dashboard after logging in to your WordPress admin panel. Under the Initial Setup section, you have the choice to Create a Membership Level.
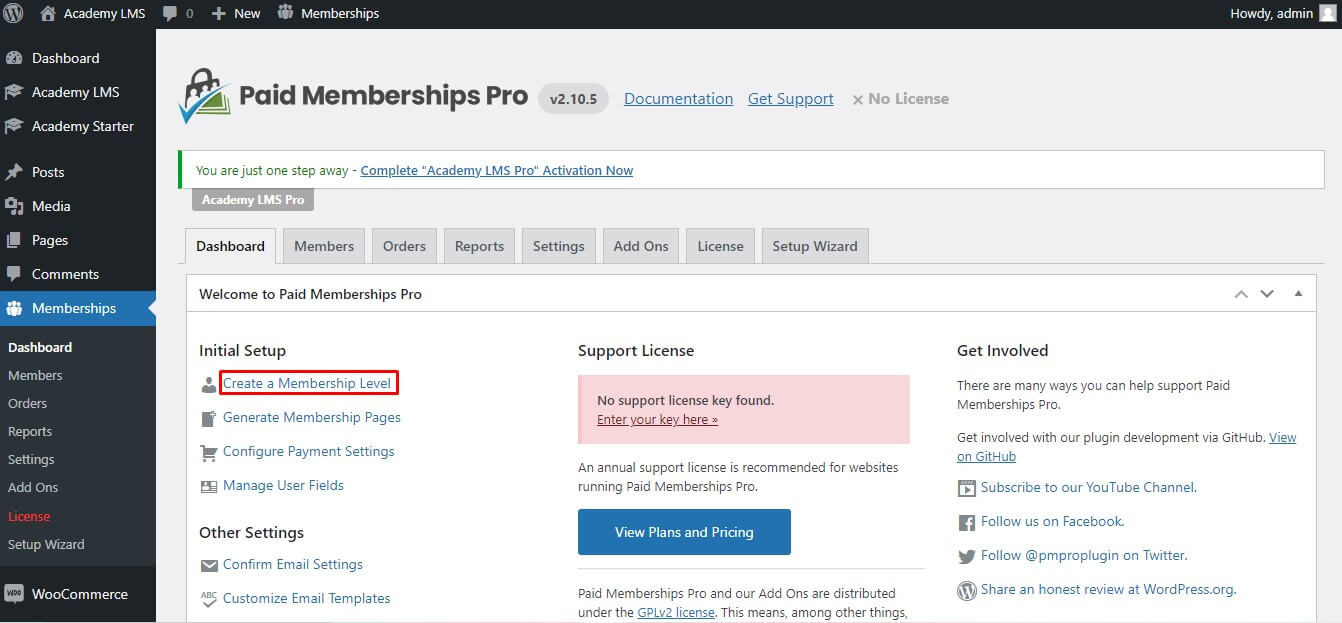
However, you will only see this screen if you do not currently have any membership levels. By selecting the button on the top panel, you can add a level if you already have one.
Step 4:
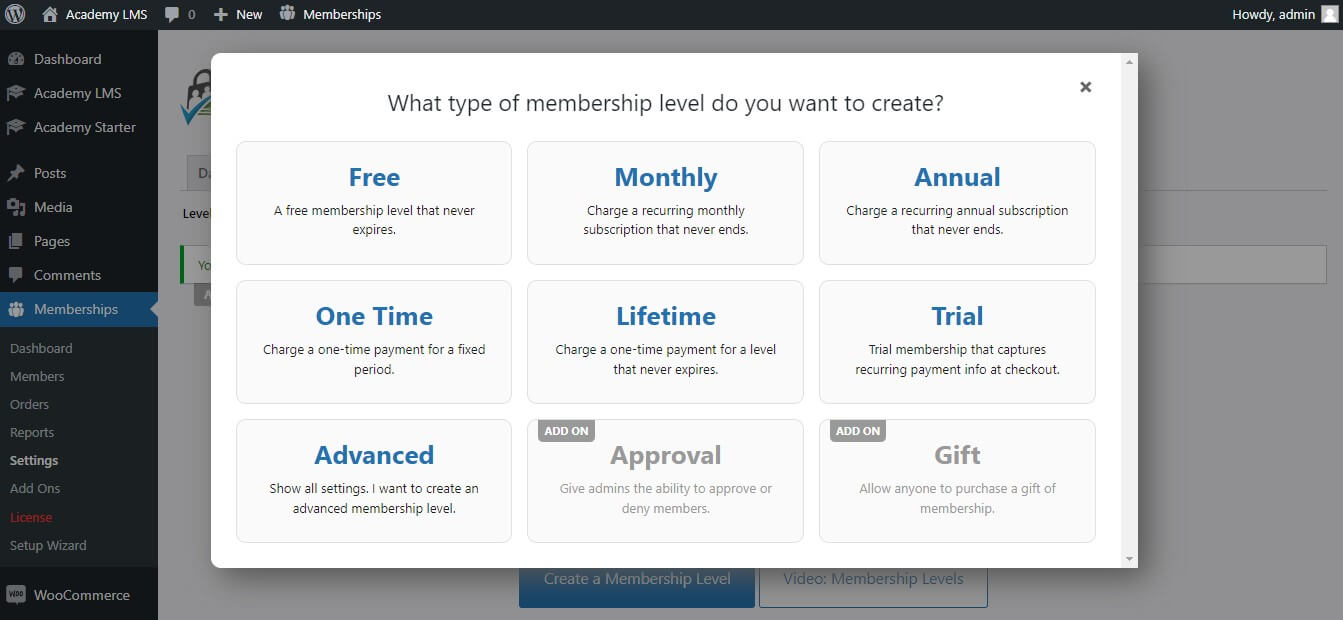
The next step is to decide what kind of membership level you wish to establish. There are 9 predetermined membership levels available for selection.
The following membership tiers are available:
- Free: It is a level of membership that is free and never expires.
- Monthly: Until the customer cancels the subscription, this level will charge them each month.
- Annual: Users will be charged annually.
- One Time: Customers will only be charged once for access for the specified time period using this method.
- Lifetime: If customers select this subscription option, they will only be charged once and will have lifelong access to the course.
- Trial: It allows for regular payments at checkout and provides a free trial subscription.
- Advanced: If you wish to design a unique membership level, use it.
- Approval: The administration can personally approve or refuse members thanks to it. To enable it, you must install an extra add-on.
- Gift: Customers can give a course as a gift to others.
You can select whichever level of membership best suits you.
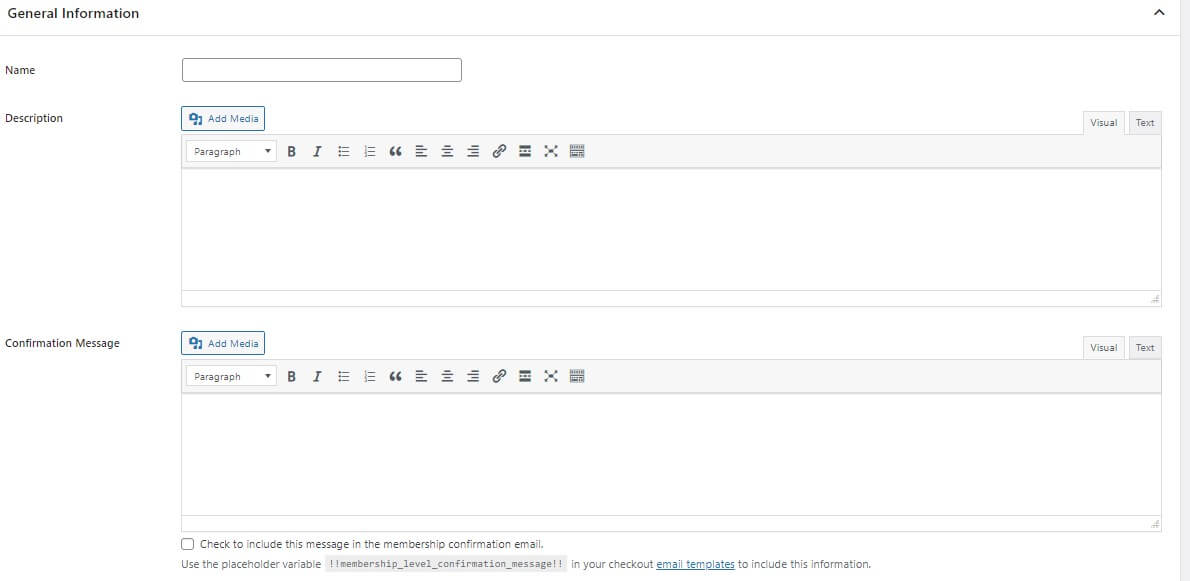
Step 5:
Include some general information here, such as the name of the membership level, a succinct description, and a message confirming your membership.
Step 6:
The member price must be specified in this area. The details you need to enter are as follows:
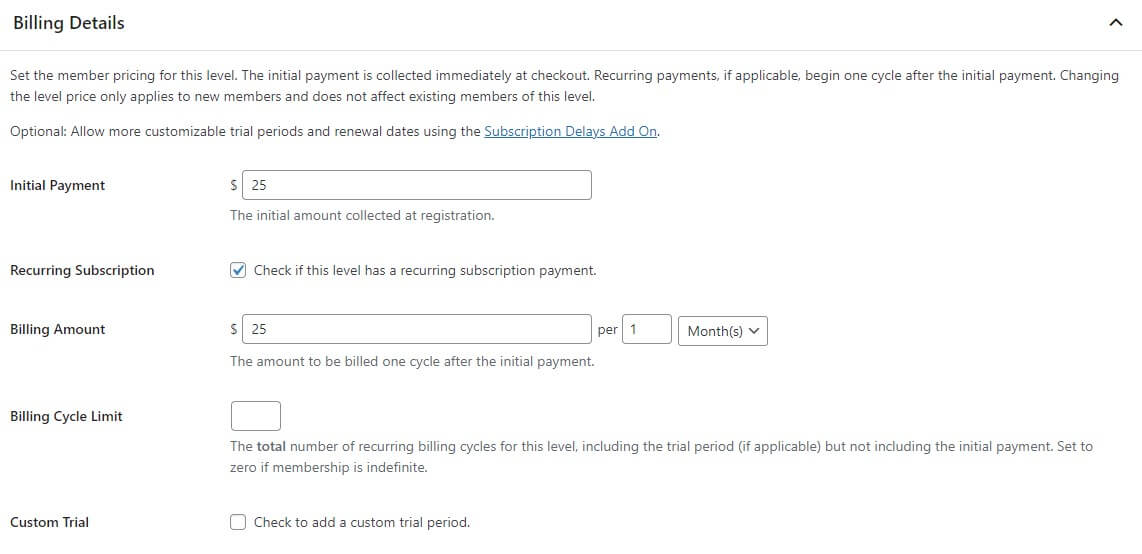
- Initial Payment: During the checkout process, customers must pay this sum.
- Recurring Subscription: If you wish to create a recurring subscription model, select this option.
- Billing Amount: Enter the recurring payment amount and billing cycle.
- Billing Cycle Limit: Indicate how many recurring billing cycles there are. If the membership is indefinite, enter zero (0) here.
- Custom Trial: If you wish to add a special trial term, check this box.
Step 7:
To specify an expiration date for this membership level, use the Membership Expiration functionality. Hours, days, weeks, months, and years can all be used to specify the expiration period.

Step 8:
Now go to the Other Setting option at Add New Membership Level of Membership plugin. Then you will find the Academy LMS content settings.
From there, you may choose a membership model and add a suggested badge to that membership level on the membership creation screen.
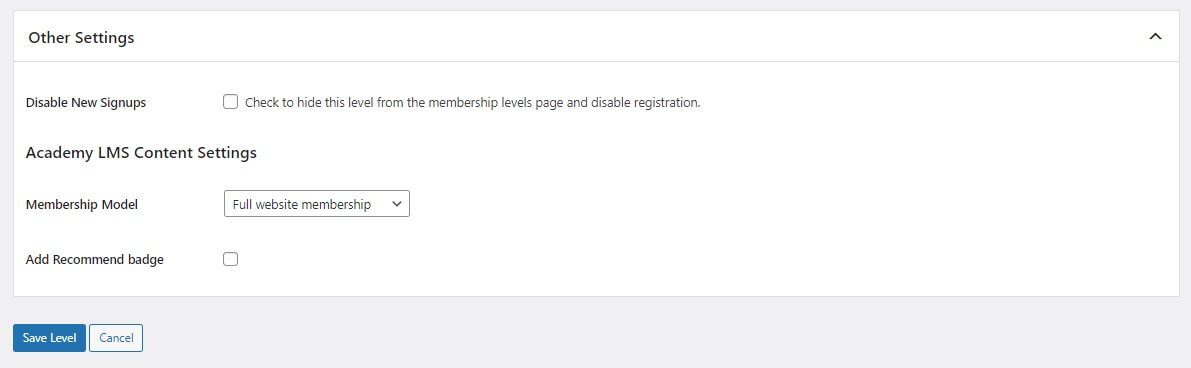
Academy LMS offers two different types of membership models. These are:
Full Website Membership
This is the best choice if you want students to purchase a single subscription package to have access to the full website and all courses.
You can use this option, for instance, if you wish to charge a monthly or yearly subscription to view the entire website.
Category-wise Membership
This is the best choice if you want to charge various rates for various course categories.
For instance, you could wish to charge an additional $80 per week for business courses and $70 per week for content courses. Category-wise membership is ideal in this situation.
Add Recommended Badge
Enabling this option will add a star badge to the frontend preview and recommend this particular membership level. After configuring all of them, use the “Save Level” button to establish your subscription level.
Preview Membership Feature
On the course enrollment page and registration page, the membership levels are shown in different ways. Here is a sample of the membership levels that can be viewed while enrolling in a course:

Here, an automated selection with a star badge on it will be made for the suggested badge. Additionally, when registering on the website, a preview of the membership levels is shown in the image above.
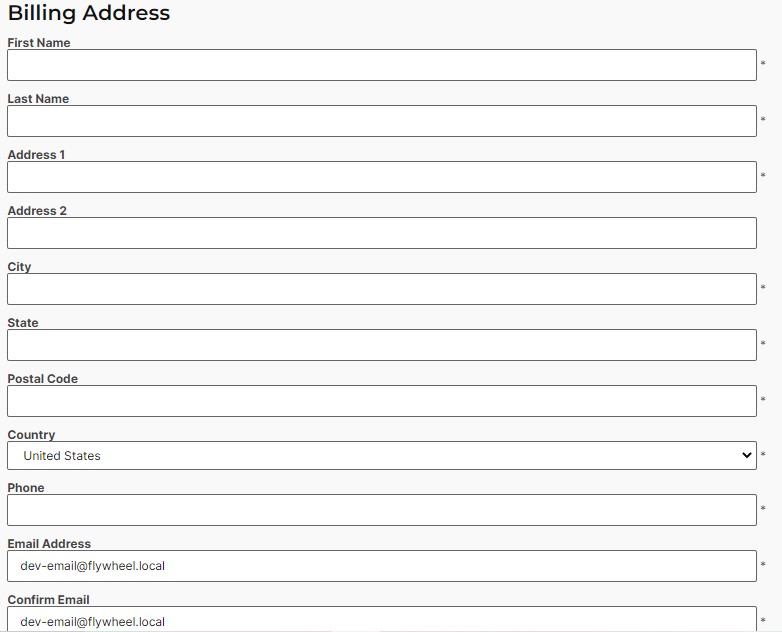
Clicking on Buy Now will redirect to the check out page, the user should fill in the billing address first.
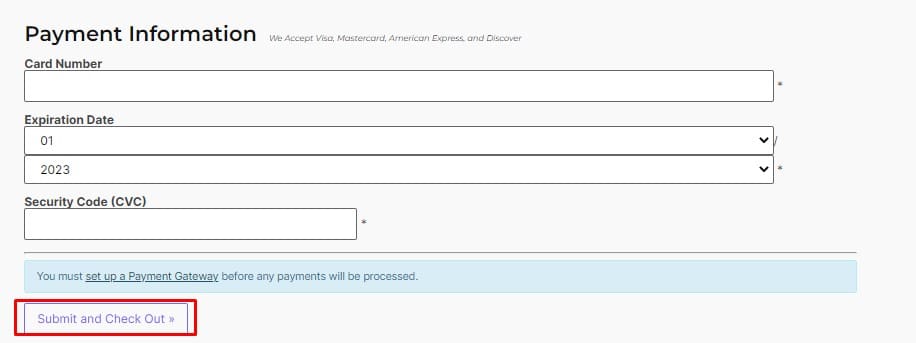
And in the second, there is payment information. After completing all these billing and payment information click on Submit and Check Out to purchase the membership.
Only the course content is accessible with membership plugins. Users are not automatically enrolled. He or she must personally enroll in a particular course in order to take it. Nevertheless, administrators can manually enroll students by utilizing the Manual Enrollment add-on.
This is how the Paid Membership Pro plugin works with the Academy LMS. If you need even more instruction, then please join our Facebook community to ask questions and follow us on Twitter for all of our latest updates.