Sending students and instructors to WordPress’s default wp-login.php breaks the experience of an otherwise fully-branded course site. Academy lets you replace it with a clean, on-brand frontend login flow — either Academy’s own login page, a page built from the aBlocks login block, or a completely custom page you choose.
How to access
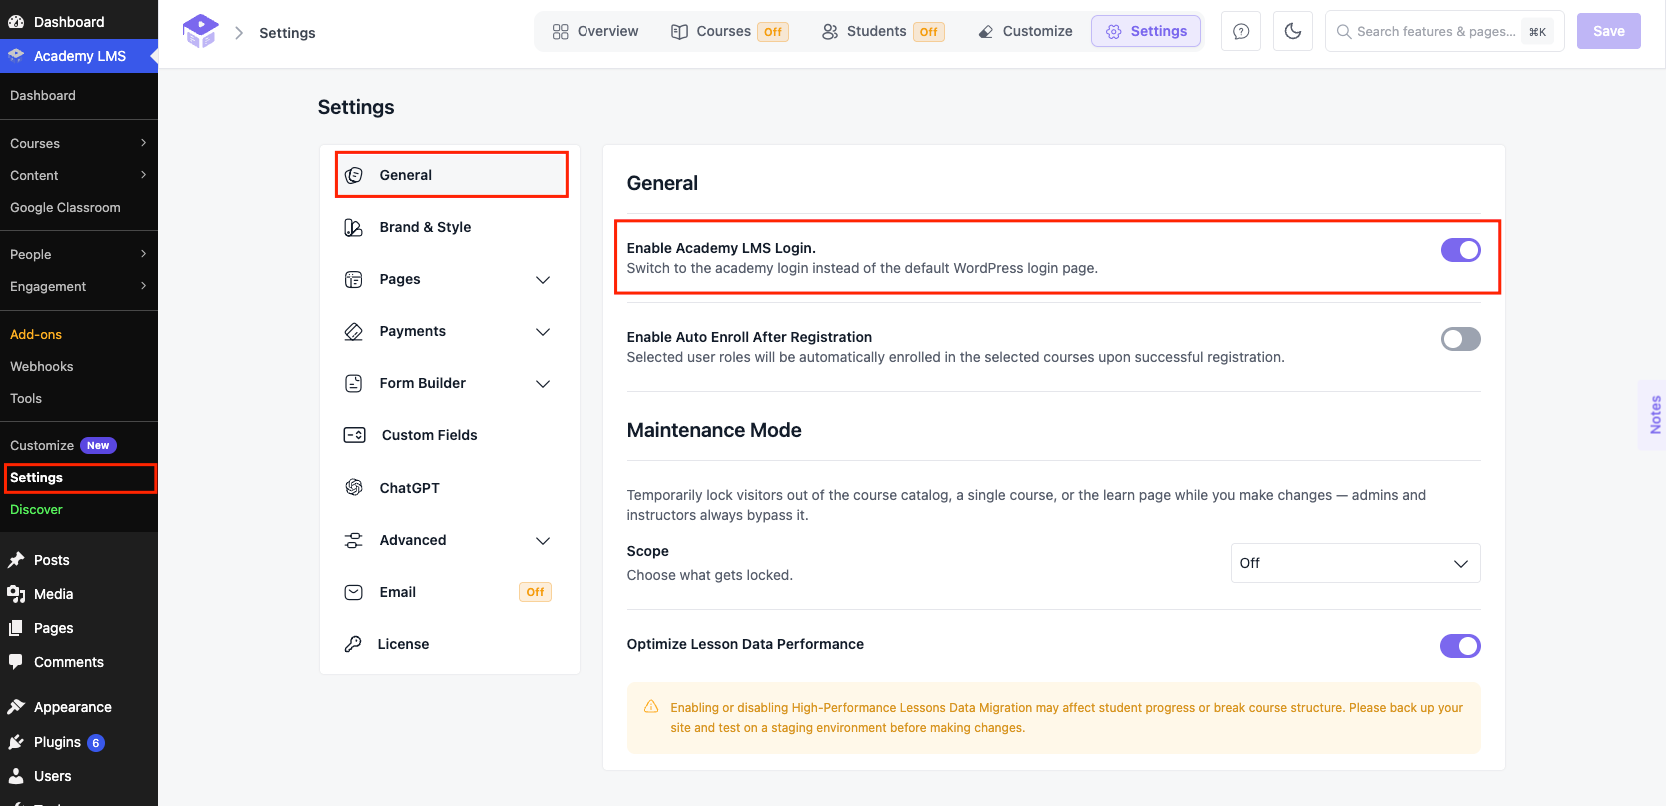
1.Go to Academy LMS > Settings, then open the General tab (this is the default tab).
2.Find Enable Academy LMS Login and turn it on. This switches the standard WordPress login page over to Academy’s own frontend login page for all users.
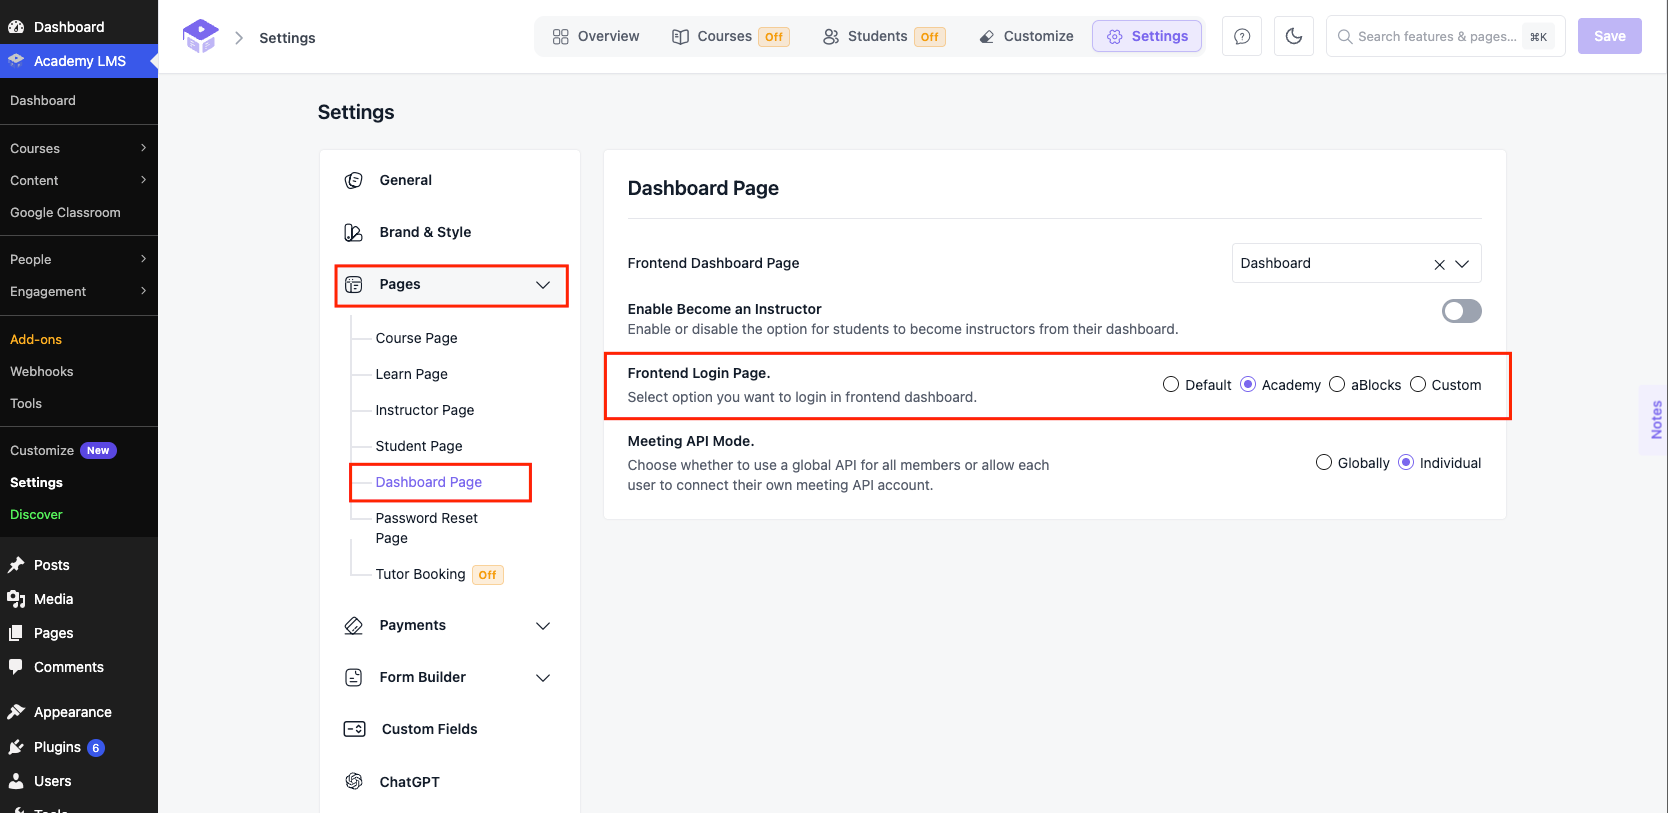
1.To choose exactly which login experience your frontend Dashboard uses, go to Academy LMS > Settings, click Pages in the left menu, then open the Dashboard Page tab.
2.Under Frontend Login Page, pick one of:
Default — use the WordPress default login form.
Academy — use Academy’s own built-in login page (recommended).
aBlocks — use a login page built with the aBlocks page builder’s login block.
Custom — point to any page of your choosing (e.g. one you’ve built yourself).
Field breakdown
Enable Academy LMS Login — master switch that replaces wp-login.php with Academy’s frontend login for the whole site.
Frontend Dashboard Page — the page assigned as your student/instructor dashboard; the login flow ties into this page.
Frontend Login Page — chooses which login experience is used from the dashboard: Default, Academy, aBlocks, or Custom.
Enable Become an Instructor — separate toggle on the same tab that lets logged-in students apply to become instructors from their dashboard.
If you choose Custom, make sure the page you pick actually contains a login form (e.g. the Academy Login block or shortcode) — otherwise visitors following login links will land on a blank page.
Where it’s used
Every “Log in” link Academy generates across the site — on the course archive, the enroll button for logged-out visitors, and the dashboard — respects this setting, so changing it updates the login destination everywhere consistently.