









StoreEngine is the recommended way to sell courses. It’s a free store plugin from the Academy LMS team, with its own cart, checkout, orders and subscriptions. The course connection turns on by itself once StoreEngine is active.
1. Choose StoreEngine
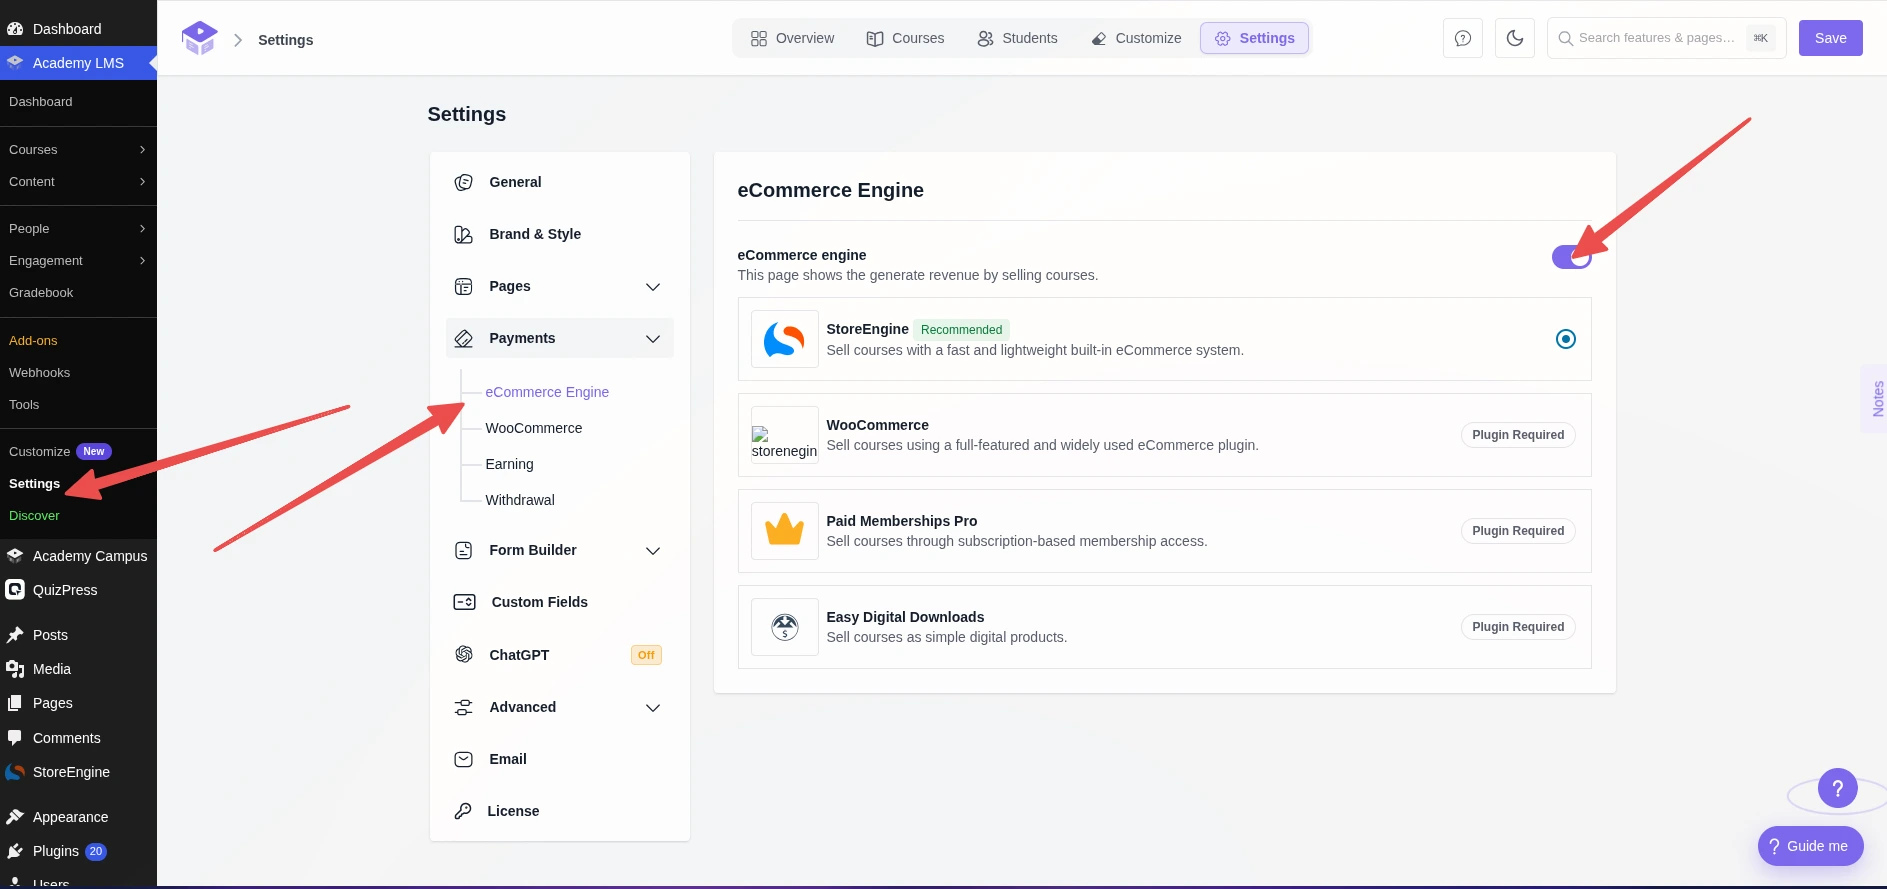
Install and activate StoreEngine (the Setup Wizard can do this for you). Then go to Academy LMS → Settings → Payments → eCommerce Engine, turn on the eCommerce engine switch, pick StoreEngine and click Save.
2. Price a course
Open a course and go to the Overview step. In Course Type:
1.Product: create or pick a product for the course.
2.Type: One Time for a single payment, or Subscription for recurring billing (every so many days, weeks, months or years).
3.Enter a Price, and a Compare Price if you want to show a crossed-out discount.
4.Click Add Price, then save the course.
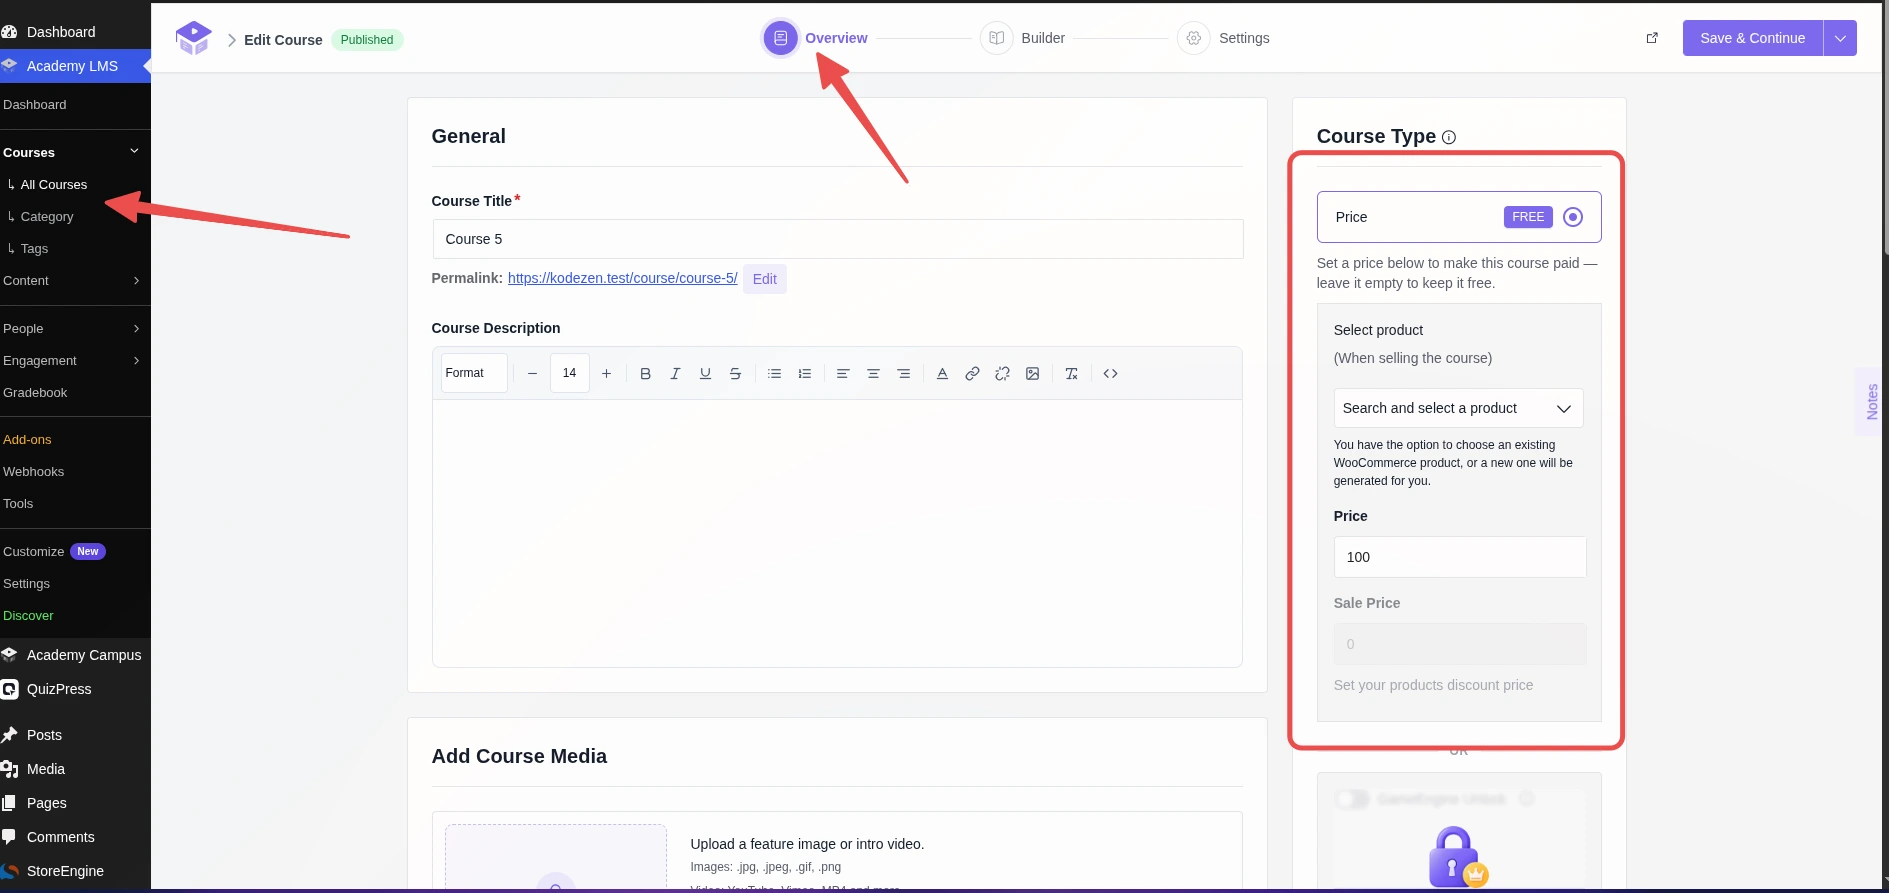
The course now shows its price and can be bought through StoreEngine’s checkout.
3. Set up payment methods
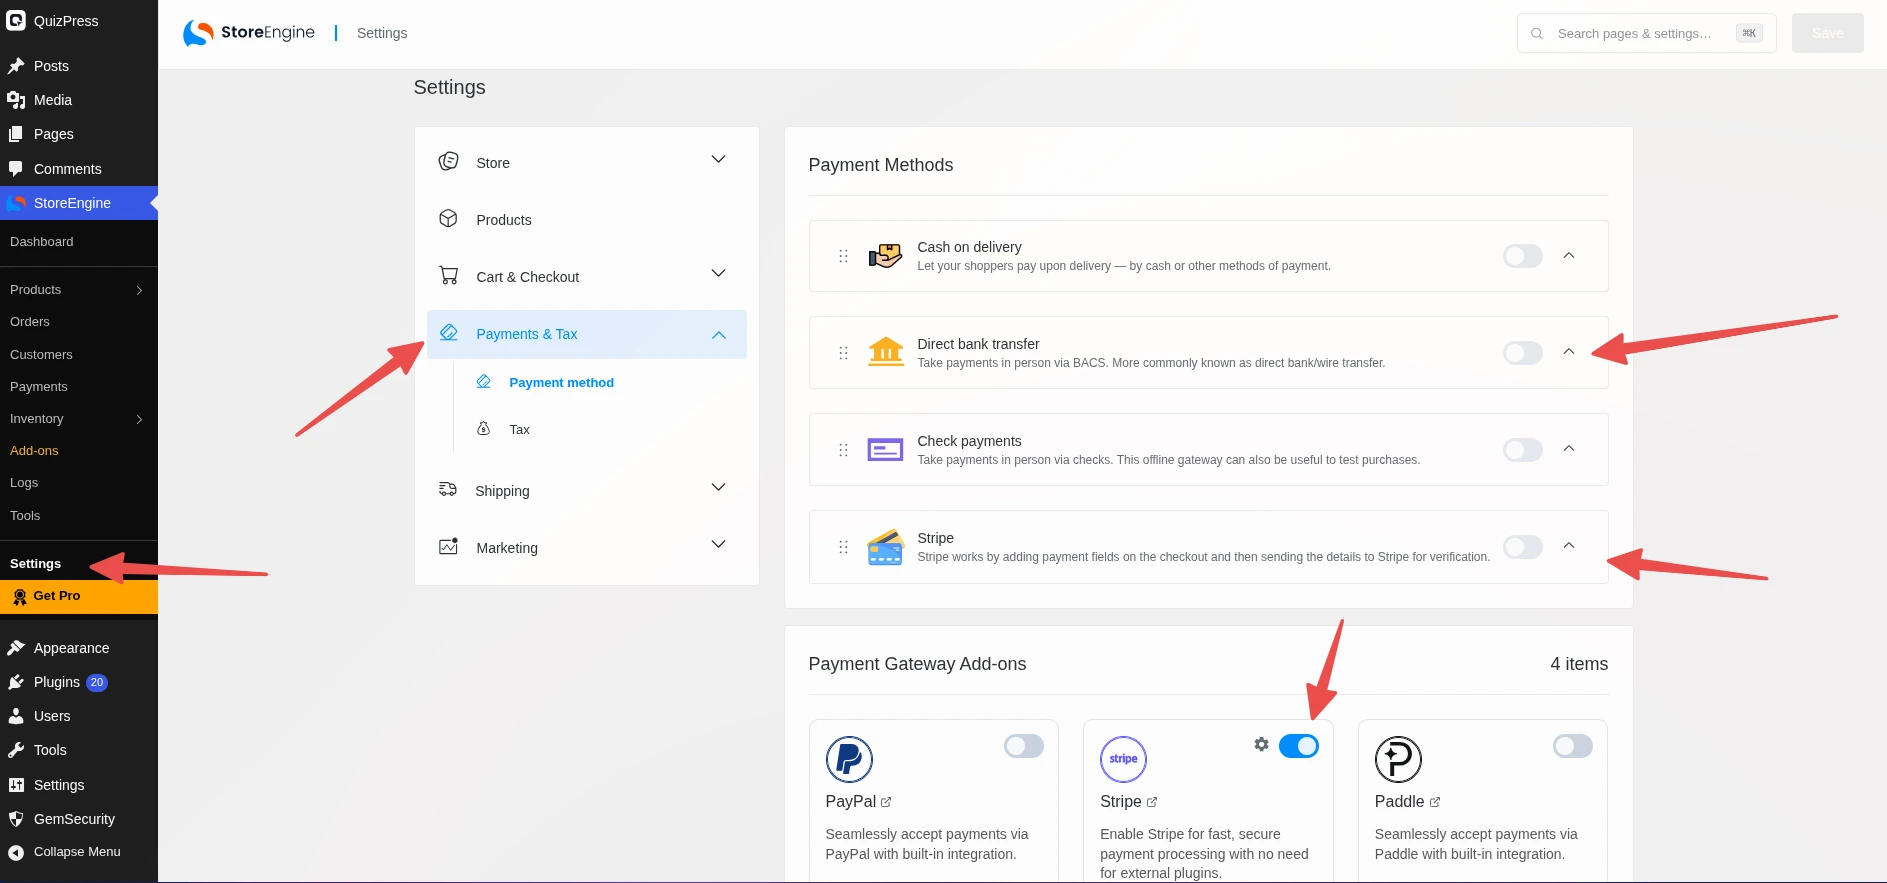
Payment methods are set in StoreEngine, not Academy LMS. Go to StoreEngine → Settings → Payments & Tax → Payment method.
Built in: Direct bank transfer and Check payments.
One-click add-ons: PayPal, Stripe, Paddle and Razorpay.
Sell access to several courses
Subscription: use the Subscription price type on a course.
Several courses in one purchase: create an Access Group in StoreEngine, or a Course Bundle.