


Here, we will walk you through how to create course with the Academy LMS plugin. From this section, you will learn about the basic course-building process and also be able to build a full course. Ultimately, the course-building process will become easy for you.
Add a New Course
Go to your WordPress website’s dashboard to learn how to create course. Log in to your WordPress site and navigate Academy LMS > Courses > All Courses. To create a course, click the Add New Course button.

You can create course here by adding the course title, description, course type, course taxonomy, course category, and course tags and configuring the course settings.
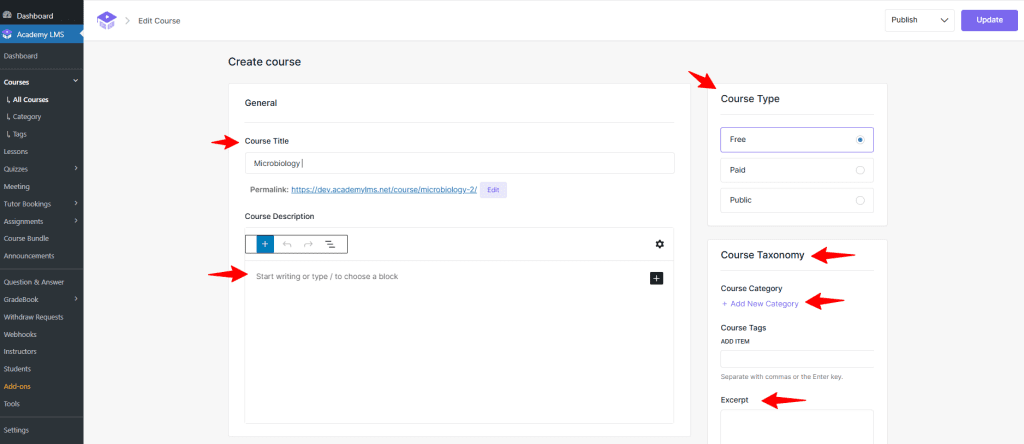
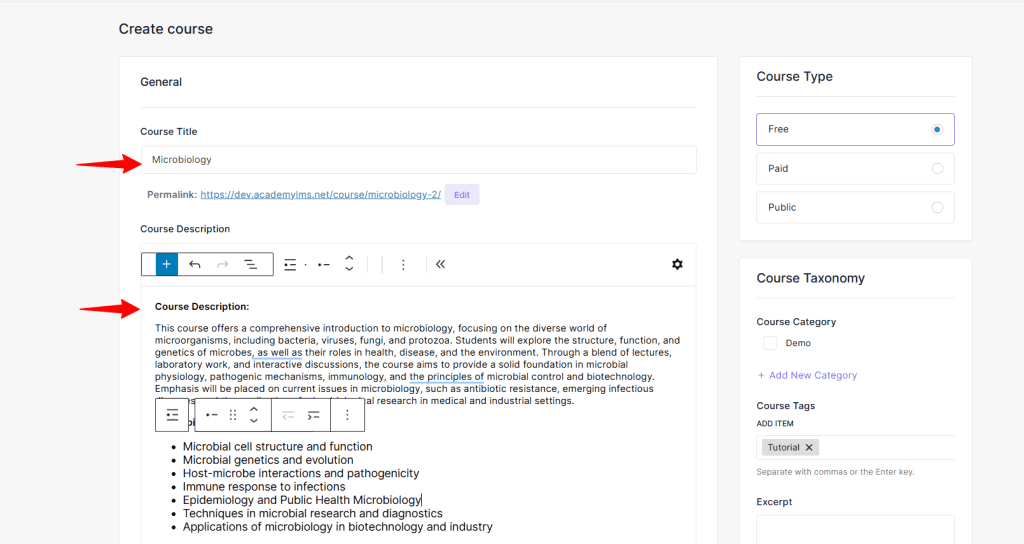
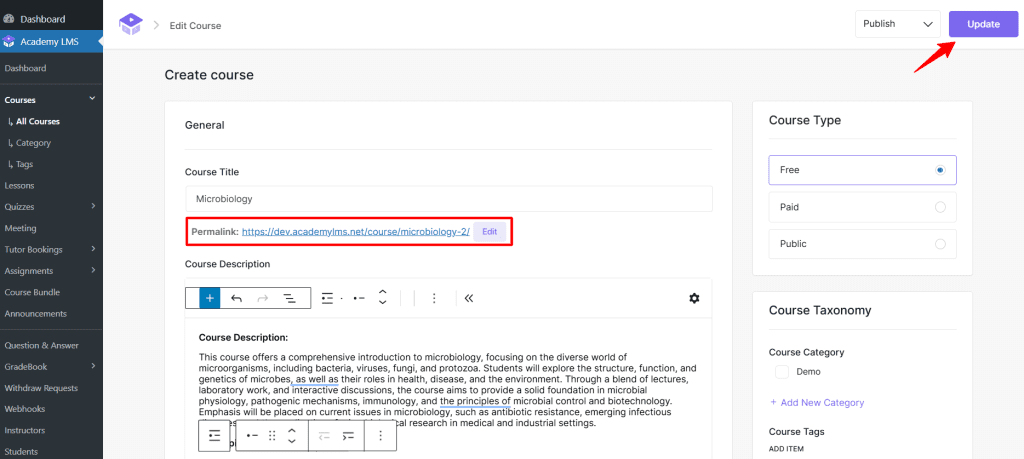
First, Add the Course title by simply putting the title in the course title text box indicated in the image. Then you can move on to the Course description or Content in the text area pointed in the image below. For a description or content area, you will get an editor with options to change the style and alignment and apply more changes to your text, just like the WordPress block editor.
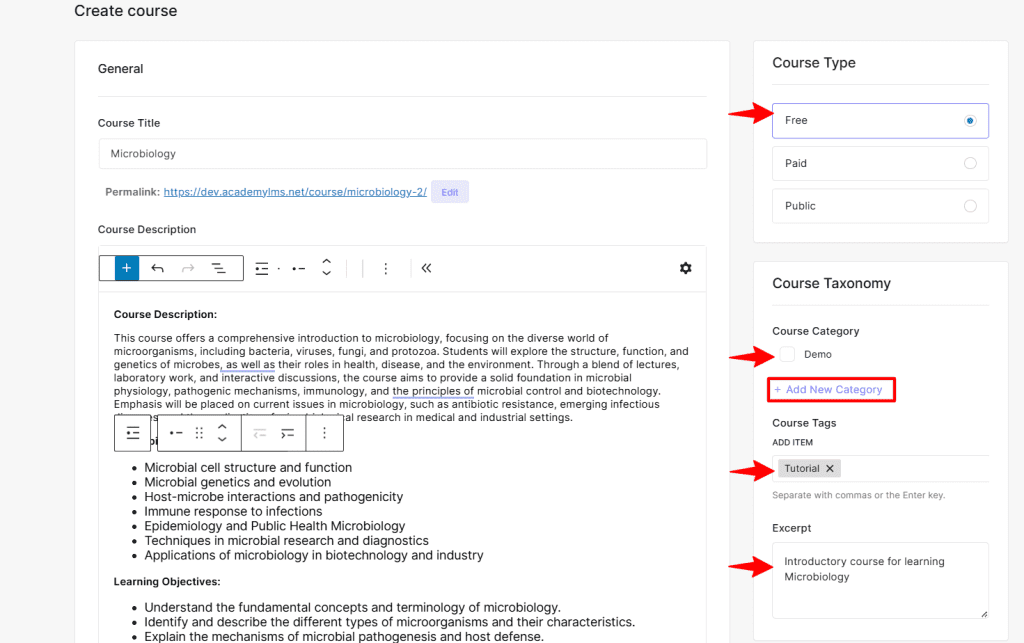
You can also select Course Type and set the course as Free, Paid, or Public. We’ve selected the course as Free. From Course Texonomy you can add a Crouse Category name according to your preference. We’ve named the category “Demo.”
Under the Beloe Course category option, you’ll find the Course Tags option, where you can set the course tags. We’ve chosen “tutorial” as the course tag. Also, you can provide the Excerpt text that you want to display for this course.
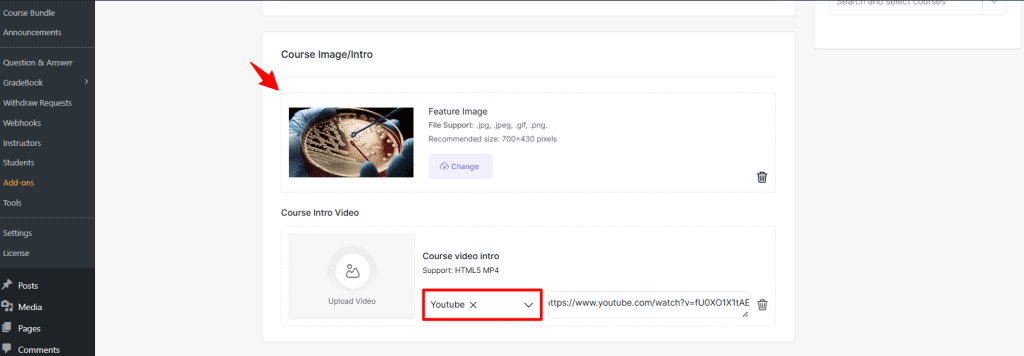
Scroll down and click the Set Featured Image button to add the Featured image for your Course. We’ve selected an image for our course. You can also set Course Intro Video and select your preferred video source from the dropdown menu. We’ve selected an intro video and provided the source URL.
Since the basic course settings are complete, scroll up and click Publish the course. After clicking the Publish button, a permalink will be available. You can click the permalink to view the course structure in detail. The publish button is now turned into Update which you can click and change any information.
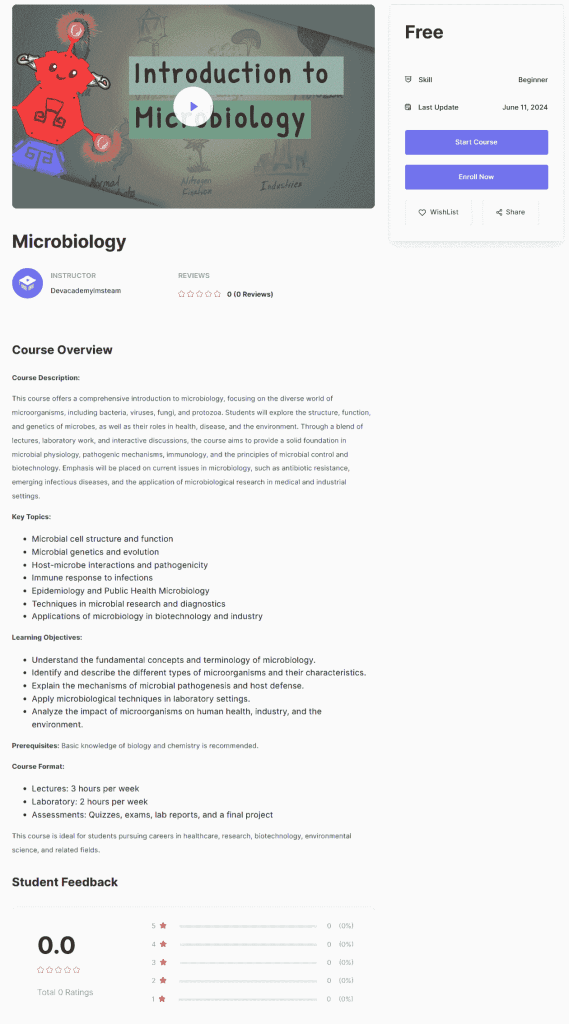
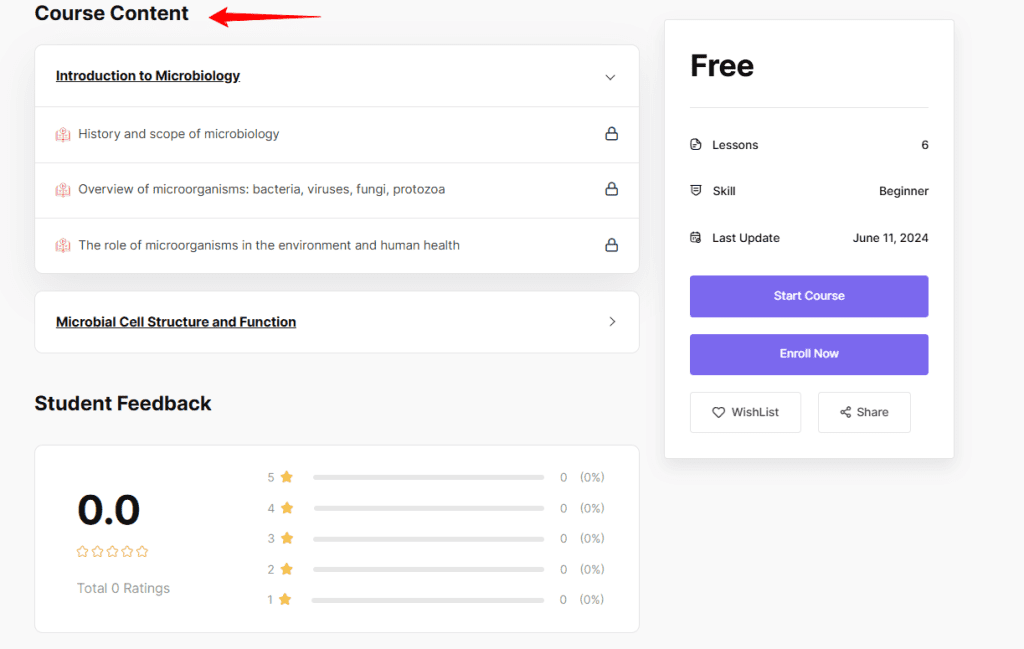
Here is the detailed view of the Course we’ve just created with some basic settings and information.
Add a Lesson to the Course
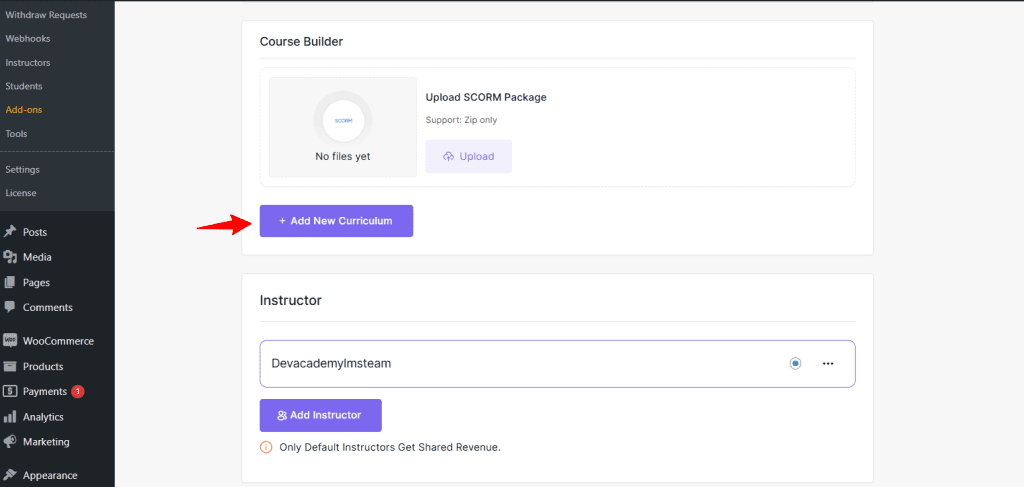
Let’s explore the Course Builder Option to set up the course with more essential information. Head back to Academy LMS > Courses and select your recently created course.

Now scroll down to the Course Builder section and click the Add Curriculum button.
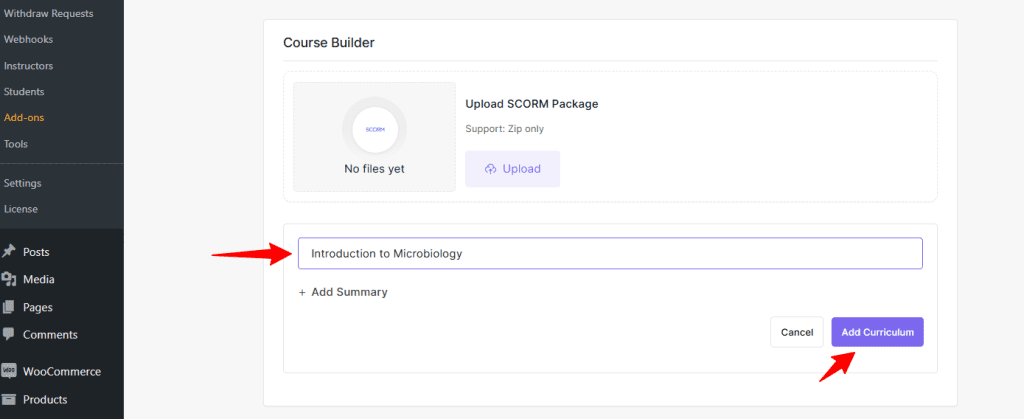
Now, add the curriculum title and click the Add Curriculum button.
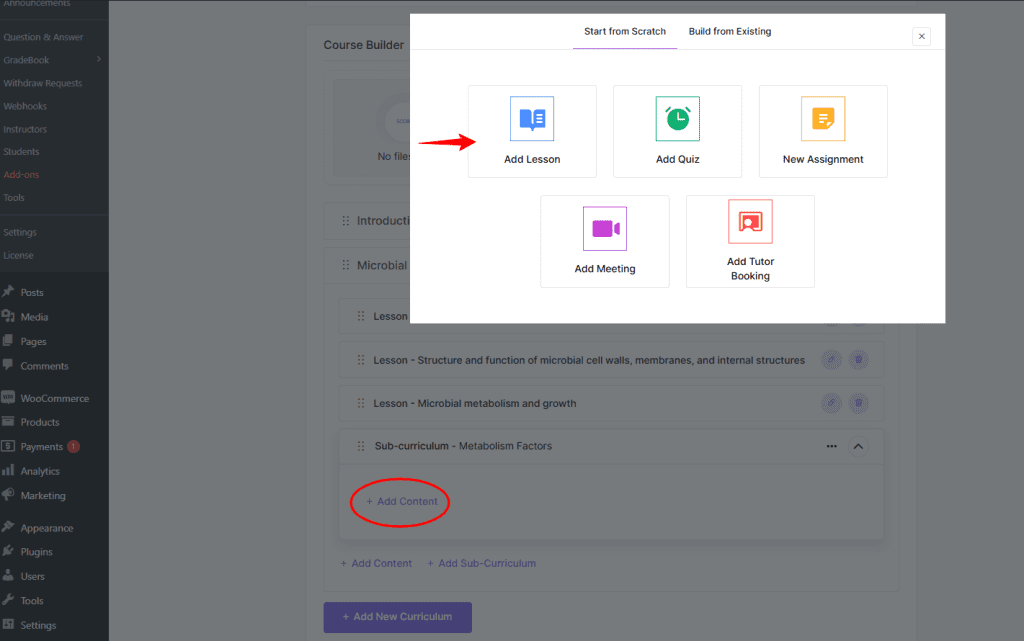
Now click the +Add Content button and then click Add Lesson.
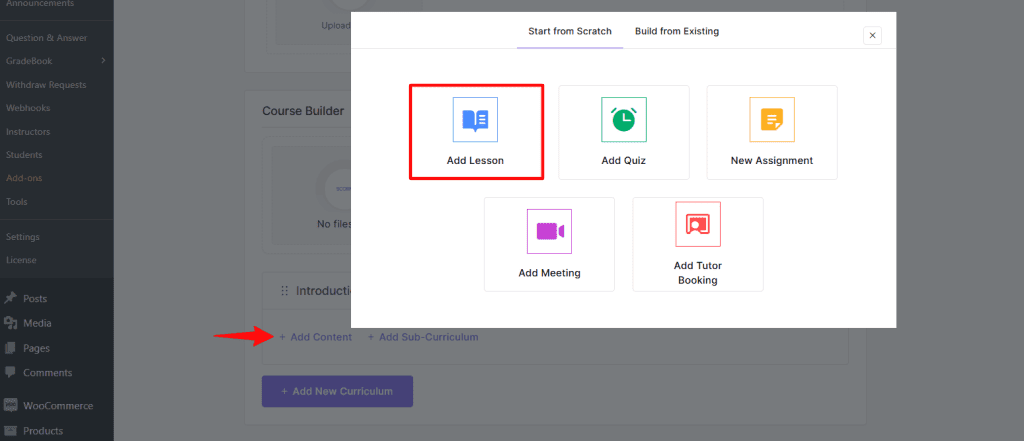
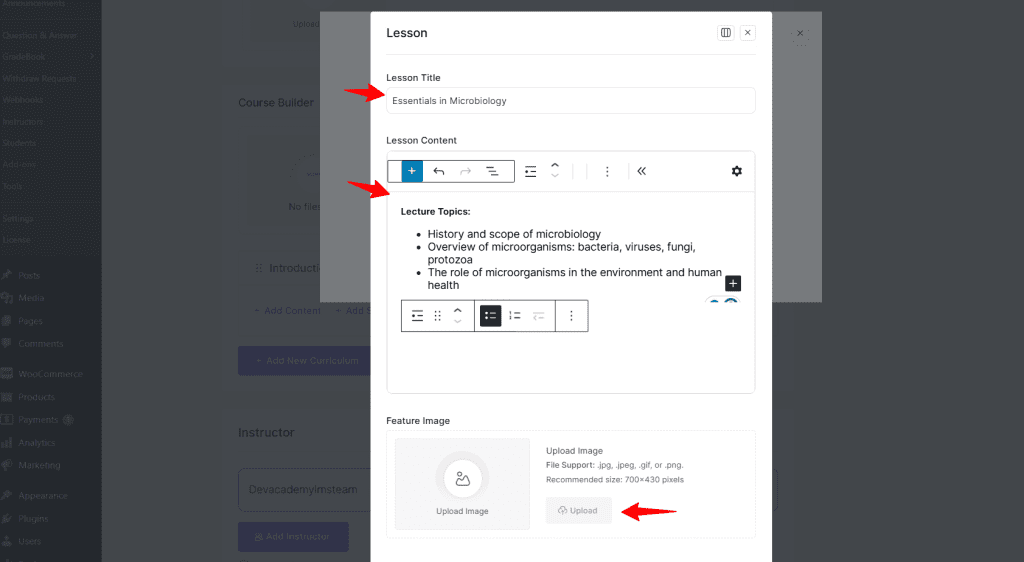
You can add the lesson title, content, and featured image in the Lesson section.
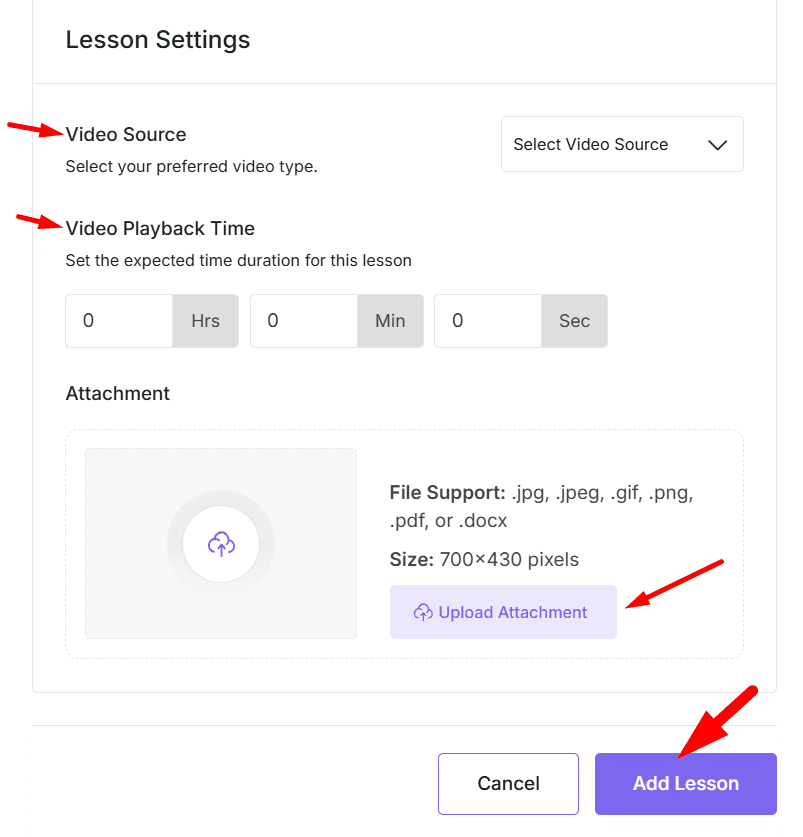
If you scroll down a bit, you can add session settings, including preview option, video source, playback time, and attachment. Then click the Add Lesson button to finalize the lesson creation process.
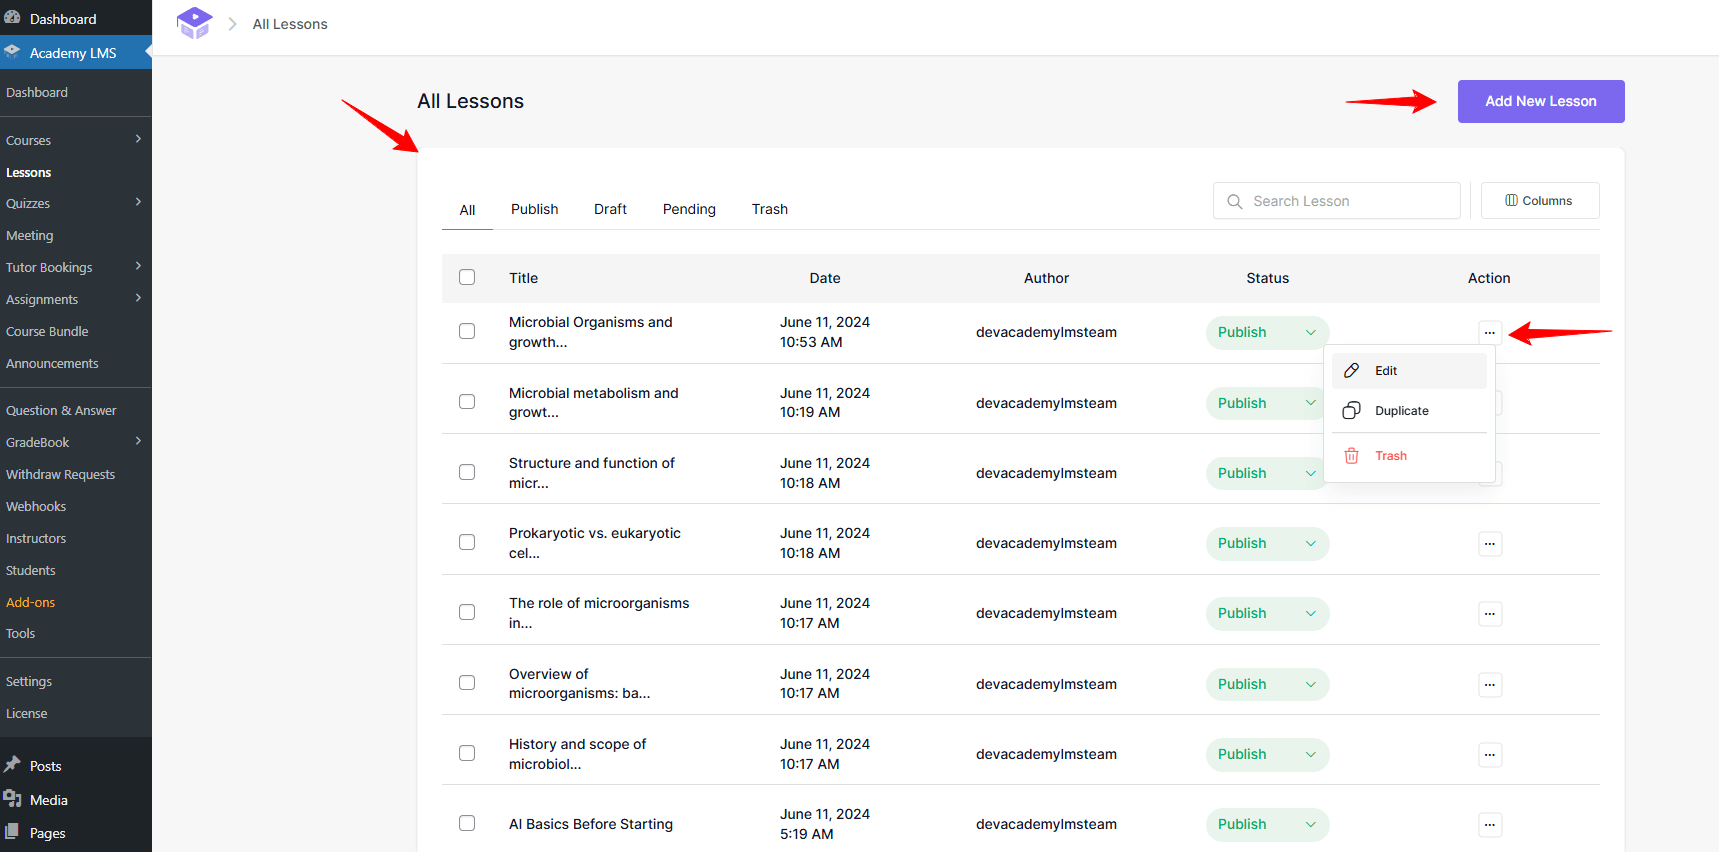
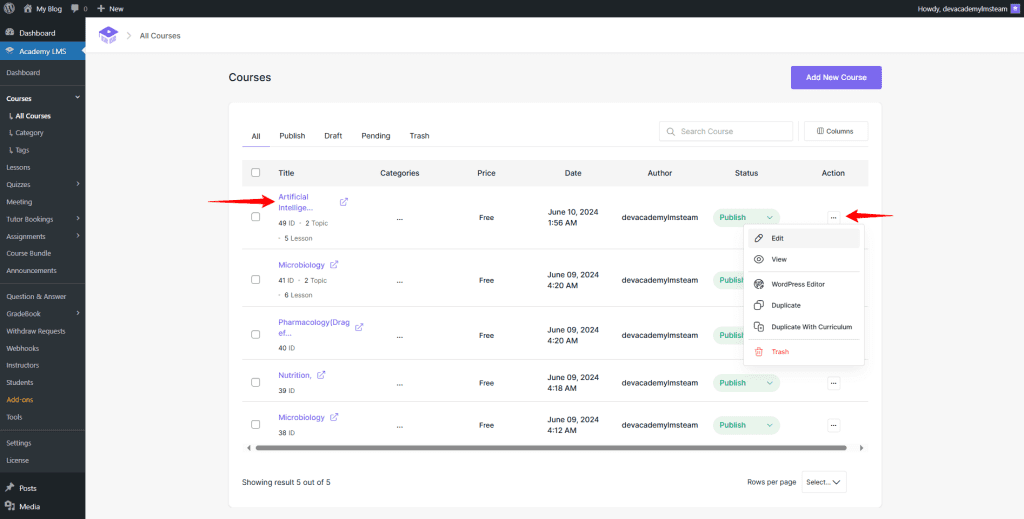
Go back to Academy LMS > All Lessons to view the courses you’ve created. You can create a new lesson from here by clicking the Add New Lesson button. Plus, you can edit, duplicate, and delete courses from here.
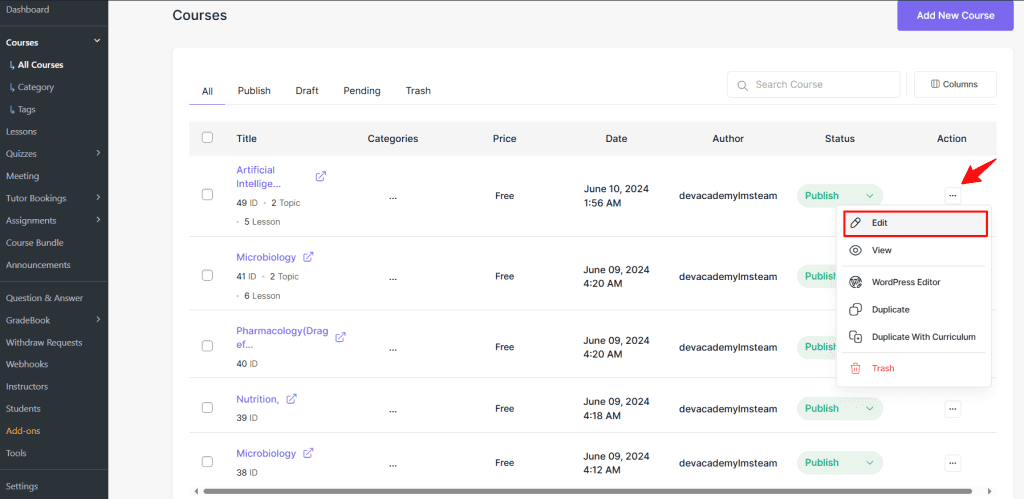
You can assign already created lessons to multiple course curriculums. head back to courses and select any course that you want to edit. Now click a course or click the breadcrumb and select Edit.
Scroll down to the Course Builder section, click on the previously created curriculum, click Add content, and select the Build from Existing tab. You can see the created course lessons here that are not assigned yet. Click your preferred lesson to add it to this curriculum.
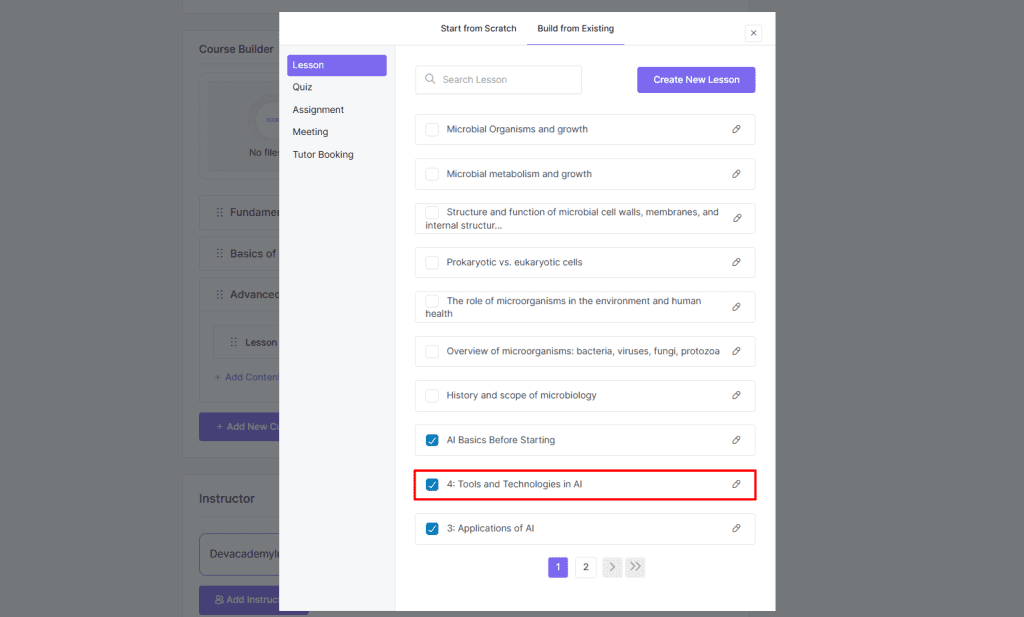
As you can see, your selected lesson is available for your chosen curriculum. Remember that you can assign lessons that are not assigned to any course or curriculum. So, Let’s preview the course along with the lessons that we just created.
Add Sub-Curriculum
A sub-curriculum is essentially a smaller curriculum within a larger curriculum. It’s like a chapter within a book, or a specific module within a broader course. It focuses on a particular area of study or skill development that falls under the umbrella of the main curriculum.
To add a sub-curriculum, go to the course builder, then click on Sub-Curriculum.
Now, set the name for your sub-curriculum and sub-curriculum summary, and lastly, click on the Add button.
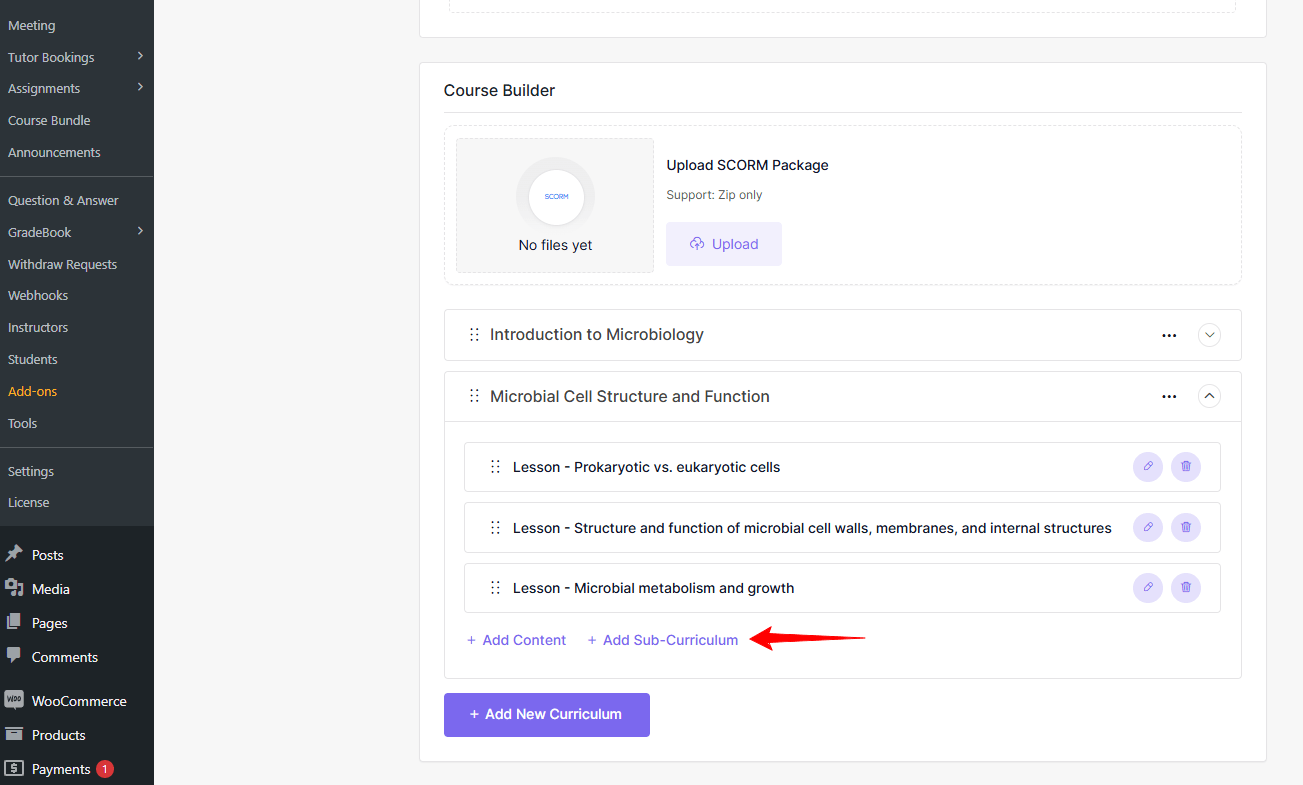
Now, you can see a sub-curriculum has been added in the course builder. From here, you can add lessons, quizzes, and other course content for the sub-curriculum.
Course Builder Settings
Just below the course builder, you will find more course settings to organize your courses. Let’s learn about those settings in detail.
Course Settings
From Course settings you can enable Public Couse, Q&A, and Announcements section. You can provide the Maximum student number, where you can state the highest number of students for this course.
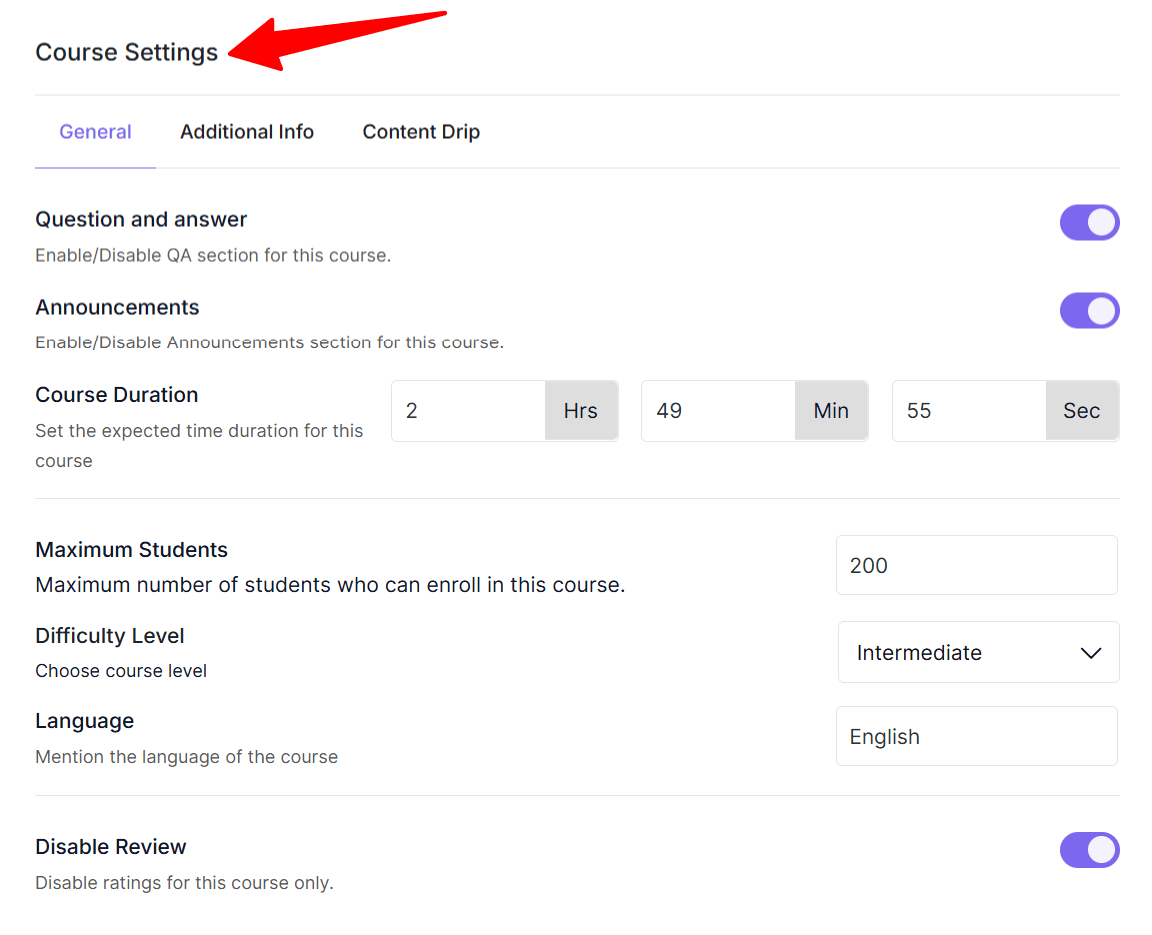
According to the course’s difficulty level, select an option between All Levels, Beginner, Intermediate, or Expert. This information will be shown when you will go to the course details.
The next option is Language, where you can mention the language of the course. Simply mention the language by typing in the language name in the box.
Disable Review: Disabling reviews is useful if you want to keep feedback private or focus solely on delivering course content without public ratings.
Additional Info
You can include additional information in this section through the Course Settings area.

With the Benefits of the course, you can mention the course’s benefits to let your audience learn about the course’s benefits.
In the Targeted Audience section, you can specify the audience category of students who will benefit the most from this course.
The next step is to fill out the Requirements section, where you’ll enter the course’s minimal or eligibility requirements (if there are any).
Lastly, you can include the course materials or the list of assets in the Materials Included section.
Paid Course Creation
The Academy LMS plugin enables users to create paid courses. Since creating a course effectively requires a significant amount of effort and time, offering paid courses becomes mandatory. This section will discuss how to create a paid course via the Academy LMS plugin.
WooCommerce Installation
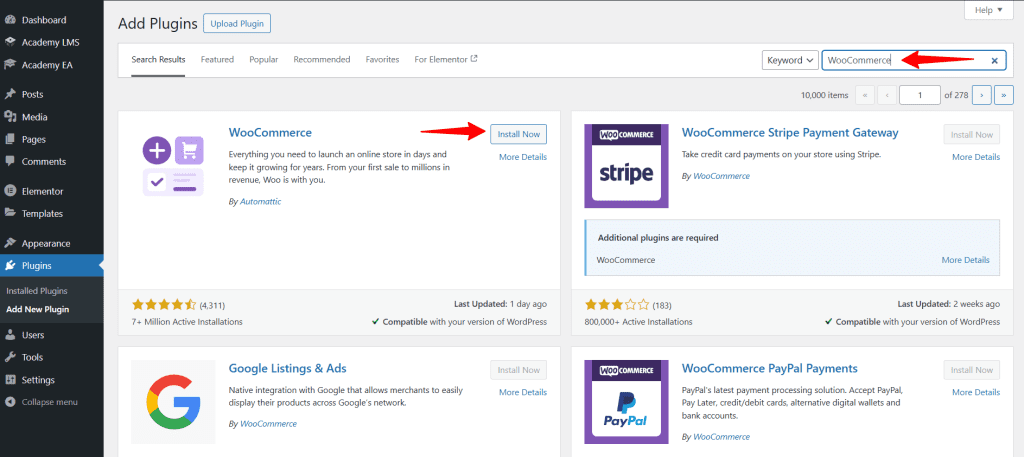
First, you will need to install the WooCommerce plugin in your WordPress dashboard. Simply click Plugins and type WooCommerce in the search bar in the right corner of your screen. Then click enter to view the plugin and click Install now. After the installation process, activate the plugin to access it inside the WordPress dashboard.
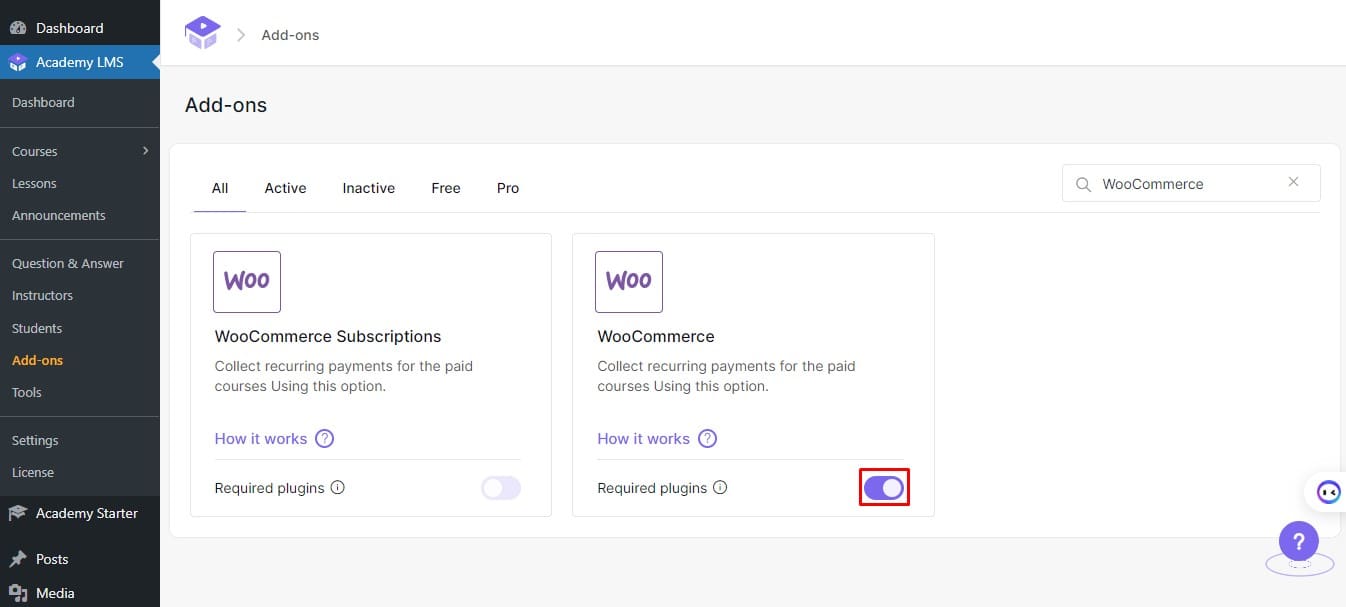
After installing the plugin, you must enable the WooCommerce addon to use WooCommerce with the Academy LMS.
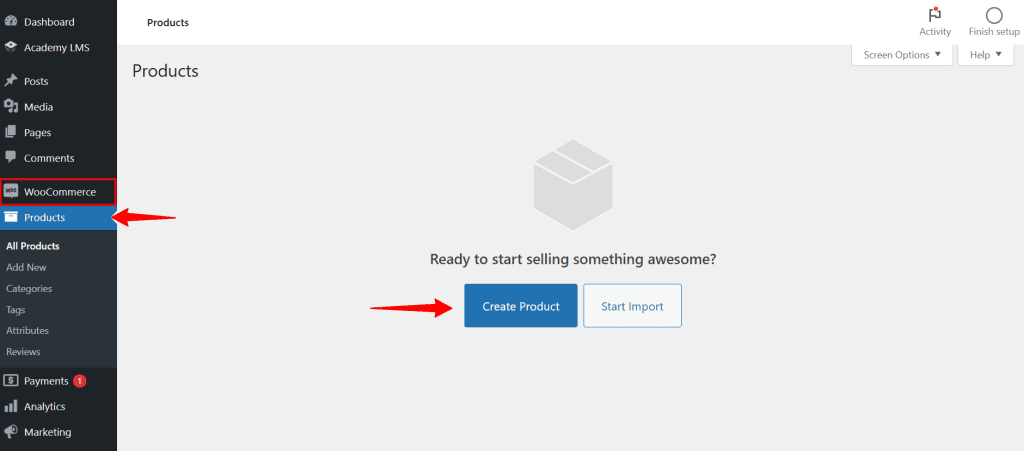
Create a Product In WooCommerce
Let’s click WooCommerce > Products and create a product in WooCommerce. We will be adding a new product, so you can click Add New or Create Product.
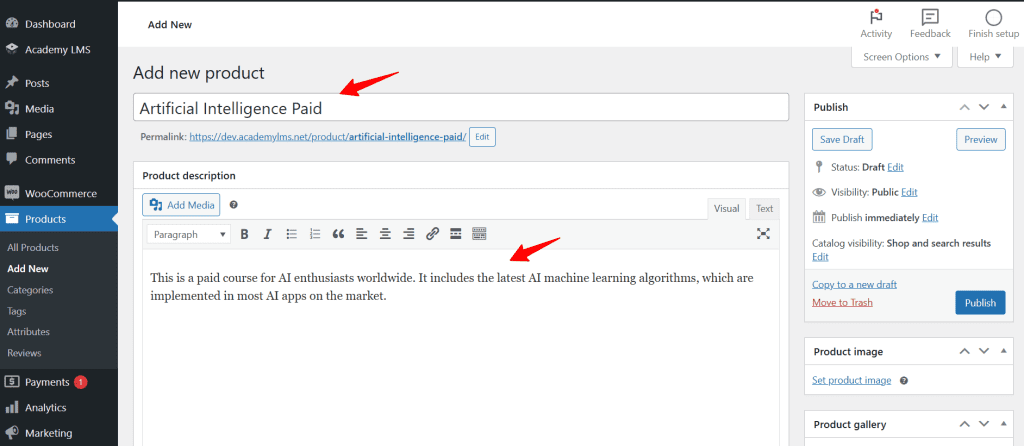
Now, set your course name in the Add New Product section. We’ve set the product Artificial Intelligence Paid. Then scroll down to set up the rest of the settings.
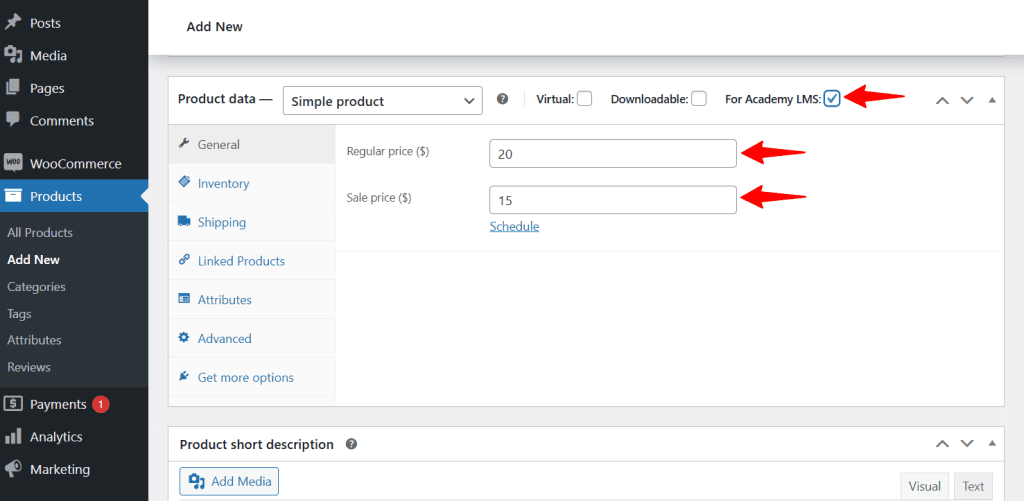
In this section, you can set the regular price and the sale price of your course. You can set the rest of the settings as you prefer since there isn’t any major dependency. But keep in mind that you need to checkmark a box located beside the text saying For Academy LMS. Even if you forget to put the checkmark, the Academy LMS plugin will set it automatically.
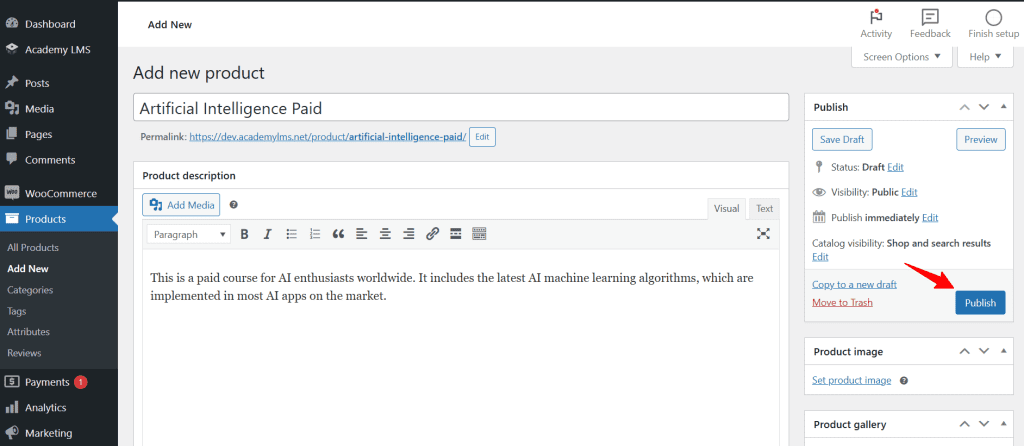
When you are done with the settings, scroll up and click Publish. Now your product is ready in WooCommerce.
Relating WooCommerce Product and Academy LMS
Head back to your Academy LMS plugin and click All Courses. You can view all courses in this section and select a preferred course. We select the Artificial Intelligence course by clicking the breadcrumb and edit button.
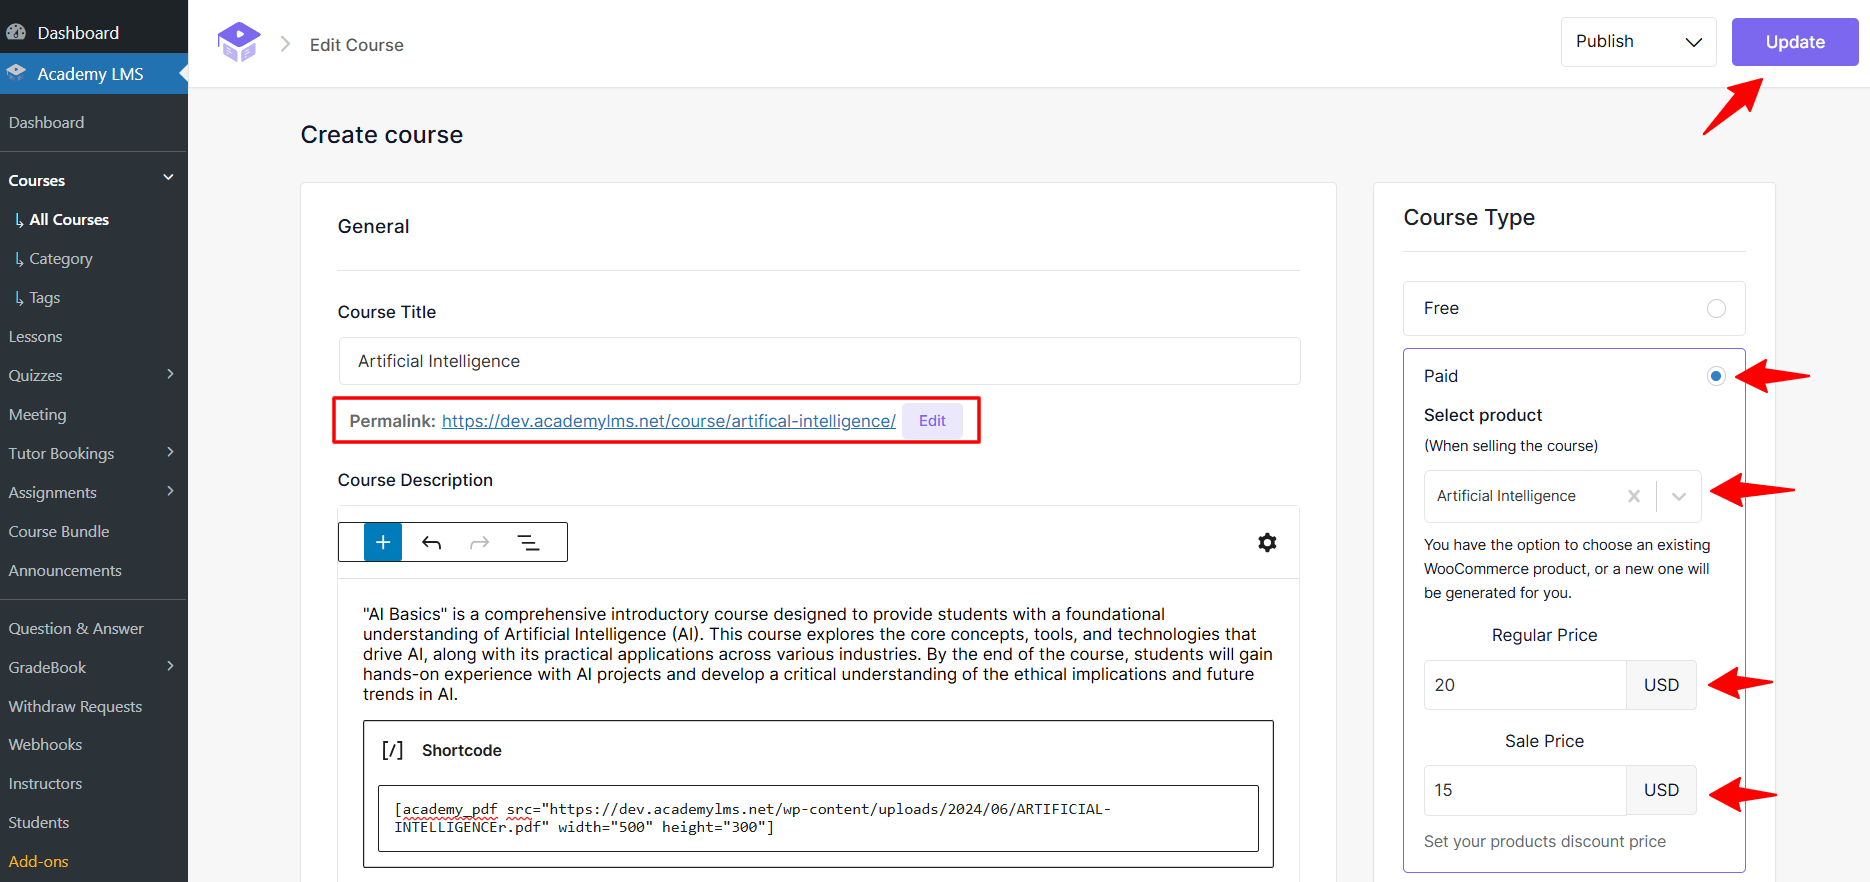
After heading into the course details area, select Paid from the Cousre type. Then select the product that you’ve created at WooCommerce from the drop-down option. The price you’ve set on WooCommerce will be automatically imported here. But you can control the regular price and sell price from here.
Note: To create a paid course, you will need to save the course once, and then the paid course and pricing option will be unlocked.
Now scroll up a bit and click the Update button to save the recent changes in this course. Then click the permalink to preview the course.
View Course
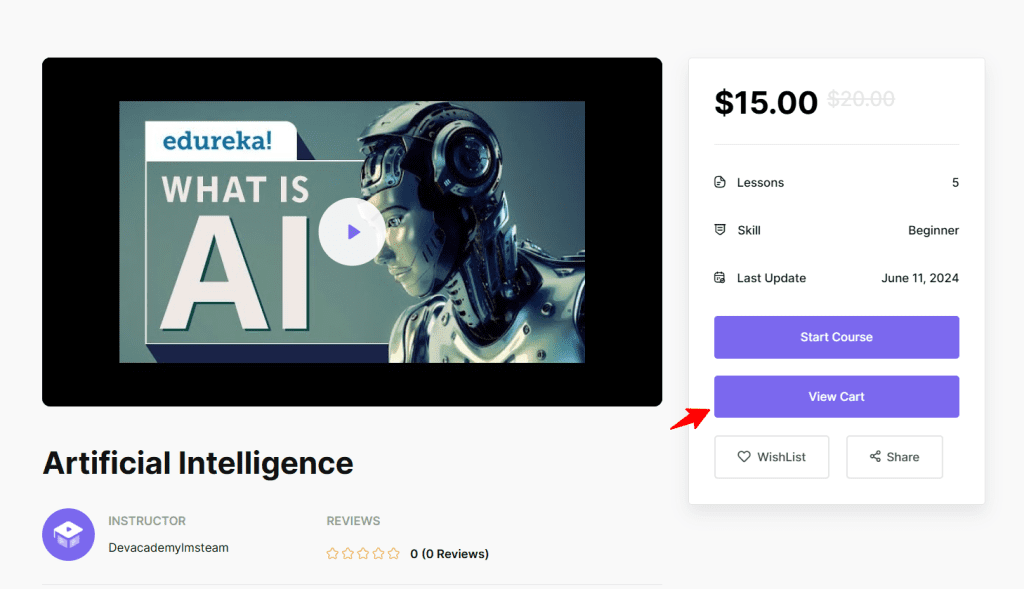
While viewing the course, In the course details area, you can see the pricing details, including the previous price and discounted price. We’ve made these settings in the WooCommerce Product settings area.
Also, you will get an Add to Cart button that comes with all the cart functionality and checkout process that are typically offered by WooCommerce. So, WooCommerce will handle all the product and cart-related functionality.

Click the Add to Cart button to explore this WooCommerce feature in detail. Since you’ve added the product to your cart, the Add to Cart button has been changed to the View Cart button. Click the View Cart button to proceed to the checkout process.
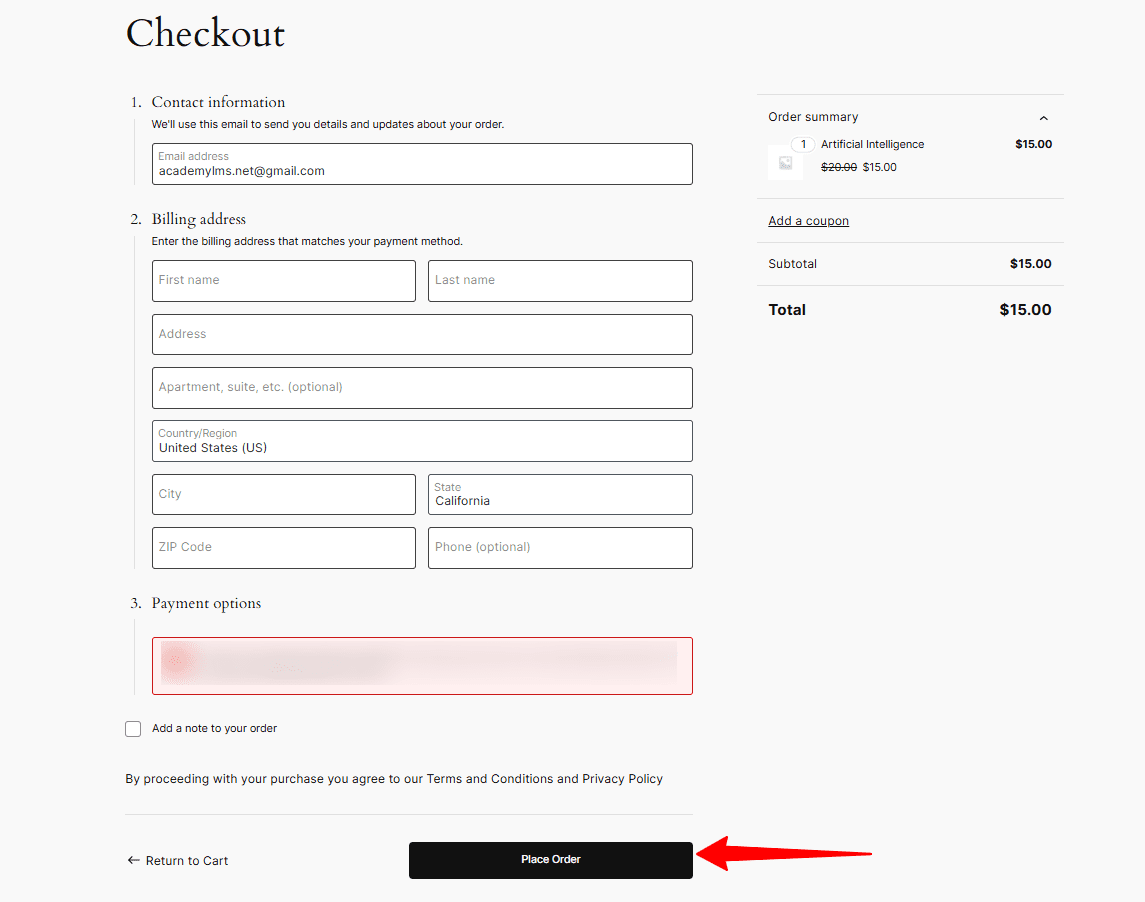
After clicking the View Cart button, you will be redirected to the checkout process of WooCommerce. Users can click the Proceed to Checkout button to complete the purchase process of their selected course.
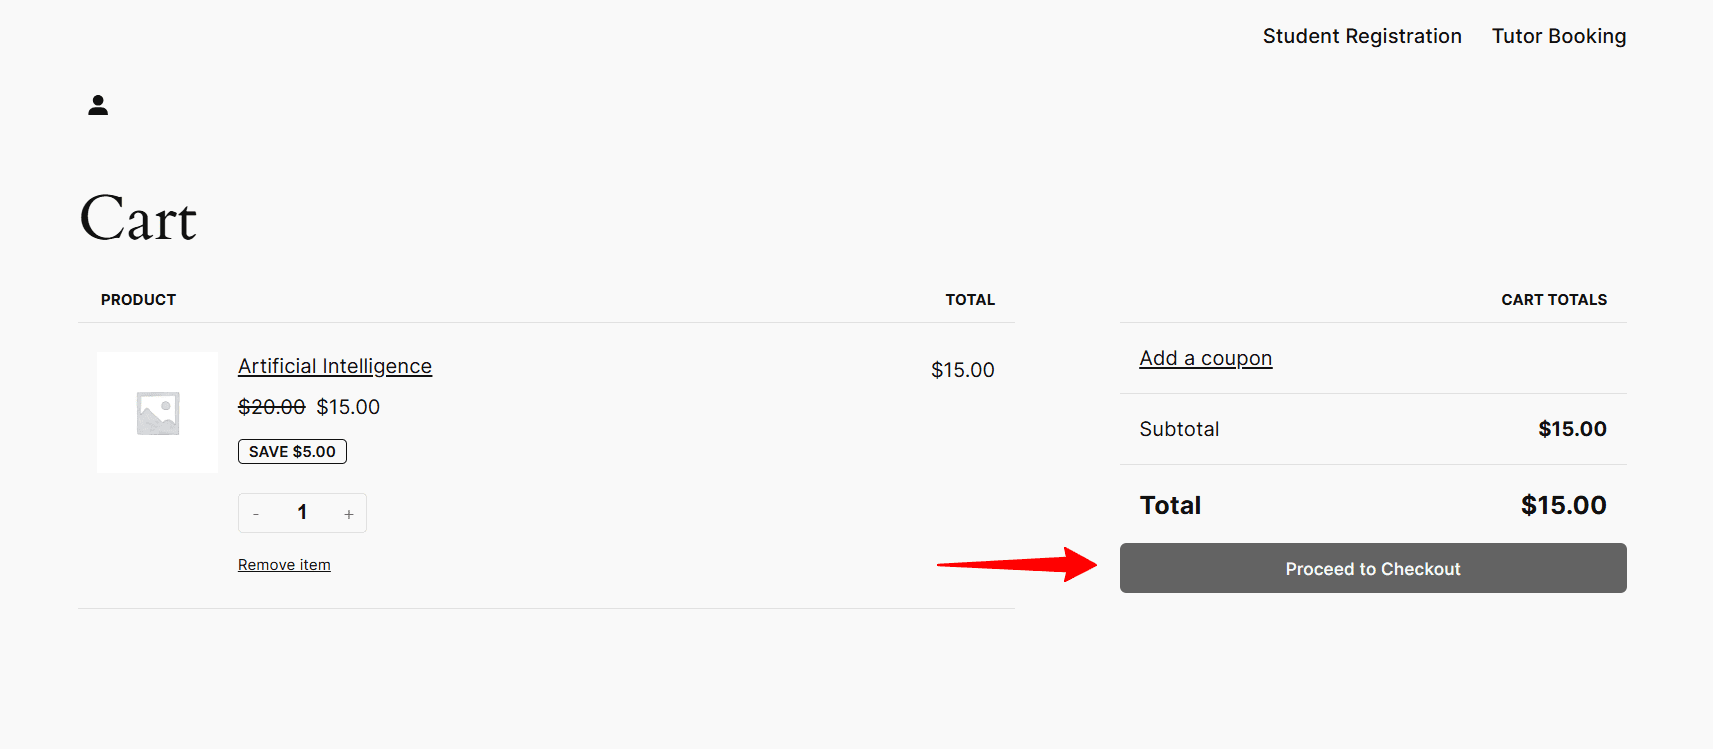
The checkout page is where you need to place your Billing information and then place an order to finalize the process.
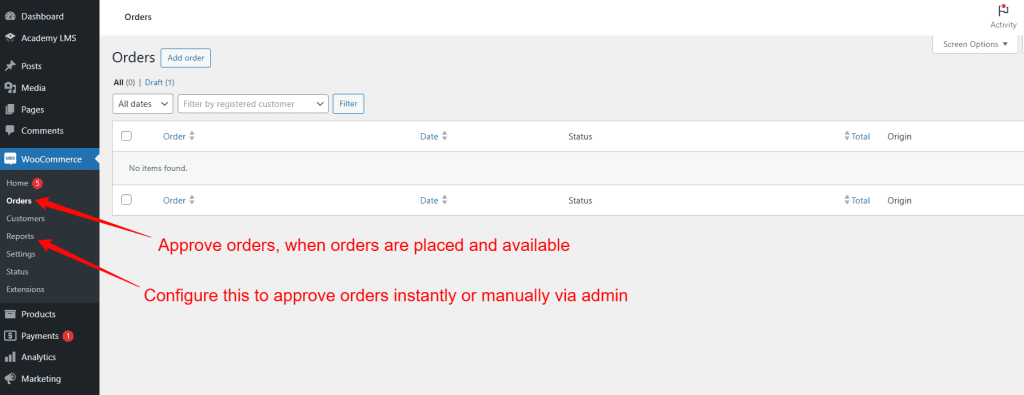
Now, Head to the WooCommerce > Orders and view the placed order whenever a customer purchases a course. From the Settings option of WooCommerce, you can set whether you want to approve a course instantly or wait for approval from the admin. When approved, students will be able to access the course.
So that’s it! This is how you can easily set up paid courses in Academy LMS. Following the above-mentioned process, You may now add paid courses that students can purchase after adding them to their cart and paying for them.
Disclaimer for WooCommerce Settings
For Academy LMS users who sell their online courses with Academy LMS, here are some settings for you to modify.
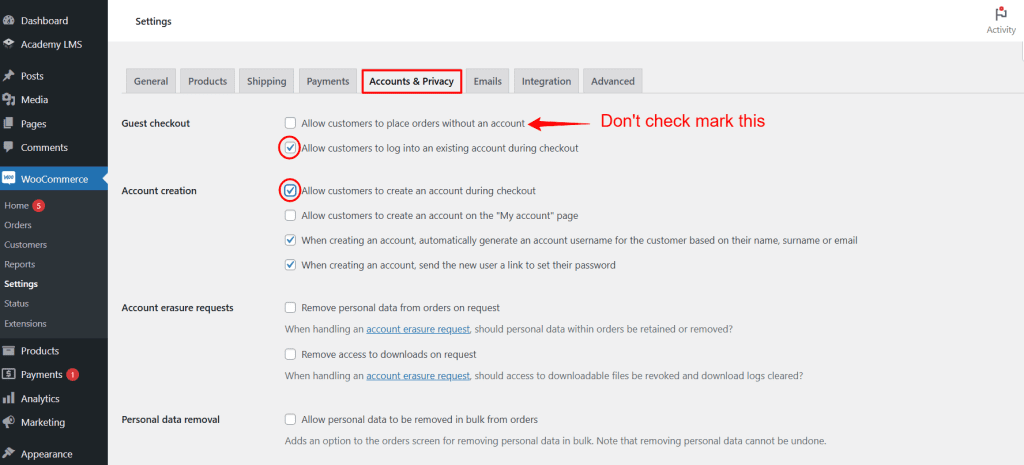
Guest Checkout Section:
1st option – do not put a tick mark: This option allows customers to complete a purchase without creating an account. They will only be asked to provide their billing and shipping information and payment details.
2nd option – put a tick mark: This option requires customers to create an account before they can complete a purchase.
Account Creation Section:
Put a checkmark next to it: “Allow customers to create an account during checkout.” This option allows them to create an account while checking out. This can be useful for customers who want to save their information for future purchases.
By configuring this setting, Academy LMS will force students to log in to buy a course, and if you do not configure this setting, then students who buy a course will not get access to the course.