









Connecting Google Meet lets Academy LMS create Meet links for your live classes automatically. You set up a Google Cloud project once, upload the credential file, and every meeting you schedule gets its own Meet link inside the course.
Note: Google Meet is one of the two providers in the Pro Meeting addon. You need Academy LMS (free) and Academy LMS Pro active, the Meeting addon on, and a Google account you can use in the Google Cloud Console.
Before you start
Academy connects through the Google Calendar API, not a Meet specific one. A Meet link is created as part of the calendar event, which is why the setup asks for Calendar access.
Step 1: Turn on the Meeting addon
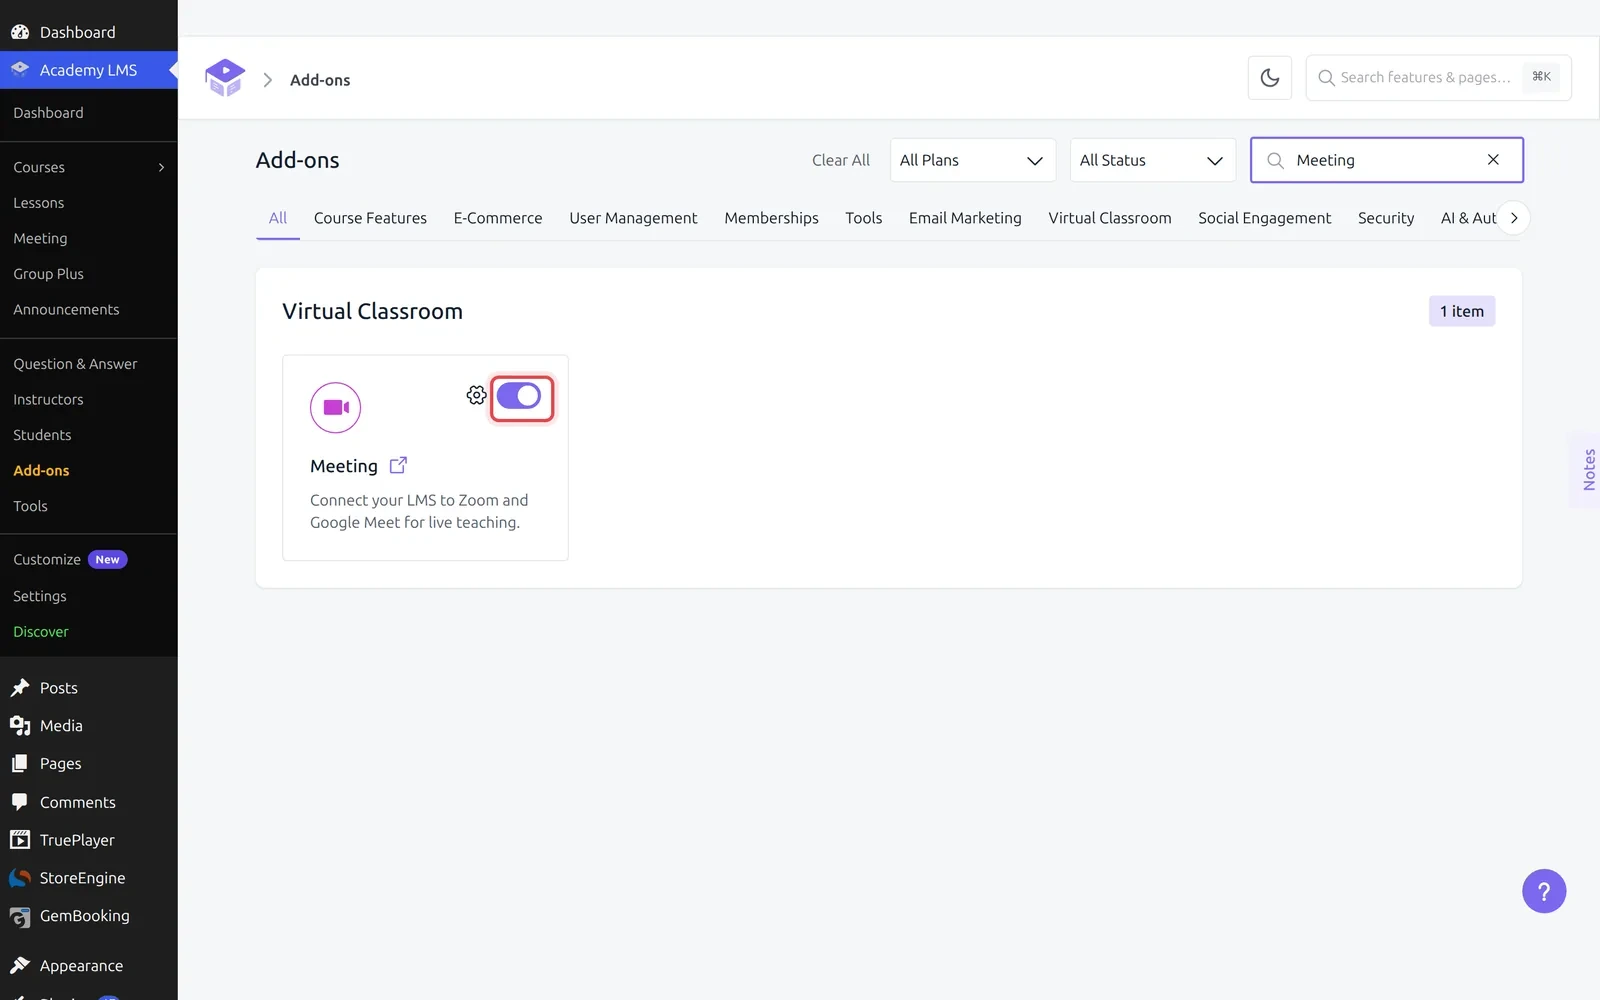
Go to Academy LMS → Add-ons, search for Meeting, and switch the toggle on. Google Meet is not a separate addon, it is a provider inside this one.
Step 2: Open the Google Meet setup
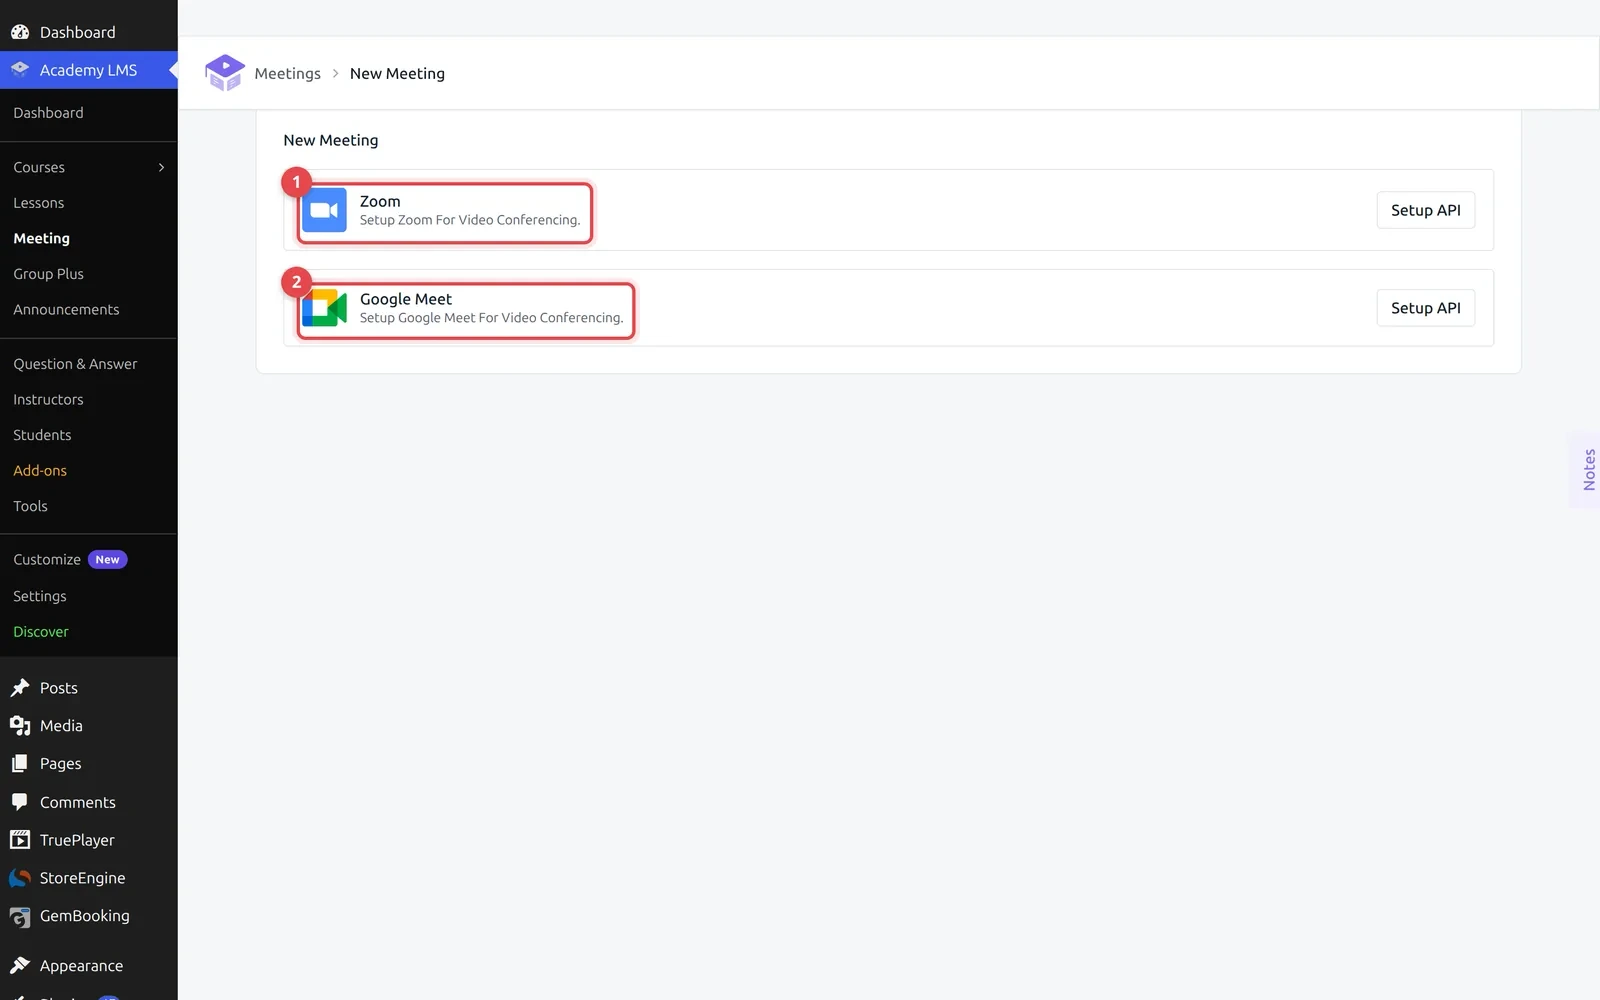
Go to Academy LMS → Meeting and click Add New Meeting. On the Google Meet card, click Setup API.
Keep this dialog open. It lists the same steps you are about to follow and it shows the exact Redirect URI your site needs, which you will paste into Google in Step 6.
Part 1: Set up the Google Cloud project
The next six steps happen in the Google Cloud Console, in a separate tab. Google changes this console from time to time, so a button may sit somewhere slightly different from the picture. The order of the work does not change.
Step 3: Create a project
Open the Google Cloud Console and open the project picker at the top of the page. Choose New Project if you do not already have one for this site.
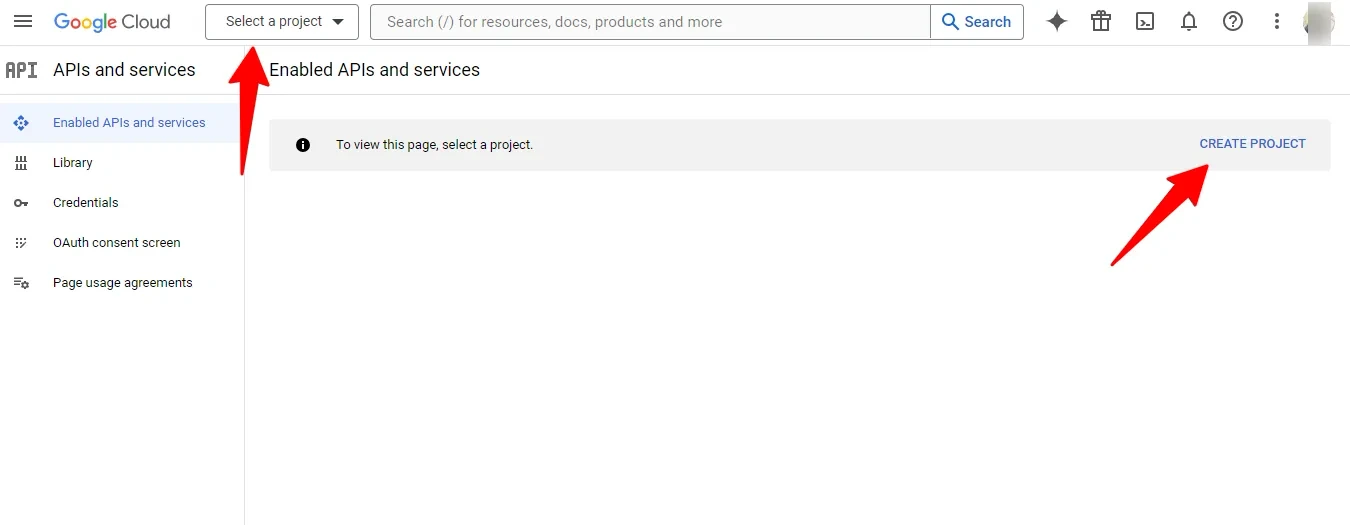
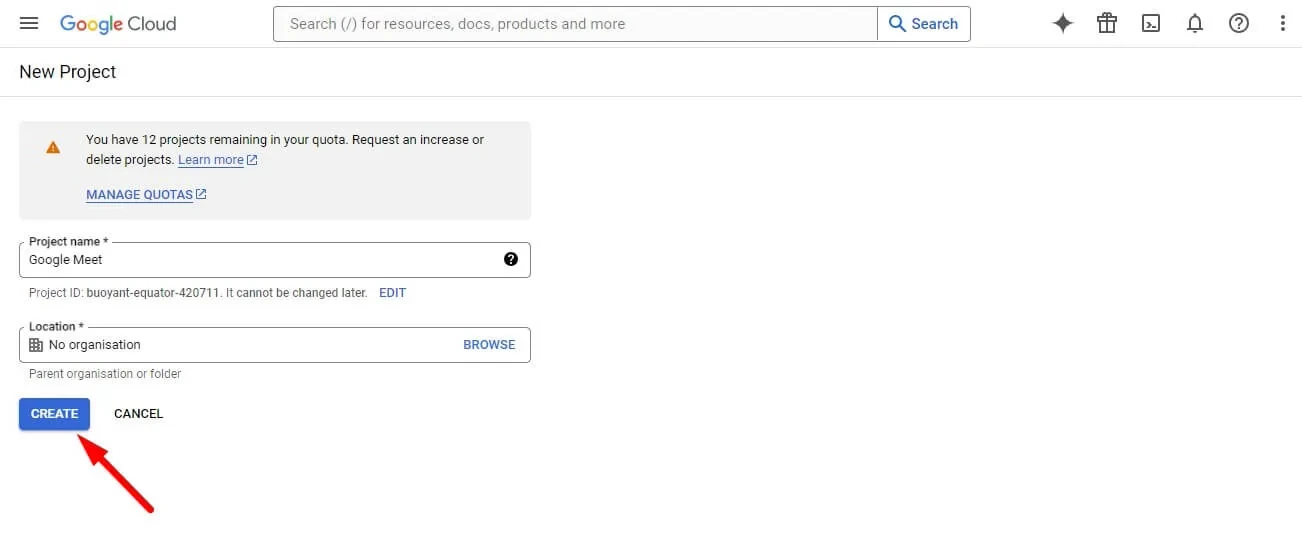
Give the project a name you will recognise later, then click Create.
Step 4: Enable the Google Calendar API
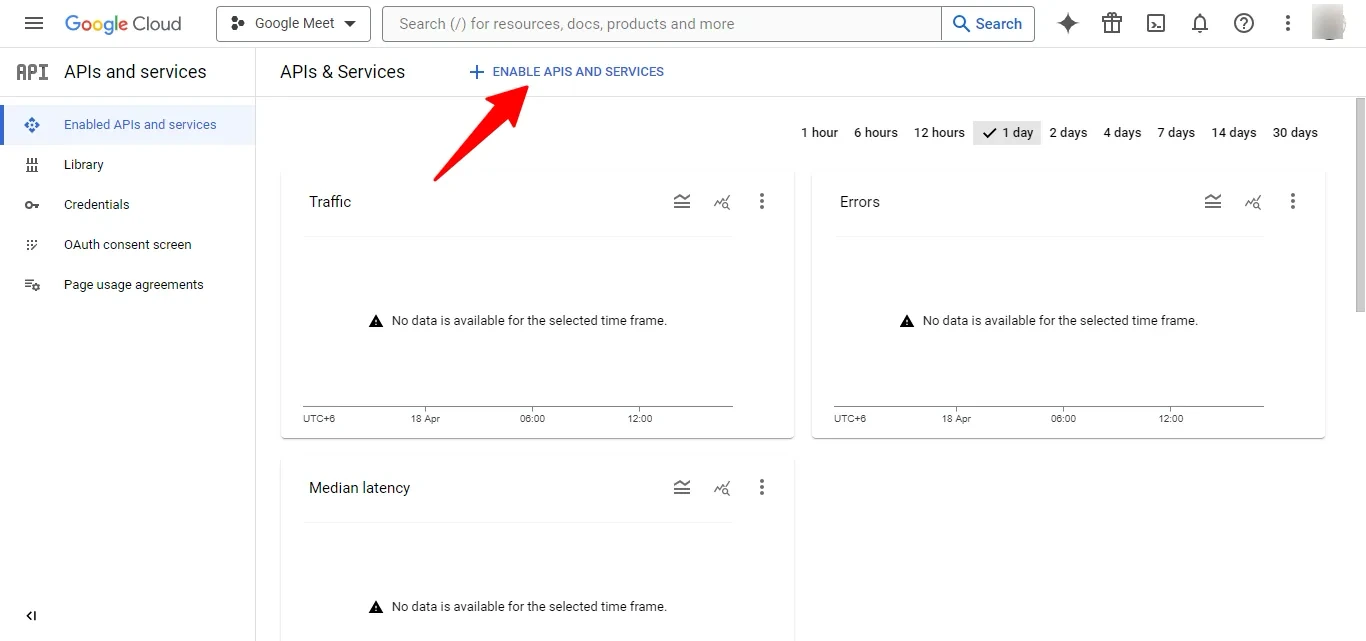
With the project selected, open APIs & Services and click Enable APIs and Services.
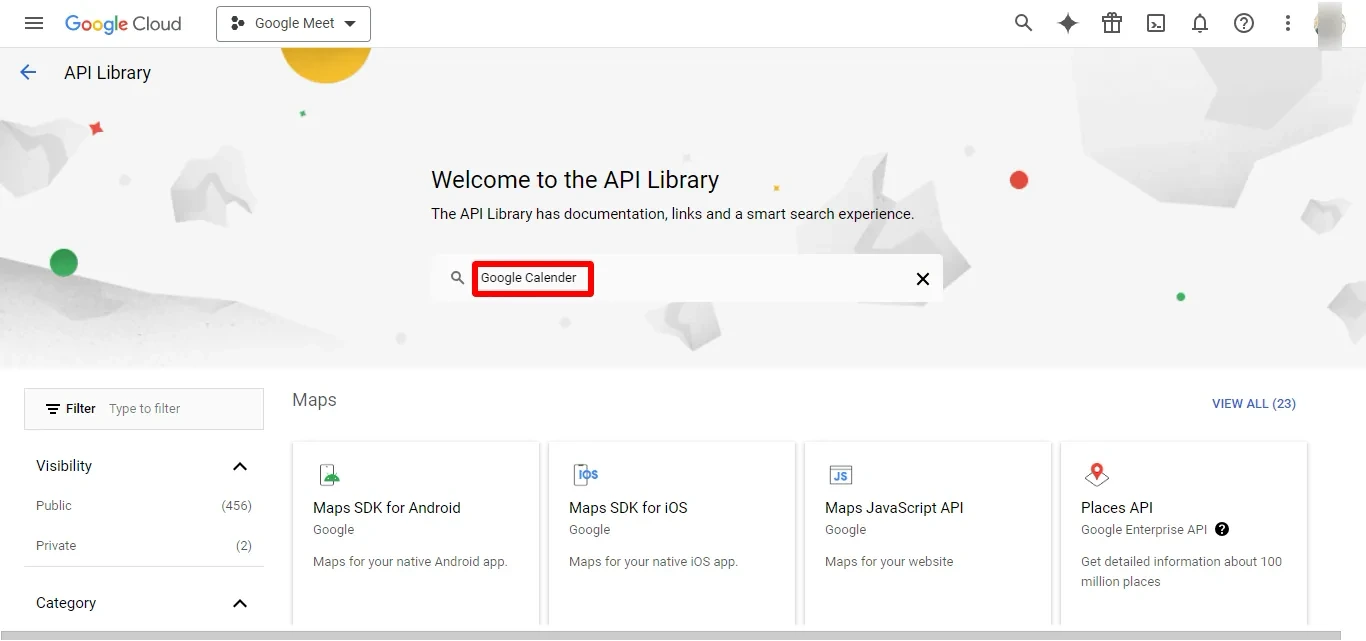
Search the library for Google Calendar API.
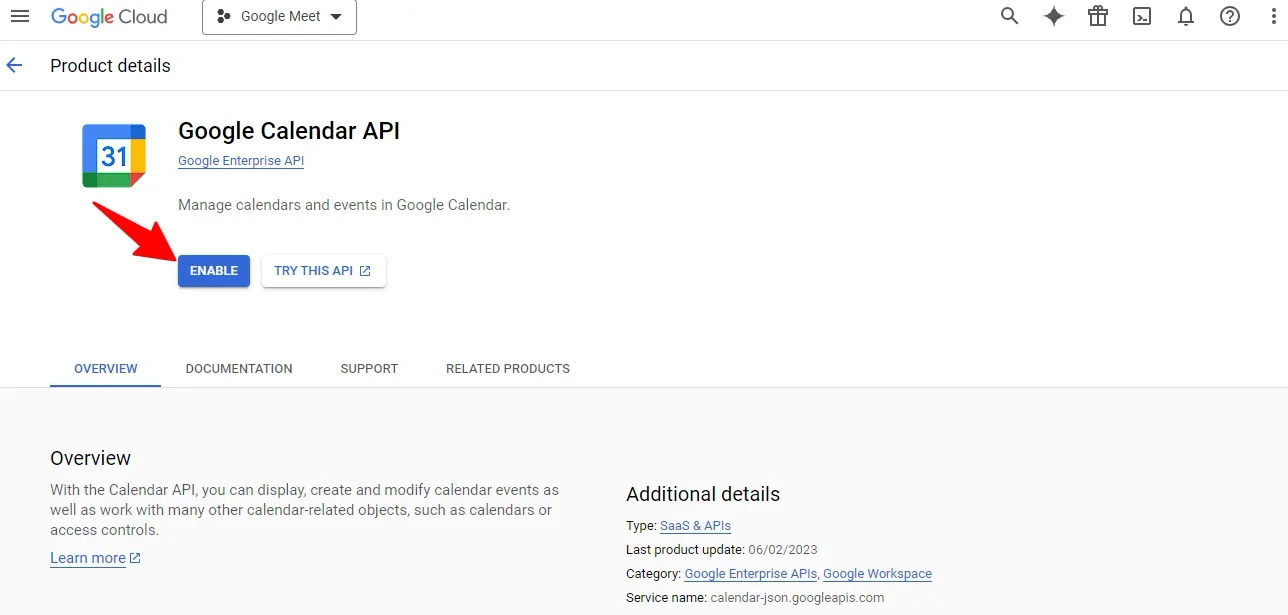
Open the result and click Enable. Without this the connection completes but Academy cannot create events, so no Meet links appear.
Step 5: Create the OAuth credentials
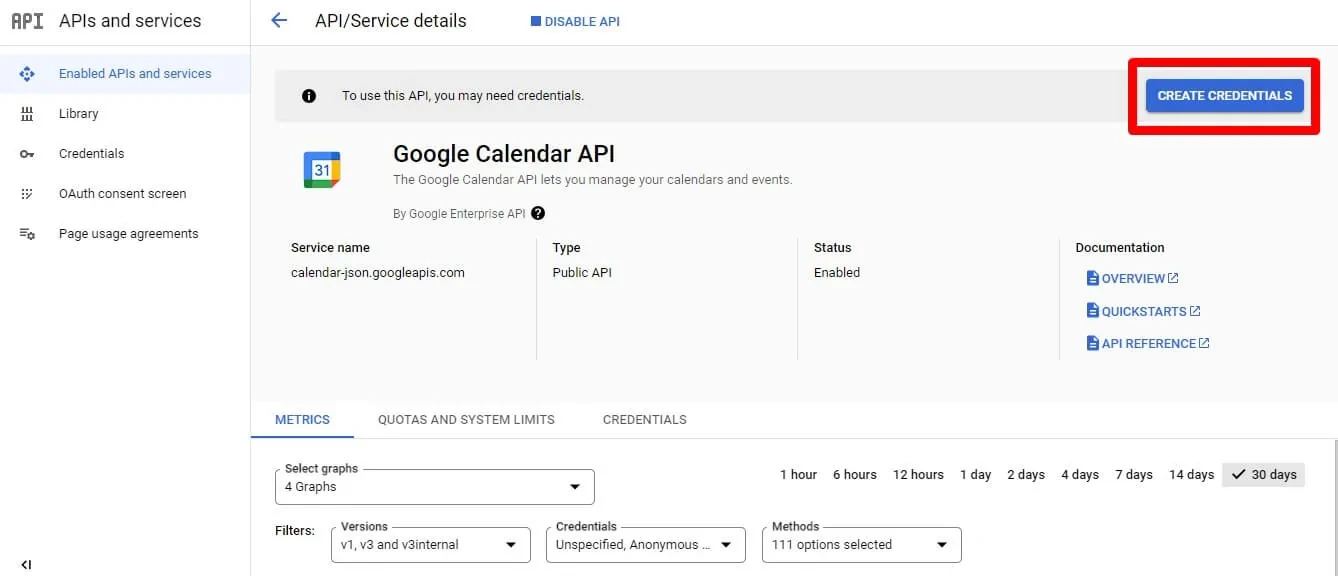
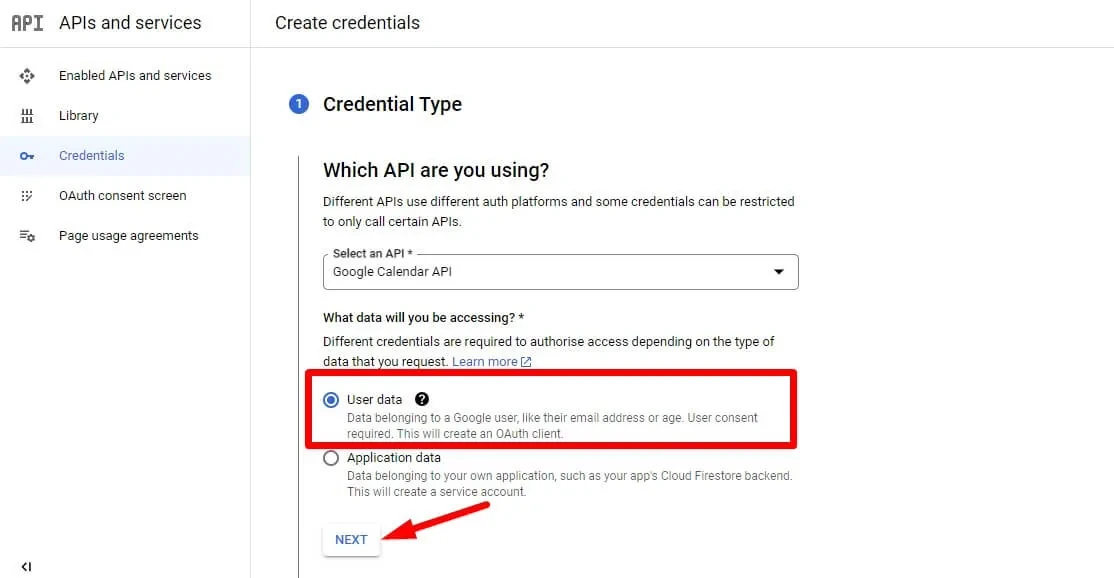
Go to Credentials and click Create Credentials.
When Google asks what kind of data the app handles, choose User data.
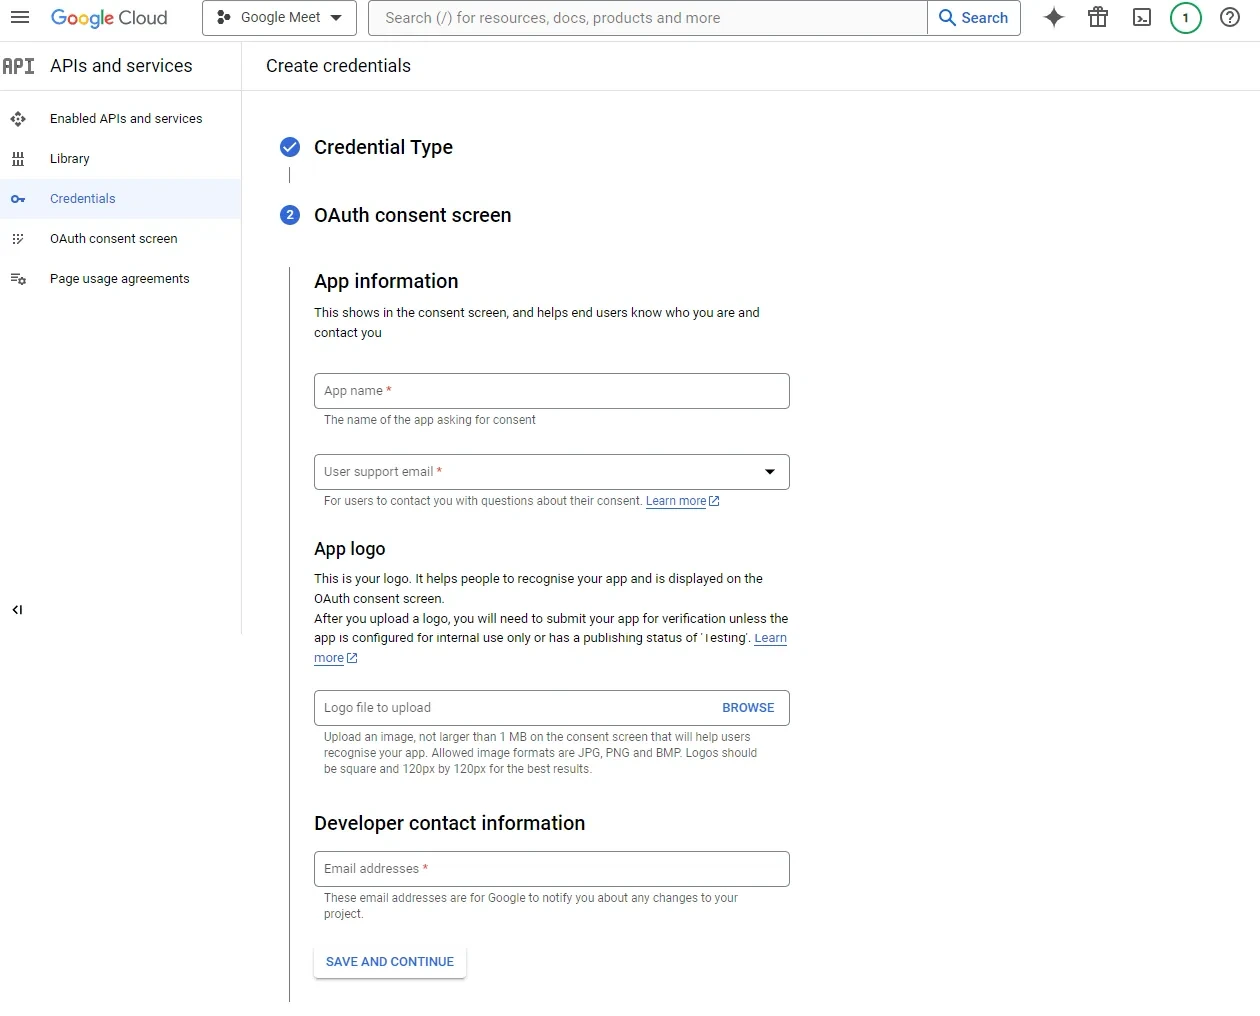
Fill in the OAuth consent screen: an app name, a support email and a developer contact address. Add yourself as a test user while you are here. While the consent screen is unpublished only listed test users can finish the connection, so an instructor who is not on the list will be refused.
For the application type choose Web application.

Step 6: Add the redirect URI
Switch back to the Google Meet Setup dialog in Academy, copy the Redirect URI with the button beside it, and paste it into the Authorised redirect URIs box of your OAuth client. It has to match exactly, including http or https and the whole query string.

Step 7: Download the credential file
Save the client, then download the credentials as a JSON file. Keep the file somewhere safe. It identifies your project to Google.

Step 8: Publish the app (optional)
While the app stays in testing, only your listed test users can connect, and their access expires periodically. If several instructors will connect their own accounts, open the OAuth consent screen tab and click Publish App.

Part 2: Finish in Academy
Step 9: Upload the JSON
Back in the Google Meet Setup dialog, click the upload area or drag the credential .json onto it.
Academy checks that the file is valid JSON and rejects anything else, so a .txt or a renamed file will not go through. Once it uploads you are asked to sign in with Google and grant calendar access.

After it connects
Go back to Academy LMS → Meeting and click Add New Meeting. Google Meet no longer asks for setup, and you get the meeting form instead. Fill in the title, the start time and the duration, and Academy creates a calendar event with a Meet link attached.
The meeting then appears on the Meeting screen with its details filled in. Add it to a course from the course Builder, and enrolled students join from the curriculum.
Which redirect URI you need
The redirect URI is not the same for everyone, which is why the dialog shows yours rather than printing a fixed value:
Use the one the dialog shows you, and add both to your Google OAuth client if instructors connect from the frontend as well.
Troubleshooting
“Wrong File Format! Please import JSON file.” The upload was not a .json file. Download the client credentials again from the Google Cloud Console rather than copying the values by hand.
“Upload File is empty.” The file did not reach the server. Try the browse button instead of dragging, and check the file is not zero bytes.
Google refuses the sign in with a redirect mismatch. The URI in your OAuth client does not match the one in the dialog. Copy it again with the copy button and paste it without editing it.
“Google Meet is not connected for this instructor.” On Individual mode each instructor connects their own account. That instructor has not completed the setup yet.
“Google Meet needs to be reconnected for this instructor.” The stored authorisation is no longer valid, which happens when access is revoked or a test user consent expires. Publishing the app as in Step 8 avoids the repeat expiry.
The connection works but no Meet link appears on the meeting. The Google Calendar API is not enabled on the project. Go back to Step 4.