


The Academy LMS Certificate add-on makes it easy to reward your learners with certificates upon course completion. Whether you’re using premade templates or designing your own, this tool offers flexibility for showcasing achievements. Now let’s learn how to use the Academy LMS certificate builder addon.
Important Note:
If you’re currently using the older Academy LMS Certificate plugin, you need to deactivate it from your WordPress dashboard before switching to the new Academy LMS Certificate add-on.
Step-by-Step Guide for Creating and Using Certificates Addon
Prerequisites:
Before diving into certificates, make sure you’ve installed and activated:
- Academy LMS Free version 2.1.0 or above
- Academy LMS Pro 2.1.0 or above is required to use advanced certificate features
- aBlocks Free version 1.1.0 (mandatory for certificate creation)
aBlocks is a WordPress Gutenberg Page Builder plugin that is made by the same team behind Academy LMS. aBlocks itself makes it easy to design any kind of WordPress page very easily.
Once these are completed, follow the steps below:
Install aBlocks Plugin
First, install and activate the aBlocks plugin. To install the plugin, navigate to the WordPress plugin section, then click on add new. In the search bar at the top-right, type aBlocks.

Once you find the aBlocks – Gutenberg Blocks Collection plugin, click Install Now. After installation, click Activate.
Enable Academy Certificate Addon
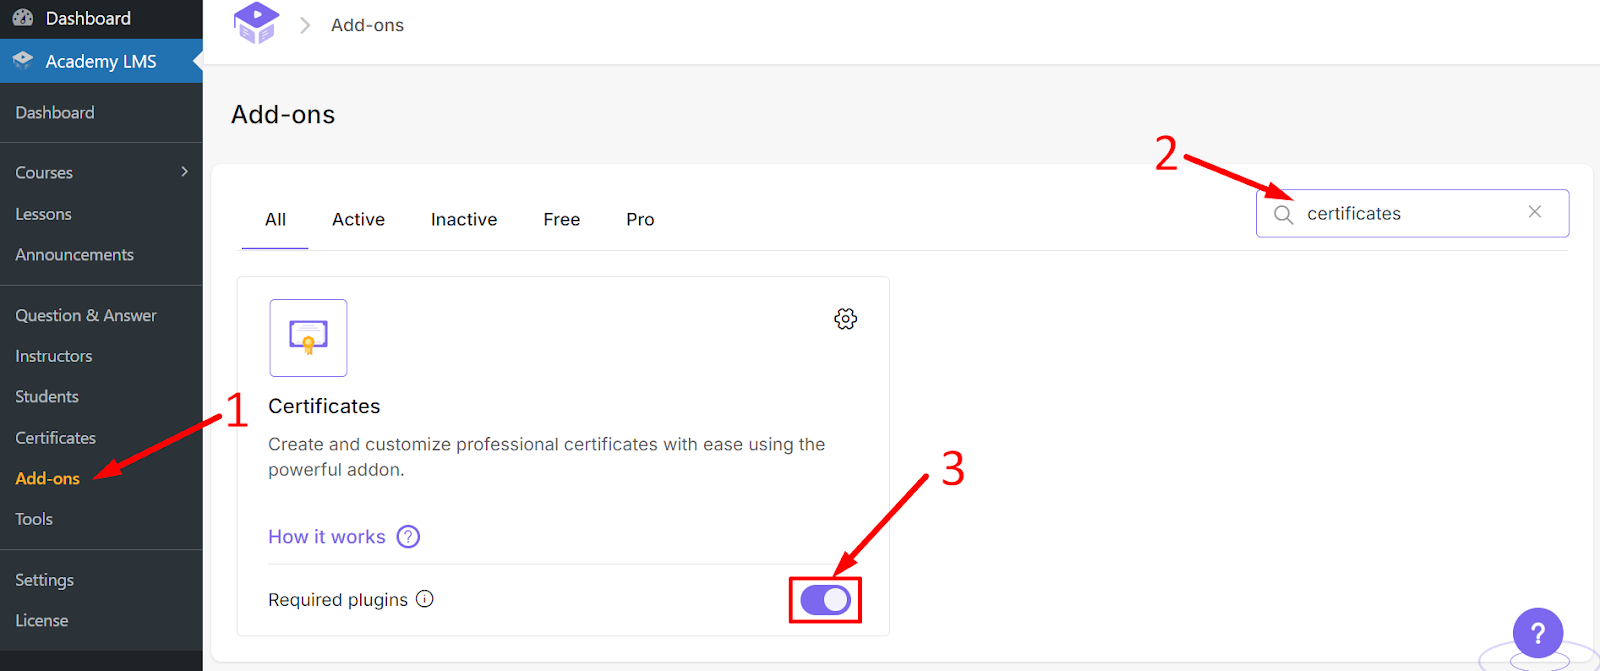
Now navigate to Academy LMS > Addons. Find the Certificate Add-on and enable it.
After enabling, you’ll see a new menu labelled Certificates in the Academy LMS menu.
Click on the Certificates menu. Here, you’ll find a list of pre-made certificates ready for use.
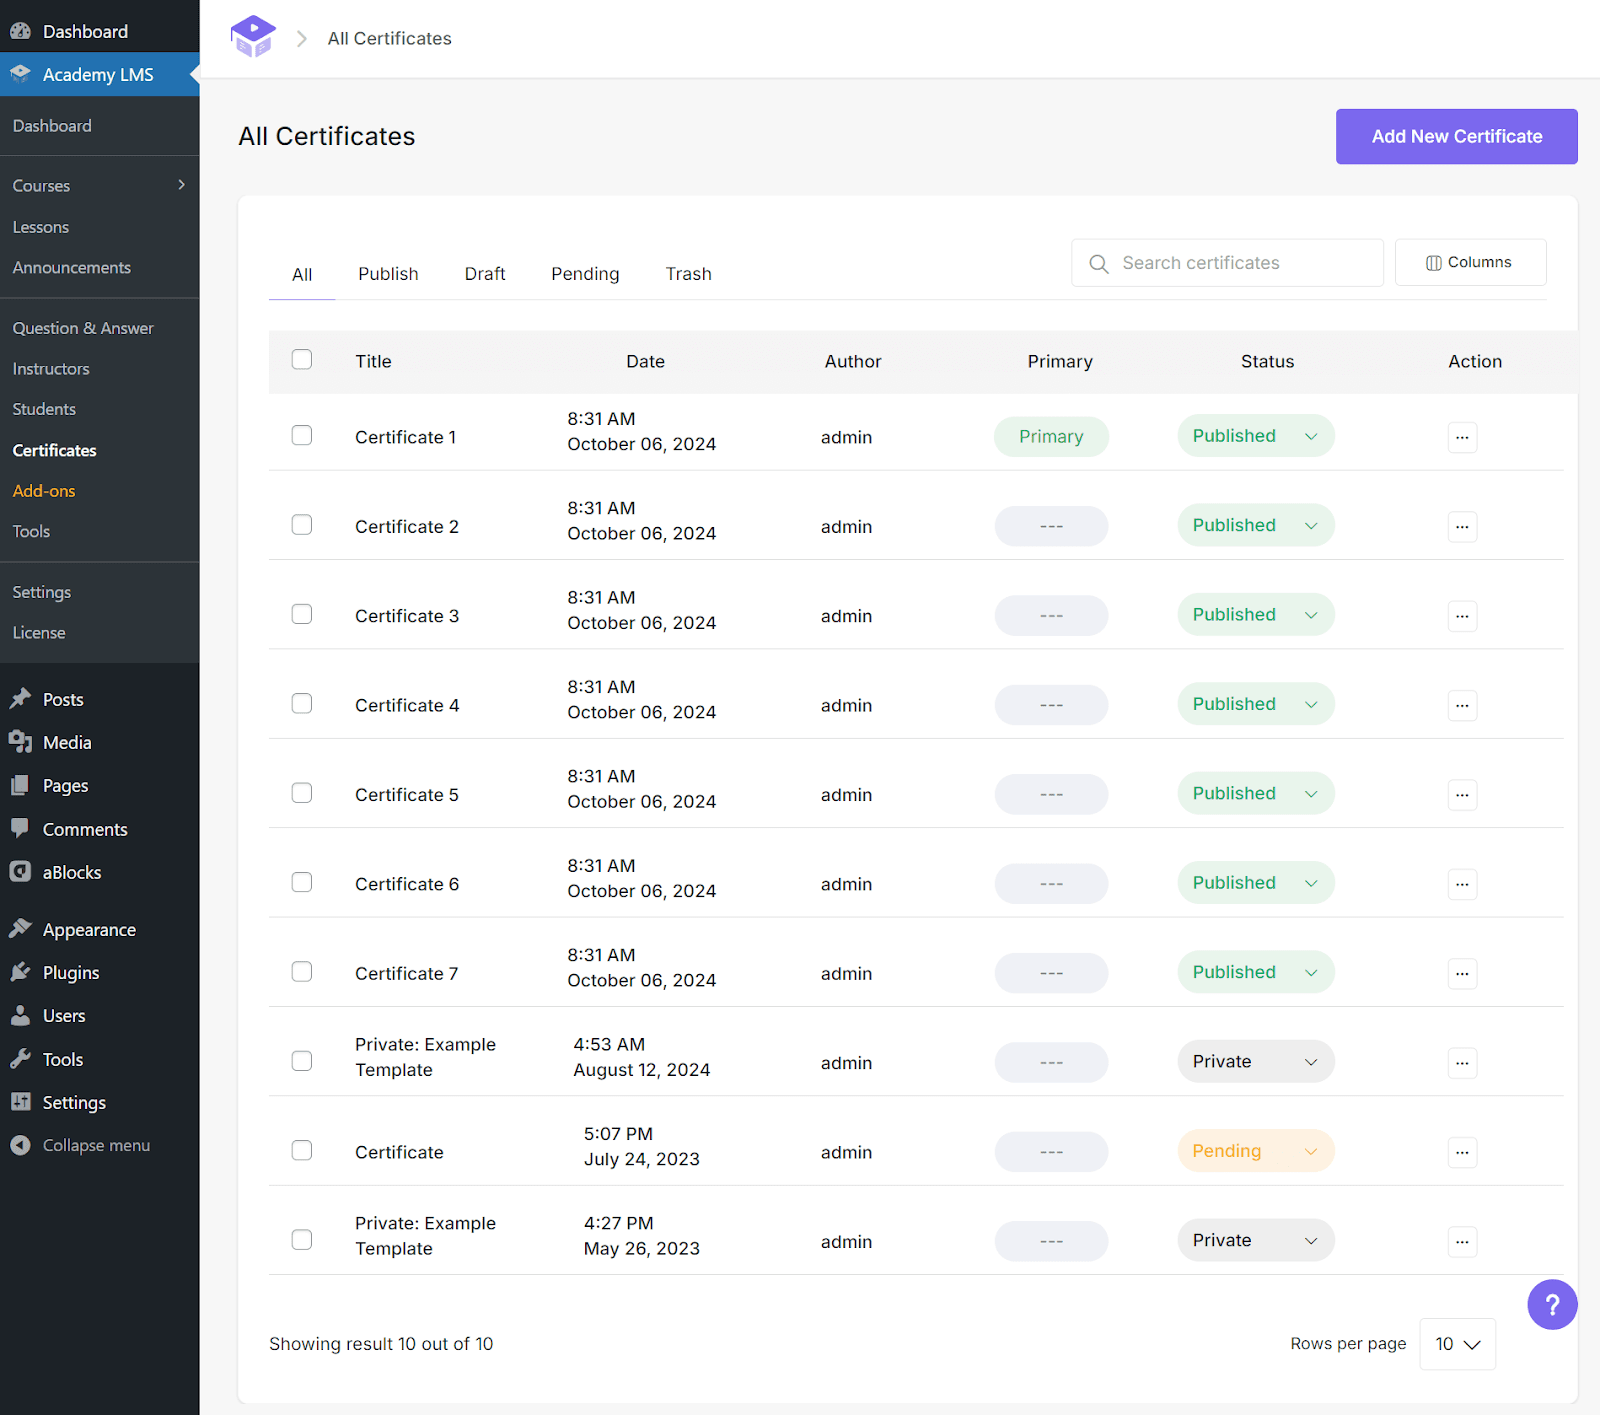
Here You can:
- Set any of these certificates as the Primary Certificate for all courses.
- Edit certificates to suit your style or requirements.
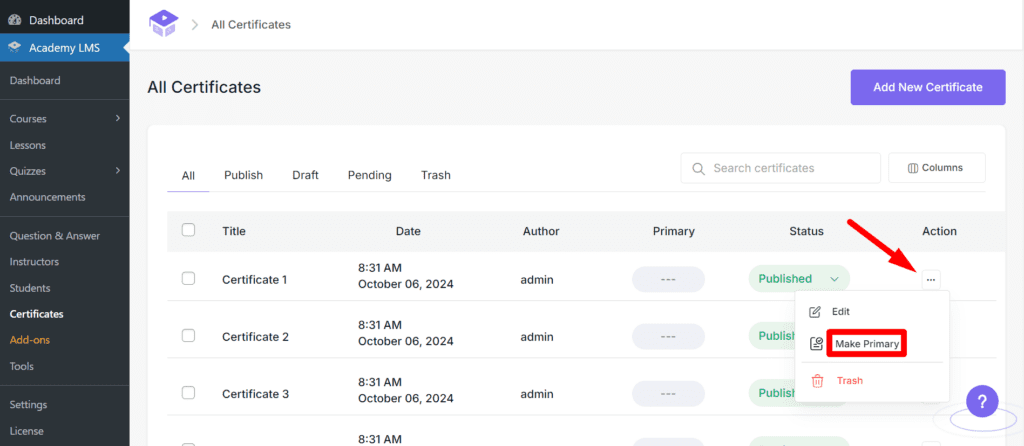
Assign a Primary Certificate:
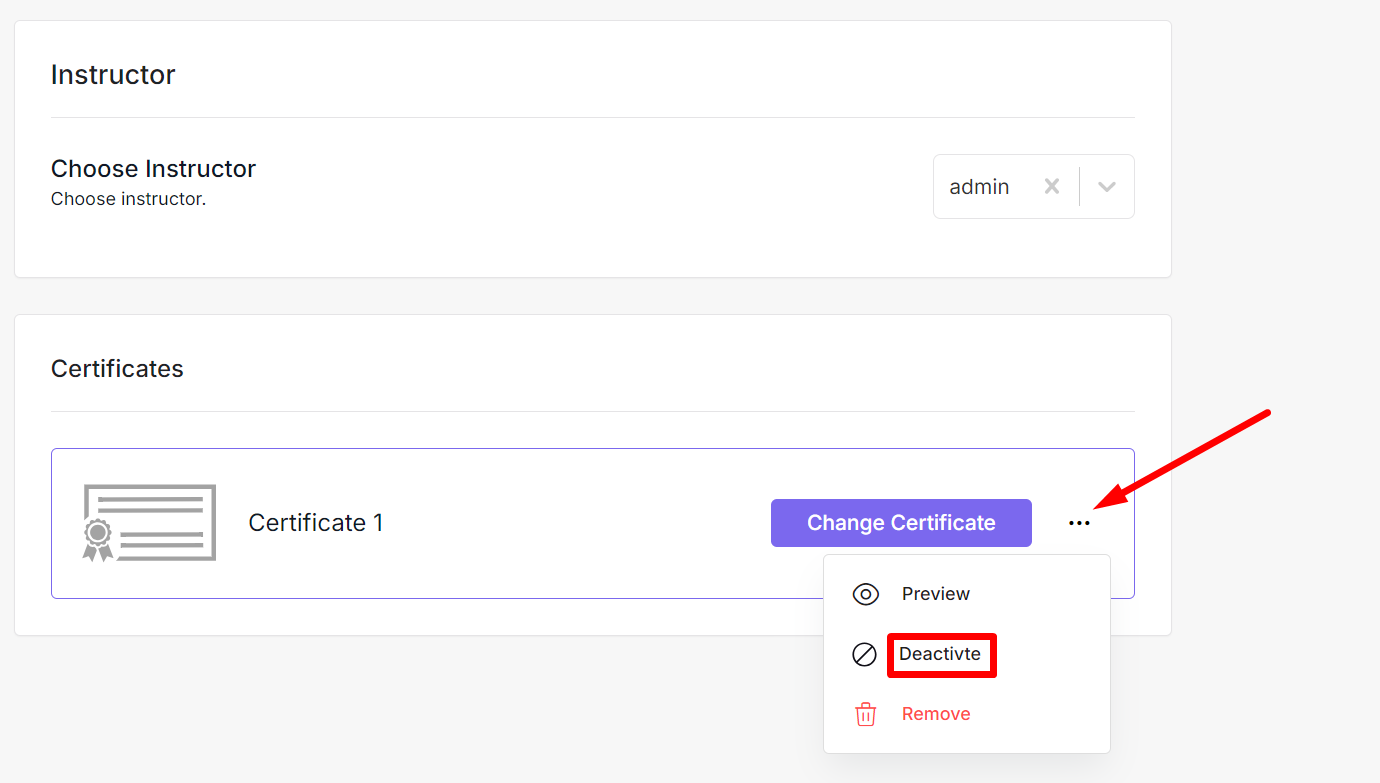
If you want to set one certificate for all courses, click the three-dot icon on the certificate and choose Set as Primary Certificate. This certificate will now apply to every course on your website.
Creating a New Certificate
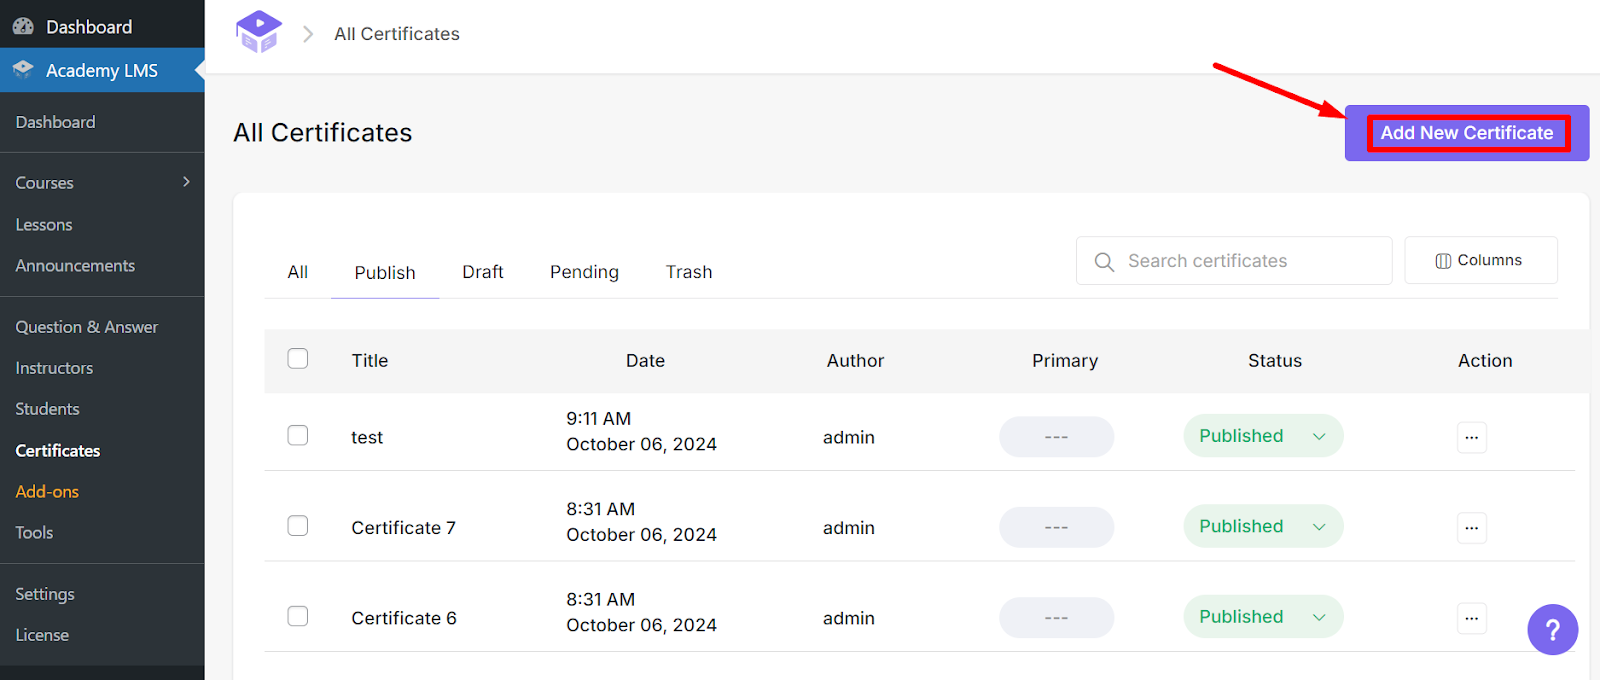
Add a New Certificate:
Click Add New Certificate in the top right corner of the Certificates page.
Once you click on add new certificate, the WordPress editor will open. Here you need to select a certificate image then start customizing the certificate as per your brand need.

Use the available shortcodes to personalize it:
- {{learner}} – Displays the learner’s name.
- {{course_title}} – Shows the course title.
- {{instructor}} – Includes the instructor’s name.
- {{course_place}} – Adds the course location.
- {{completion_date}} – Shows the date the course was completed.
- {{verification_id}} – A unique verification ID for the certificate (Pro feature).
Example: If you’re creating a coding course, a certificate might look like:
“This certifies that {{learner}} successfully completed the {{course_title}} under the guidance of {{instructor}} on {{completion_date}}.”
Note: {{verification_id}} is only available in the Academy LMS Pro version.
Managing Certificates for Specific Courses
Set No Certificate for a Course:
If a course doesn’t require a certificate, simply navigate to the Course Creation page. Scroll down, and you’ll find an option to disable the certificate for that particular course.
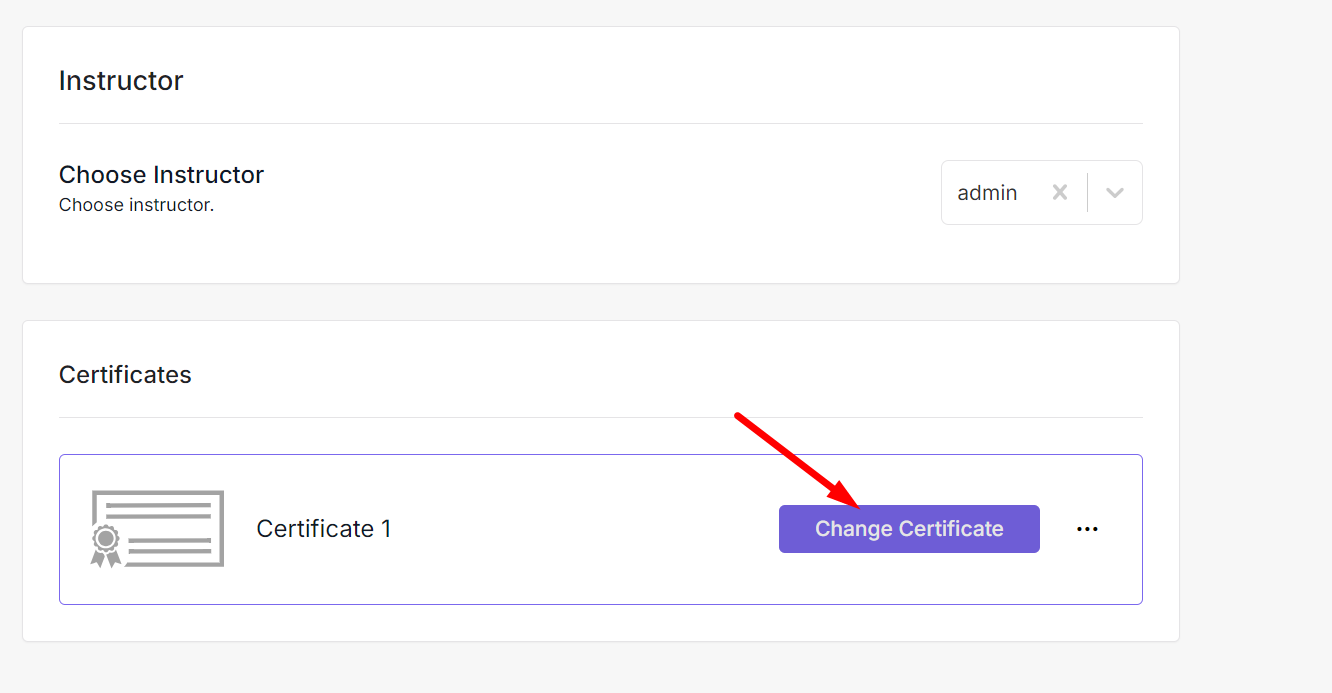
Custom Certificate for Different Courses (Pro Feature):
With Academy LMS Pro, you can assign different certificates to different courses. To do that, navigate to the course where you want to set a unique certificate and click on the change certificate button.
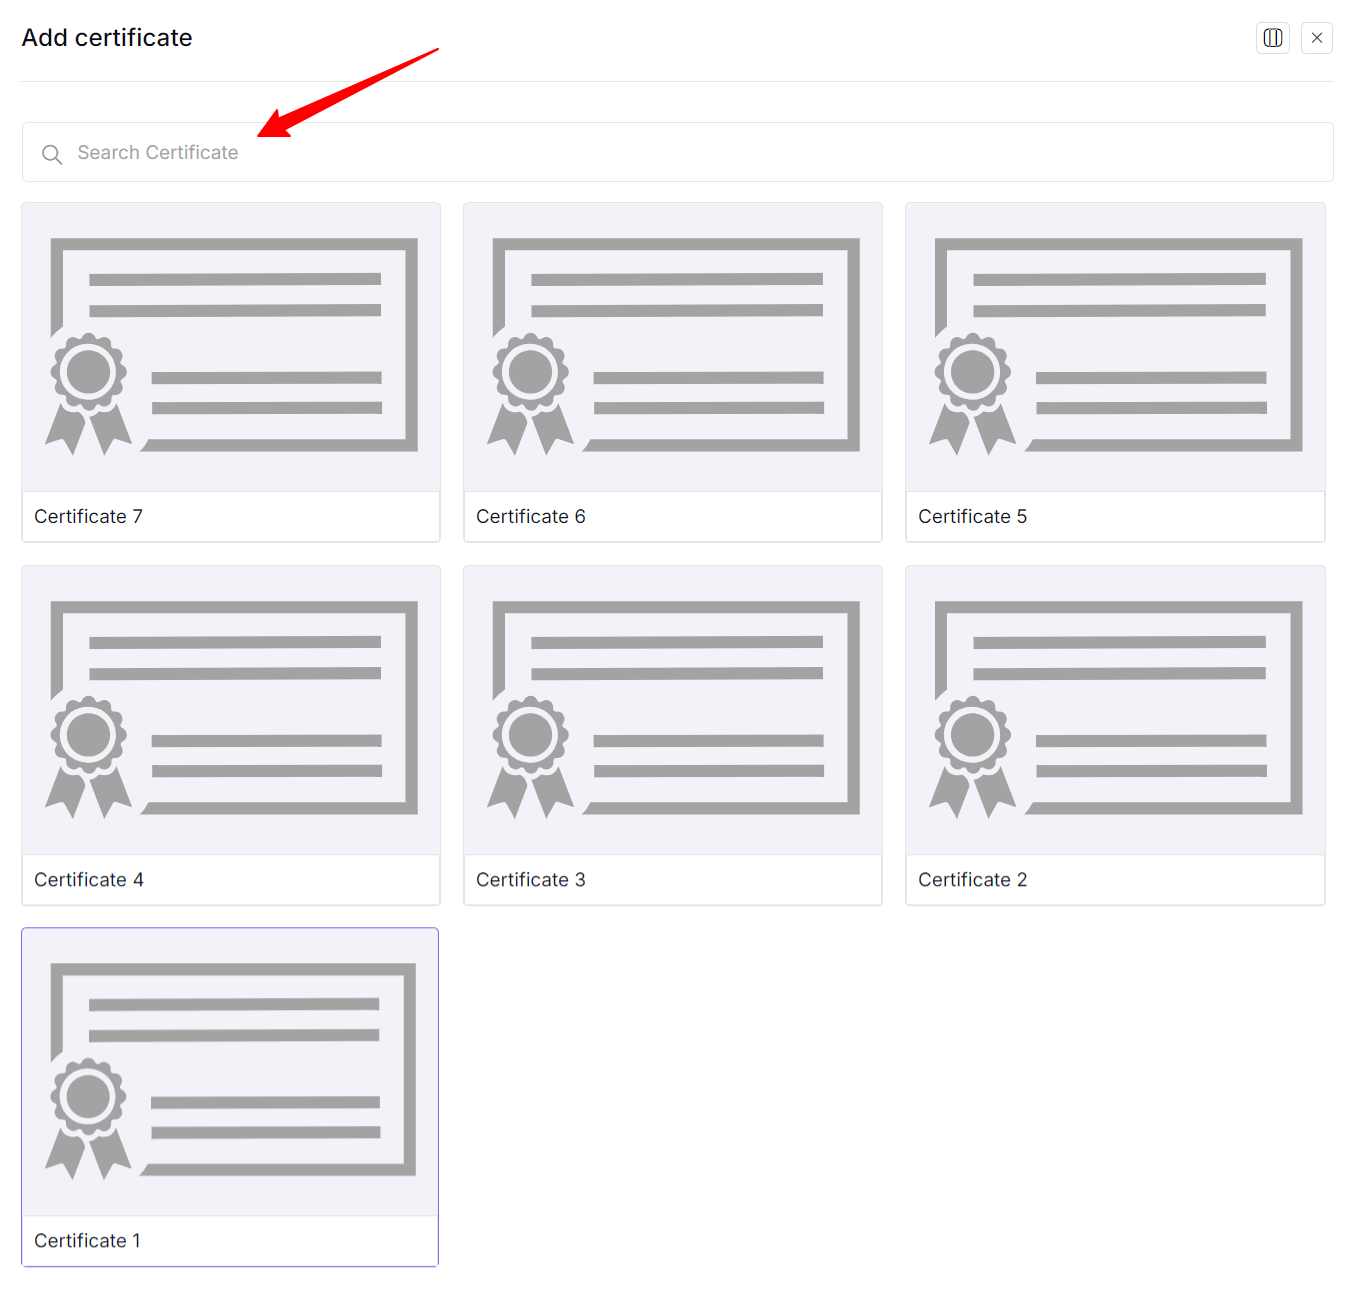
Now all your created certificates will appear; you can add a certificate from here or you can search and search add certificates.
With the Academy LMS Certificate add-on, you’re not just giving your learners certificates—you’re delivering a memorable experience that celebrates their achievements. Whether you’re using premade templates or crafting your own, you have full control over how your certificates look and feel. And with aBlocks, customization is a breeze!