


Academy LMS, the fastest-growing LMS plugin for WordPress, now integrates with the WishList Member plugin.
Wishlist Member plugin provides a comprehensive solution for creating a membership, including protected content, members-only content, integrated payment options, and advanced features for managing your members. And with Academy LMS, it perfectly syncs with your course contents, student management and more!
Wishlist Member works as an addon with Academy LMS, and it’s a Pro feature. Now let’s show you how to use WishList Member with ACademy LMS.
Activating Required Plugin, Enabling Addon
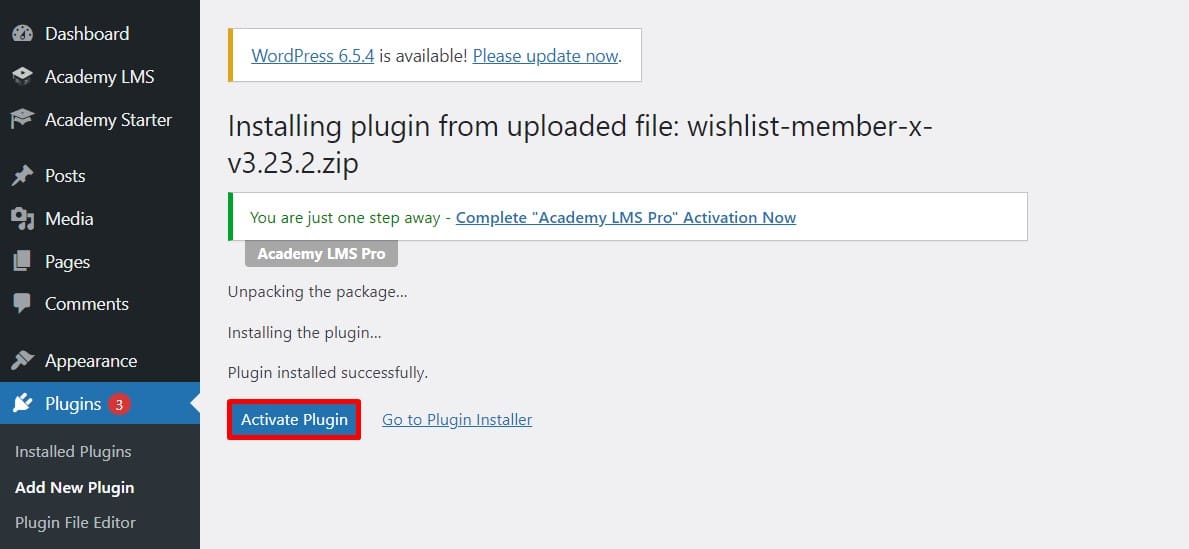
Install And Activate the WishList Member plugin. This is necessary for using Academy LMS WishList Member integration.
Now Enable the WishList Member Addon.

Go to Academy LMS > Add-ons menu. There, you’ll find all the available add-ons. Look for the WishList Member Addon and enable it using the toggle.
Enable Academy LMS From WishList
Now head over to WishList Member Setup > Integrations > Other Services, then select and enable Academy LMS.

After activating the integration, you’ll have two main ways to manage “Actions” between WishList Member and Academy LMS.
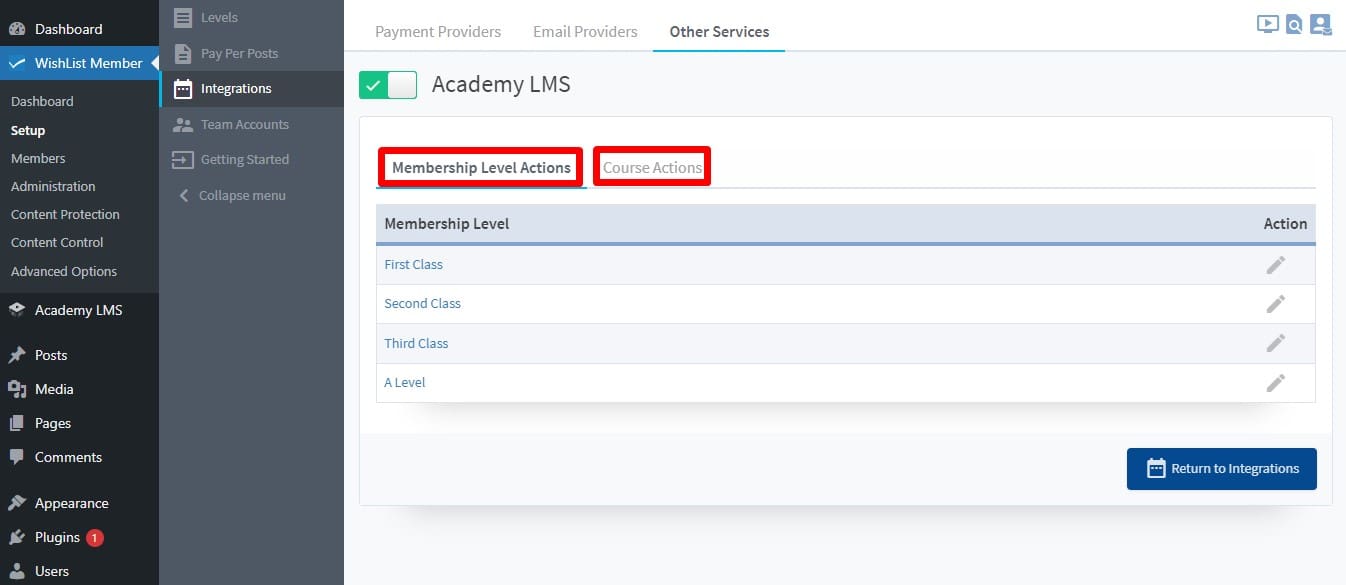
Here’s a concise overview of the two options:
- Membership Level Actions: These triggers fire based on events of the WishList Member, such as adding or removing a member from a specific level.
- Course Actions: These triggers activate based on Academy LMS events, for example, a student enrolling or completing a course.
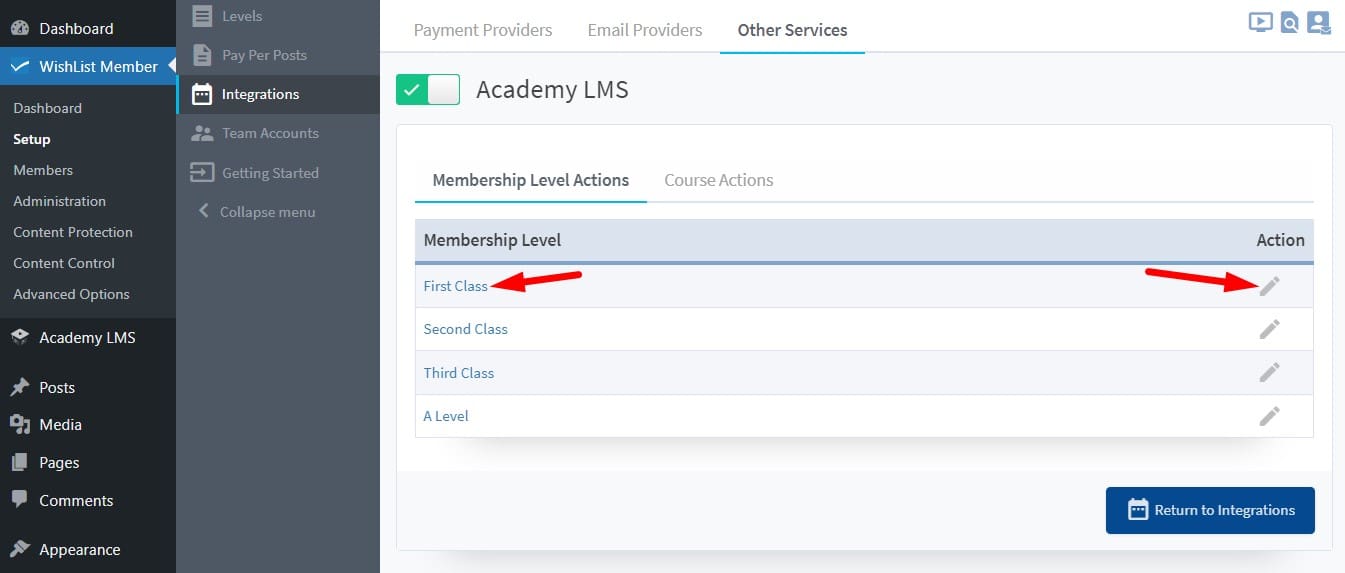
Membership Level Actions
Choose the membership level you want to set actions for by clicking its name or the Edit icon.
Clicking the name or Edit icon opens the Membership Level Actions pop-up.
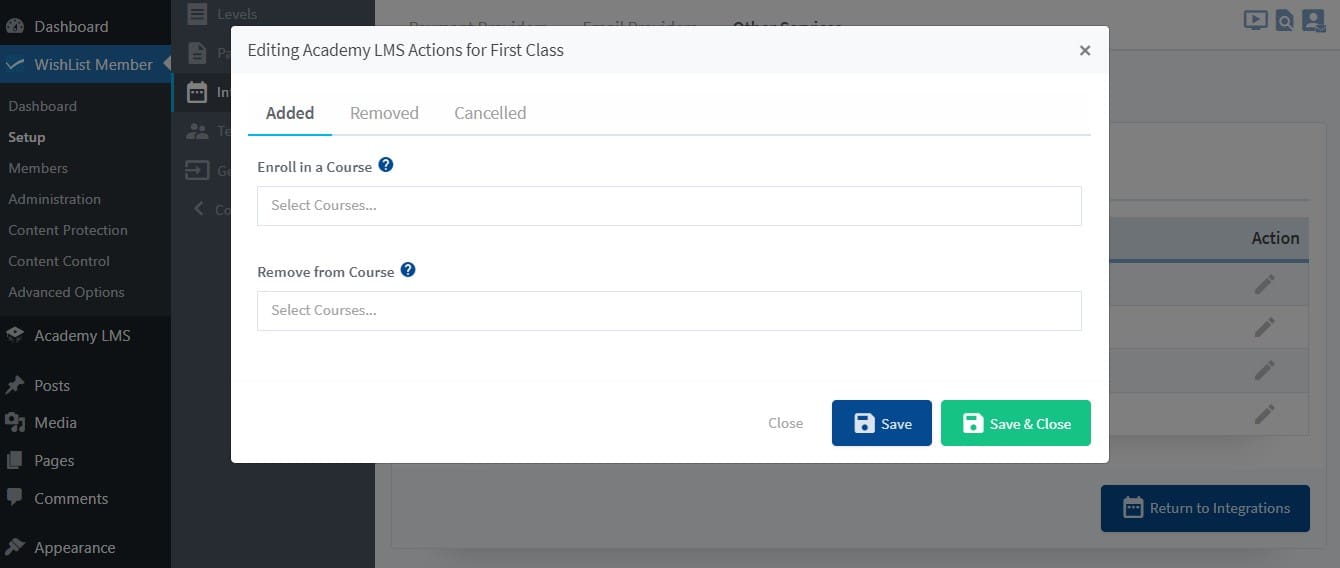
Here, you can set actions for two membership-level events:
- Removed: This is different from cancellation or expiration. When a member’s status changes to “cancelled” or expired, they technically remain part of the level but with an updated status. Removal means the member is completely deleted from the level. This trigger activates when a member removal occurs.
- Cancelled: This trigger fires when a member’s subscription to this specific level is “cancelled”.
You can then choose two actions to link with these triggers:
- Enroll In Course: This automatically enrolls the member in a specific course you designate.
- Remove From Course: This action removes the member from a designated course.
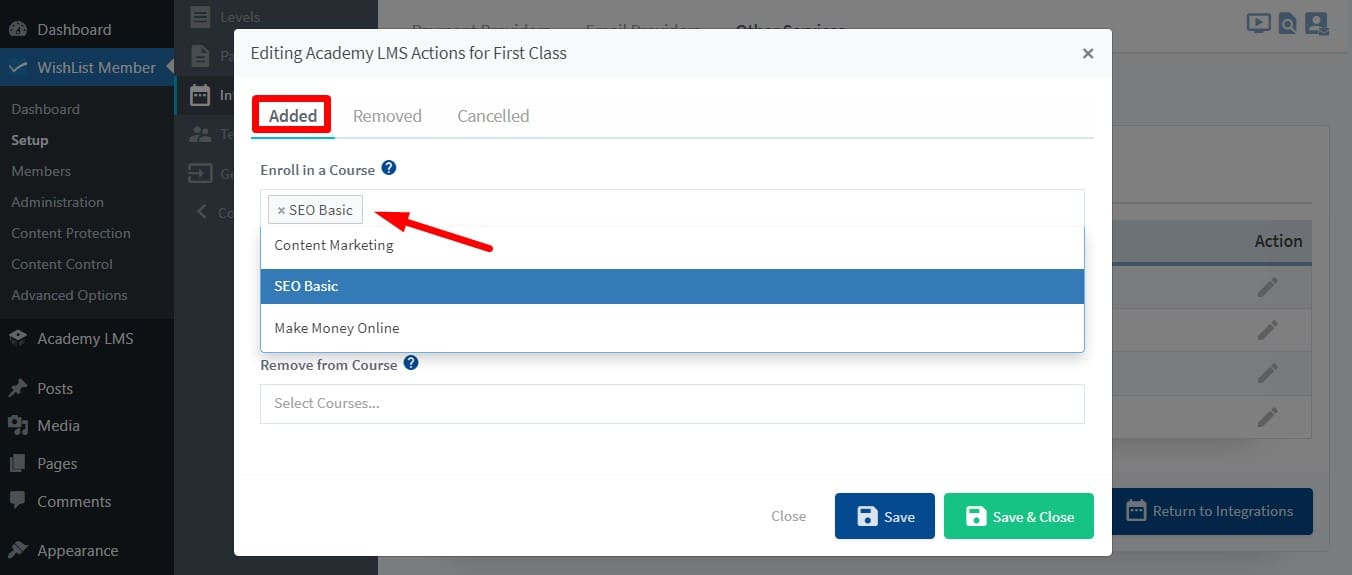
Now choose the membership level event you want to use as a trigger: Added, Removed, or Cancelled. Select the action you want to happen: Enroll In Course or Remove From Course.
Finally, pick the specific course you want members to be enrolled in or removed from based on the chosen trigger and action.
Example: Auto-Enrollment for New First Class Members. (We’ve shown this in the “Membership Level Actions” section.)
- Set Trigger: Select “Added” from the Membership Level Actions tab.
- Define Action: Choose “Enroll In Course”.
- Assign the Course: Pick a course from the “Enroll in a Course” dropdown menu. We picked “SEO Basic.”
With this configuration, whenever a new member joins the “First Class” level, they’ll be automatically enrolled in “SEO Basic” within Academy LMS.
Note: You can also choose to enroll existing members who are already part of the “First Class” level into “SEO Basic” by selecting the appropriate option.
Don’t forget to click “Save and Close” to apply your settings.
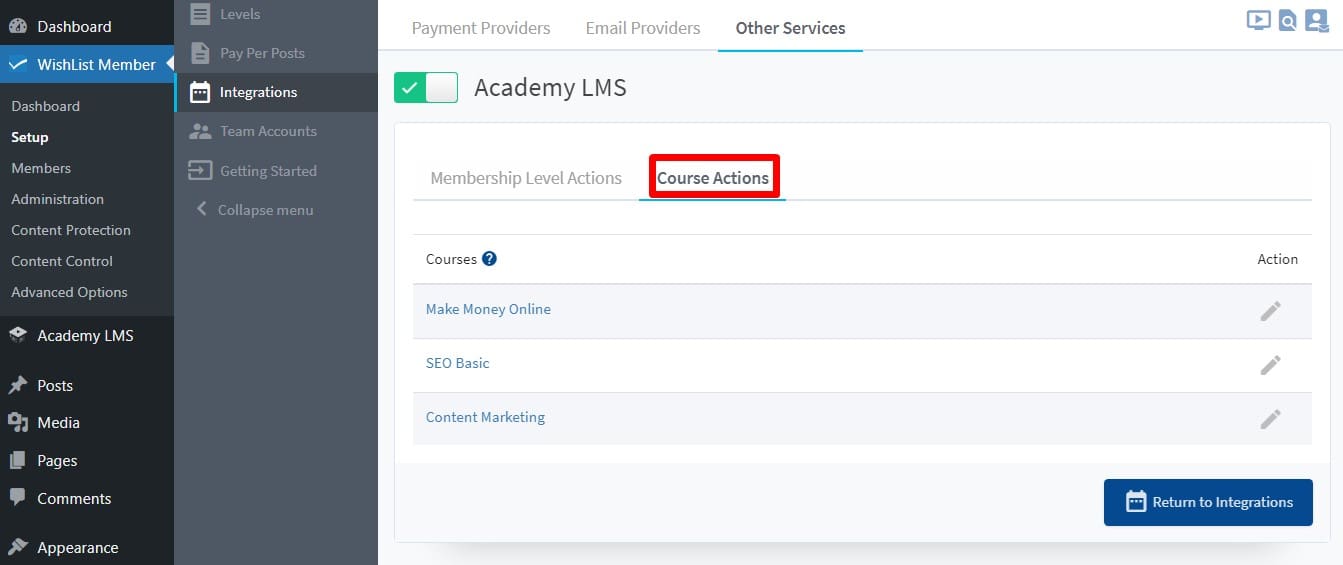
Course Actions
Course actions are the opposite of Membership Level Actions. In this section, we use events (triggers) within Academy LMS to initiate actions in WishList Member.
Select the Course Actions tab. This will display a list of your courses created in Academy LMS.
To configure Course Actions for a specific course, select its name or click the Edit icon.
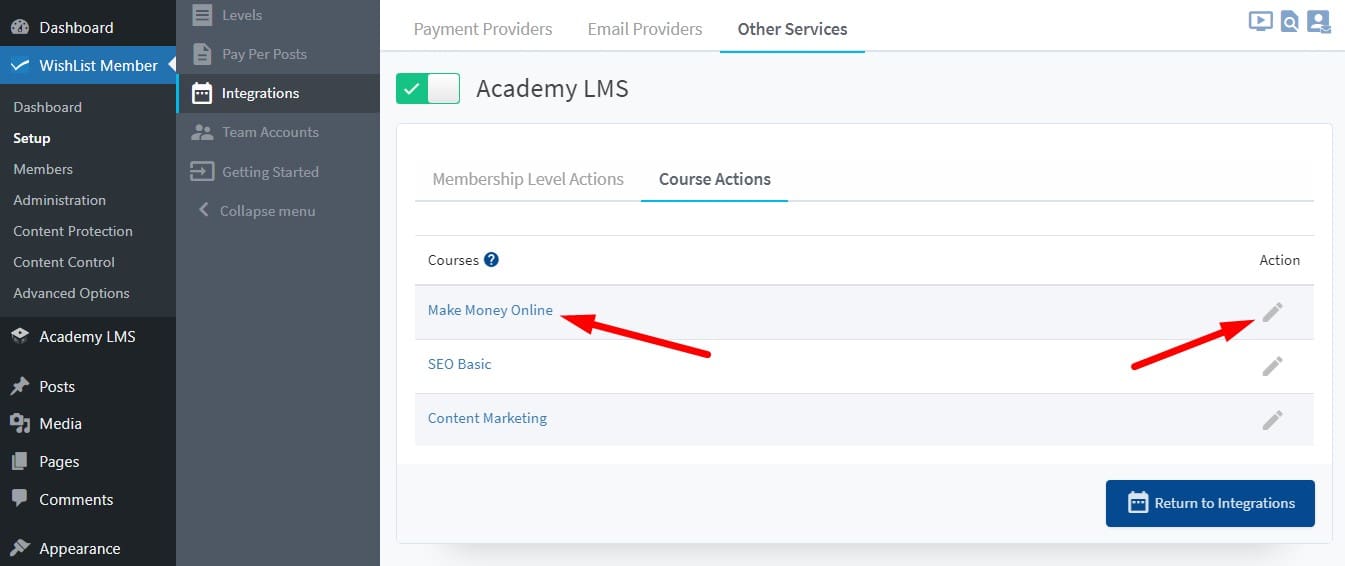
Clicking the name or Edit icon opens the Course Actions pop-up.
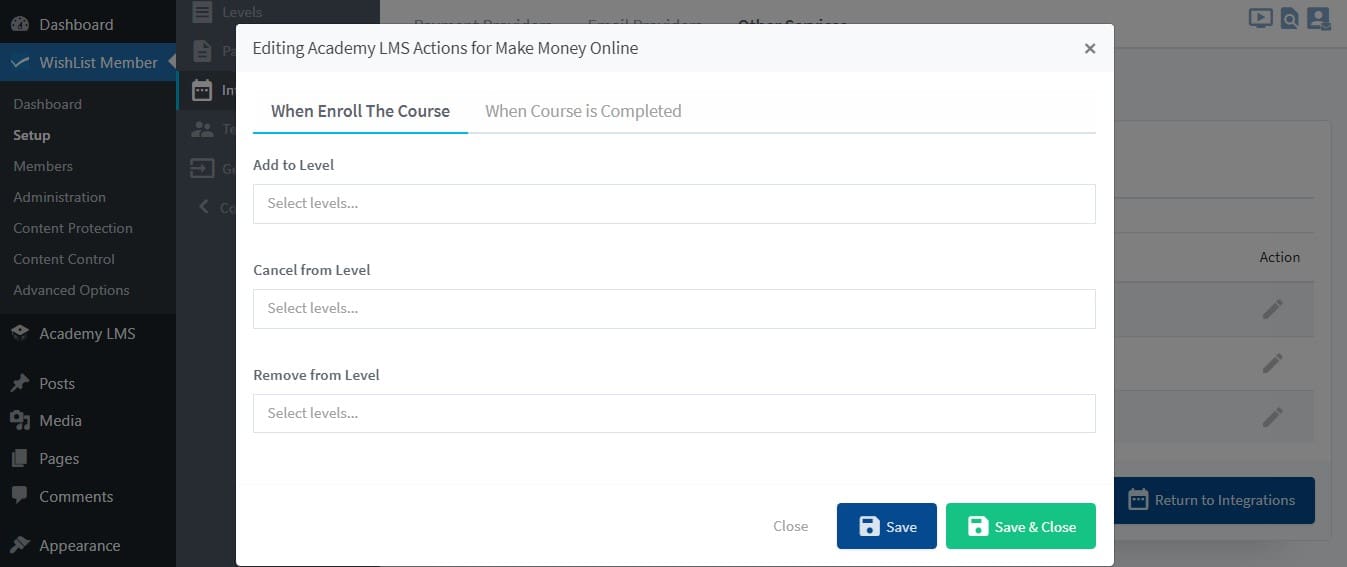
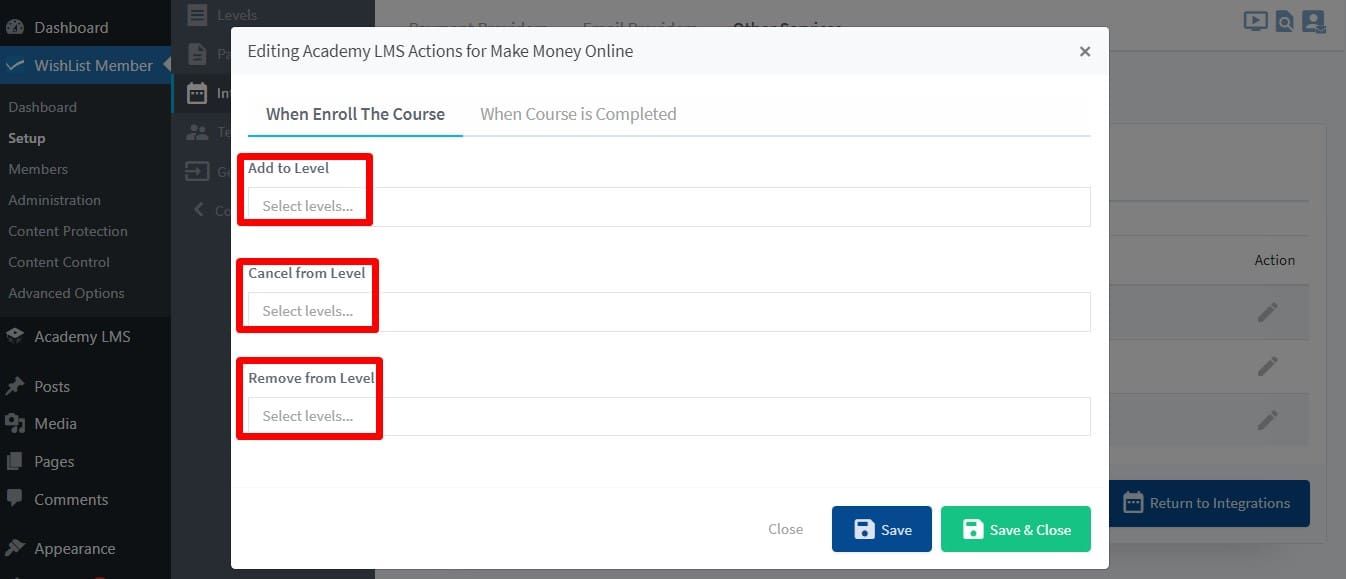
The Edit pop-up for Course Actions presents two enrollment-related triggers:
- When Enrolled the Course: This trigger activates when a member is enrolled in the chosen course.
- When Course is Completed: This trigger fires upon a member completing the course.
For each trigger, you can define three actions within WishList Member:
- Add to Level: Assign members to a specific WishList Member level upon meeting the trigger.
- Cancel From Level: Cancel members’ memberships from a designated WishList Member level based on the trigger.Note: Canceling a membership retains the member information within the level, but their access is revoked.
- Remove From Level: Remove members from a WishList Member level based on the trigger.
Automate WishList Member Actions based on Course Activity
Select the Trigger: Choose the Academy LMS course event you want to use as a trigger: When Enrolled in this Course or When Course is Completed.
Define the Action: Pick the action you want to occur within WishList Member:
- Add to Level: Assign members to a specific level.
- Cancel From Level: Cancel memberships for a designated level.
- Remove From Level: Completely remove members from a level.
Depending on the chosen action (Add to Level or Cancel From Level), select the specific WishList Member level to be affected.
Example: Auto-Assigning First Class Level for Enrolled Students
- Select Trigger: Choose “When Enrolled in this Course” from the Course Actions tab.
- Define Action: Pick “Add to Level”.
- Assign the Level: Select “First Class” from the dropdown menu.
With this configuration, whenever a member enrolls in “Make Money Online” within Academy LMS, they’ll be automatically assigned to the “First Class” level in WishList Member.
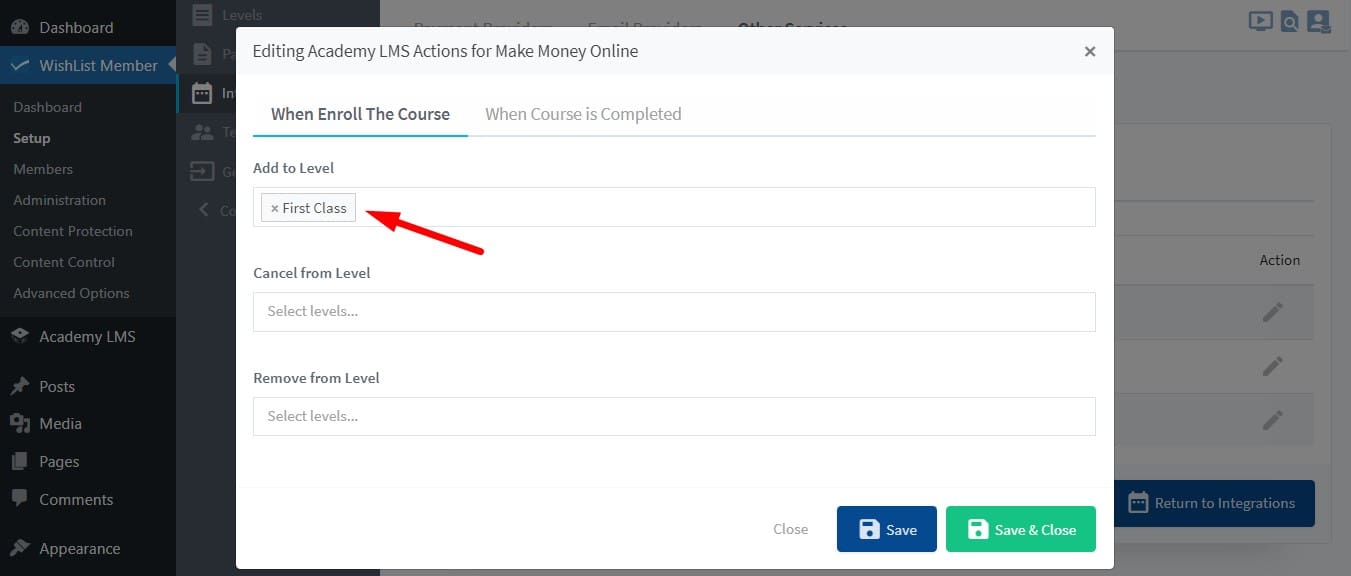
Remember to click “Save and Close” to apply your settings.
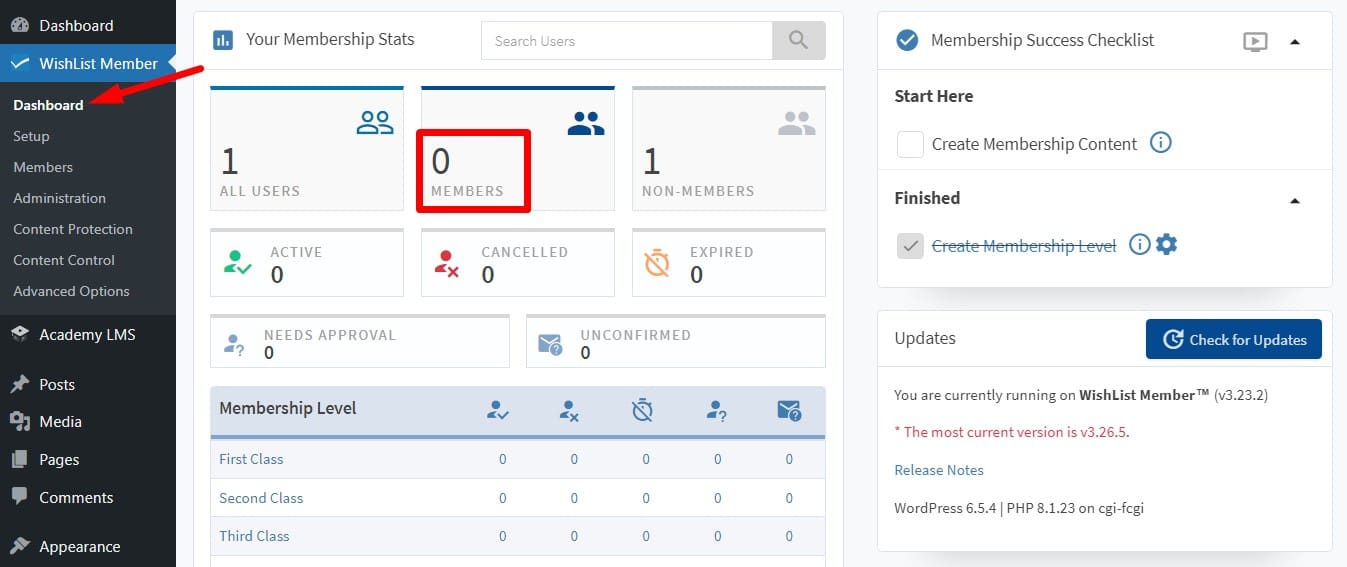
Let’s Check Memberships Level
Now from the dashboard of WishList Member there are no members showing.
Let’s walk through verifying if the WishList Member level assignment is working as expected for course enrollment. We’ll use the “SEO Basic” course in Academy LMS as an example.
Navigate to the “SEO Basic” course within Academy LMS. This is typically where you manage your course settings and content.
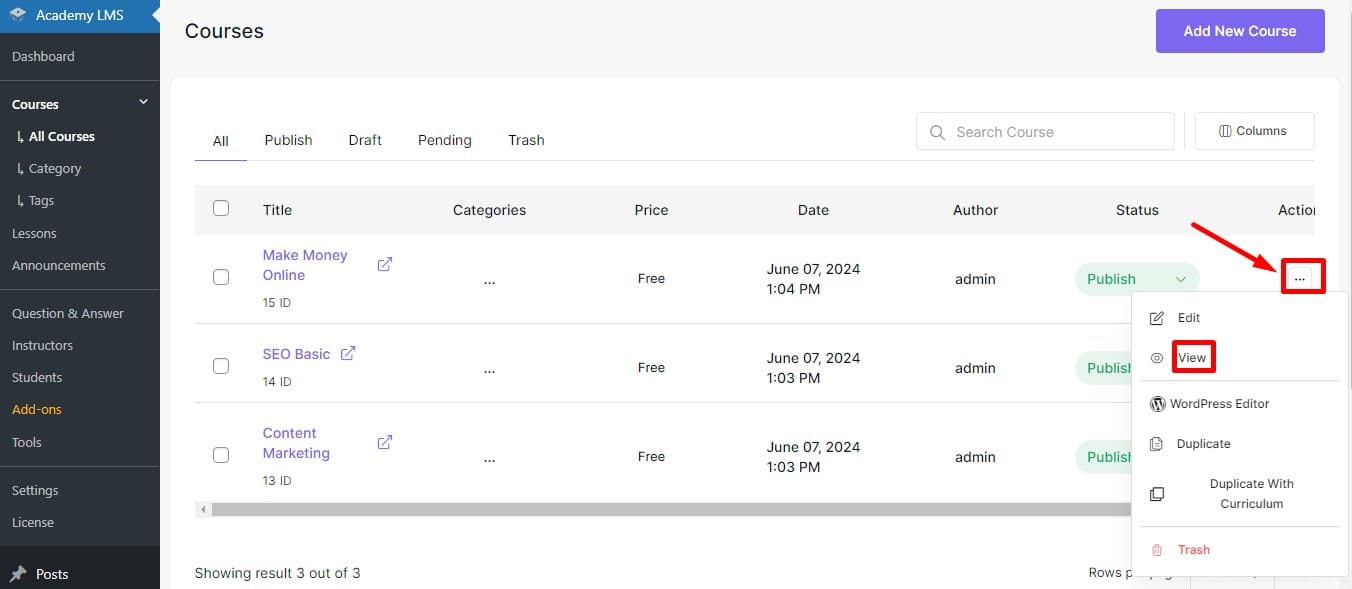
To test the functionality, we’ll switch gears and view the “Make Money Online” course from the student’s perspective. Imagine you’re a student browsing available courses.
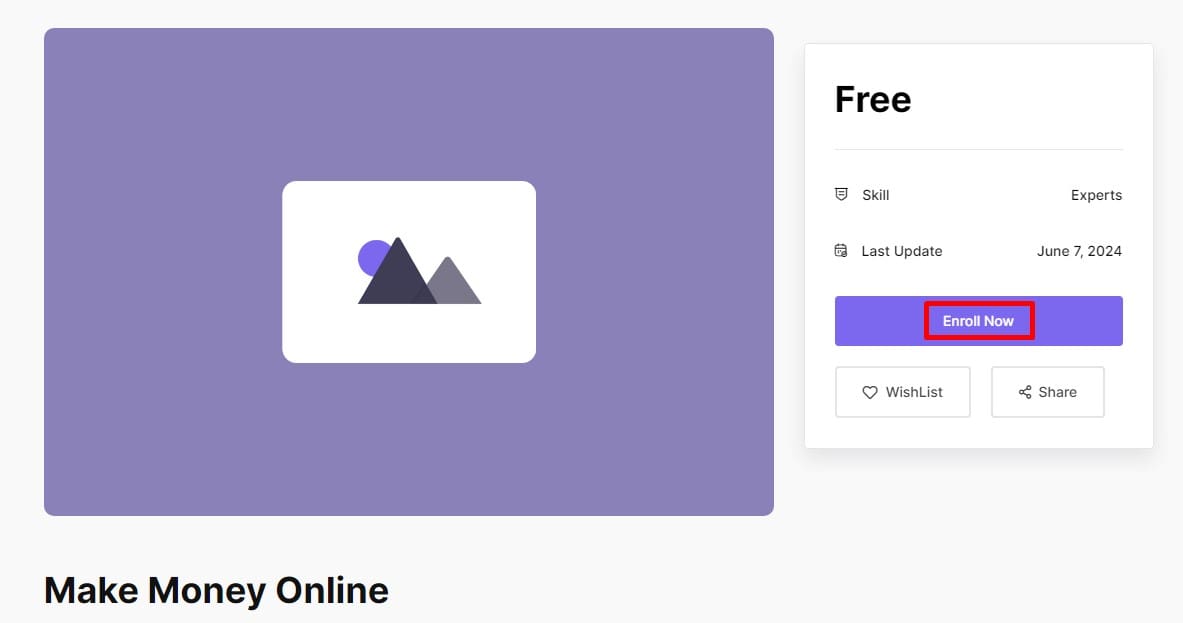
Locate the enrollment option for the “Make Money Online” course on the student-facing course page. Proceed with enrolling yourself in the course, mimicking a student’s action.
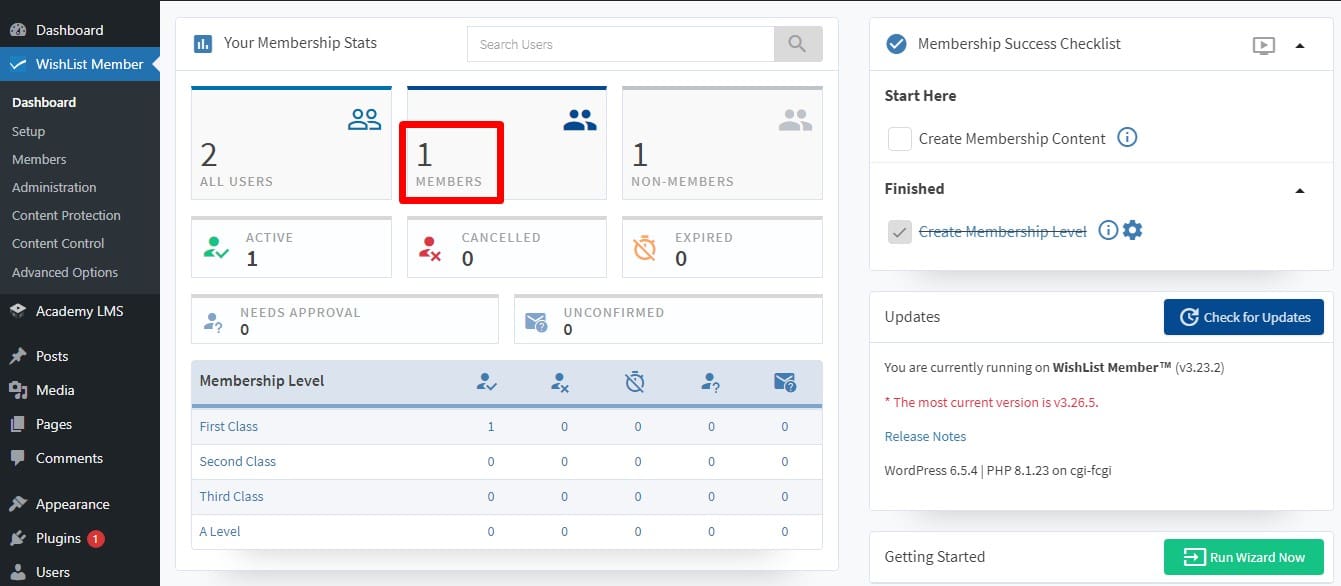
After successful enrollment, check your WishList Member dashboard to see if you’ve been automatically assigned the designated level associated with the “SEO Basic” course. Here you can see that one member was added in the Members section.
And that’s how you can use WishList Member with Academy LMS.