


Academy LMS seamlessly connects with Google Classroom to enhance the online learning experience and reach more students. Google Classroom add-on enables you to sync its existing students with Academy LMS. You can also import classes, publish and edit courses, enroll students, and do more with Google Classroom.
Prerequisite
The Academy LMS Google Classroom Add-on requires the following plugins:
- Academy LMS Pro plugin (Version 2.0 or higher),
- Academy LMS 2.0 (Free) or higher.
Activate Google Classroom Add-on
To use Google Classroom with Academy LMS, navigate to Academy LMS > Add-ons. Scroll down to locate the Google Classroom add-on and turn it on.
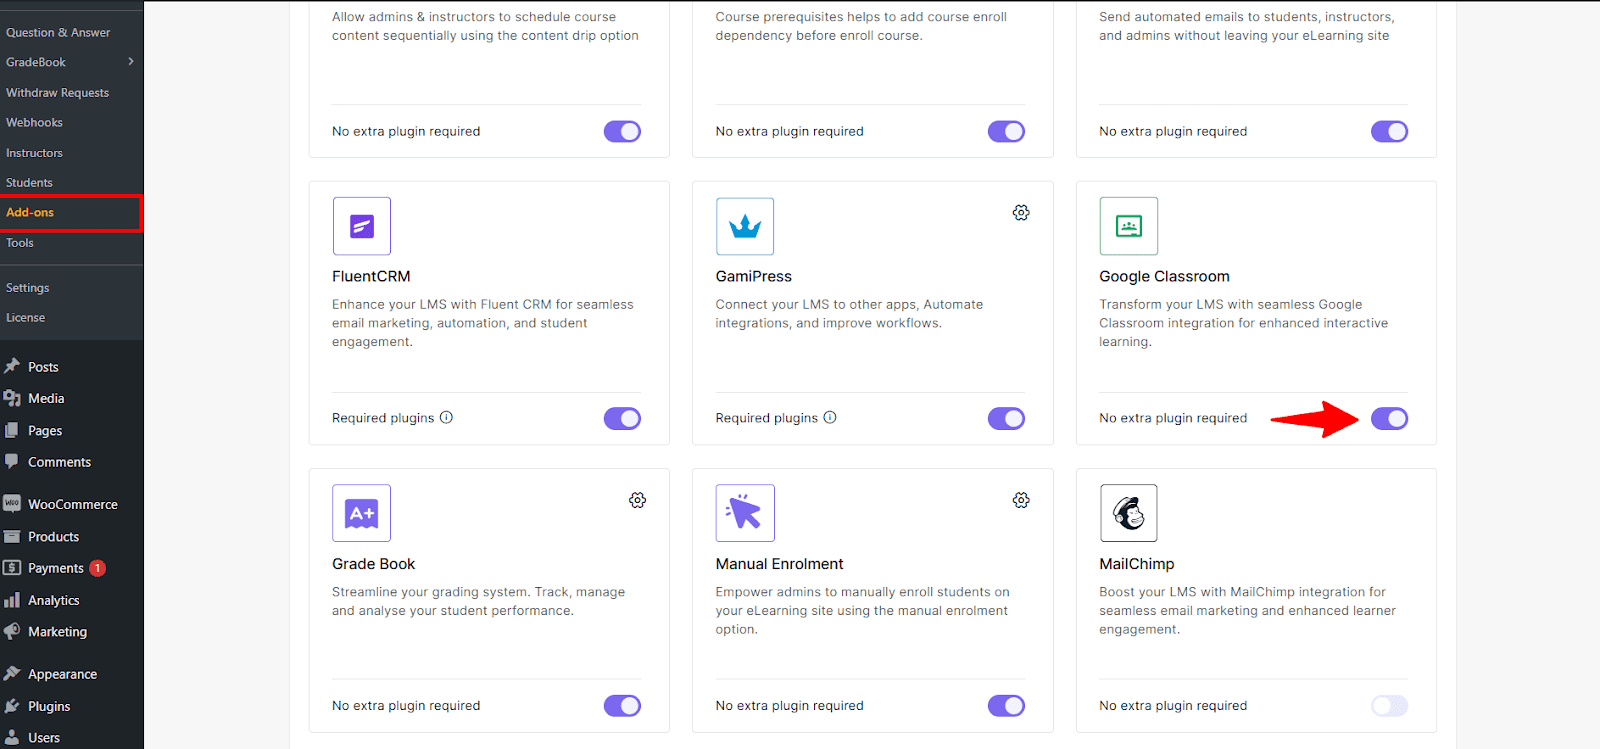
The Google Classroom option will be available in Academy LMS menu items upon activation. If you click on Google Classroom, a window will pop up for Classroom Setup. To set up the classroom, you need to create your Google Credentials.
Create Google App Credentials
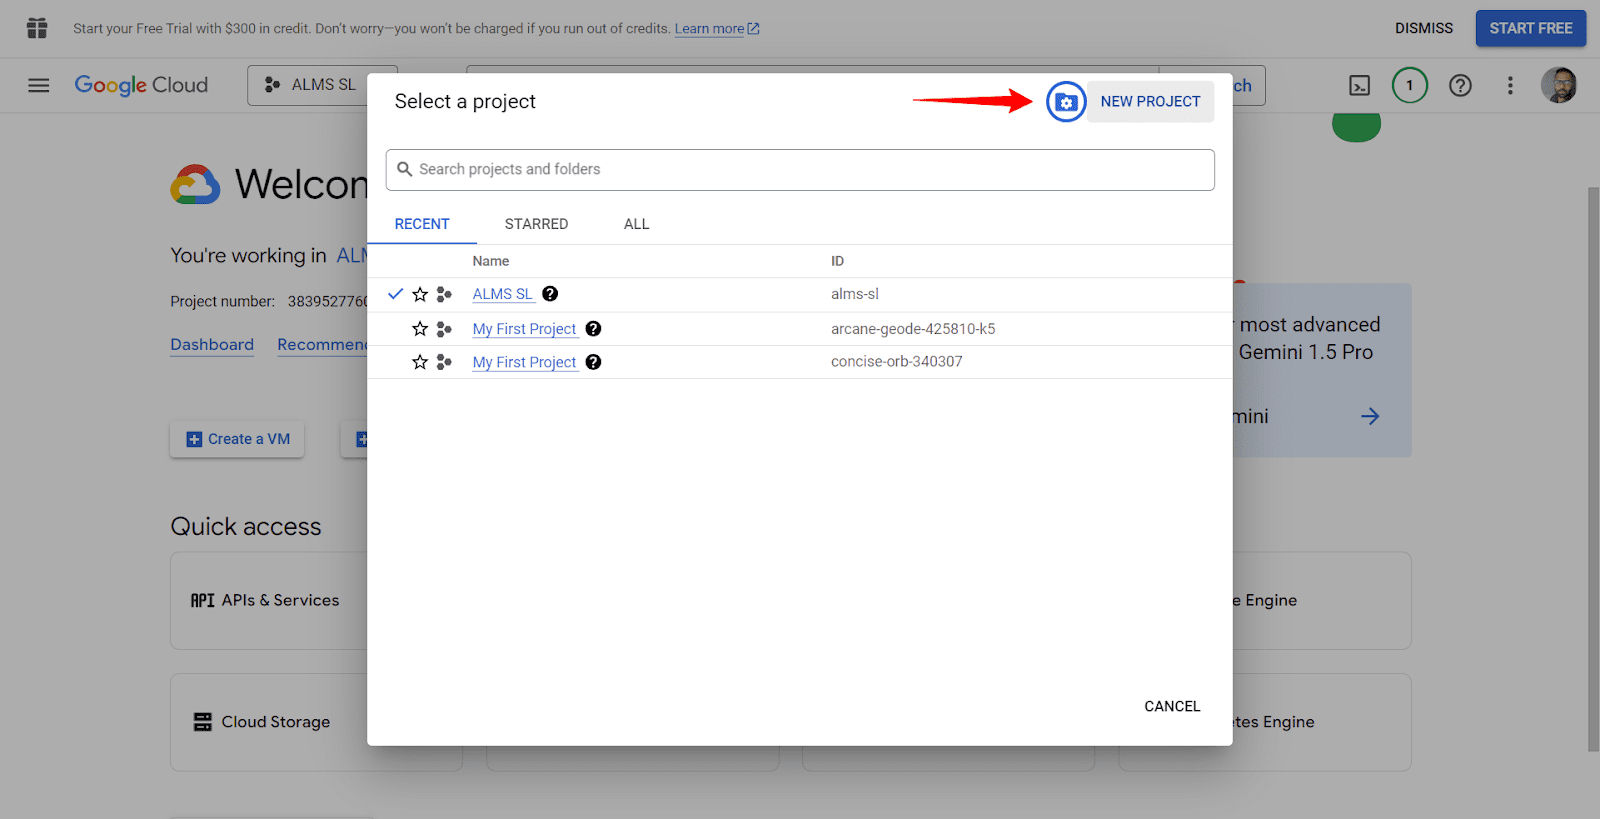
Visit Google Developer Console and click the option in the top left corner to open a new window. If you don’t have a project already created, click the NEW PROJECT button.
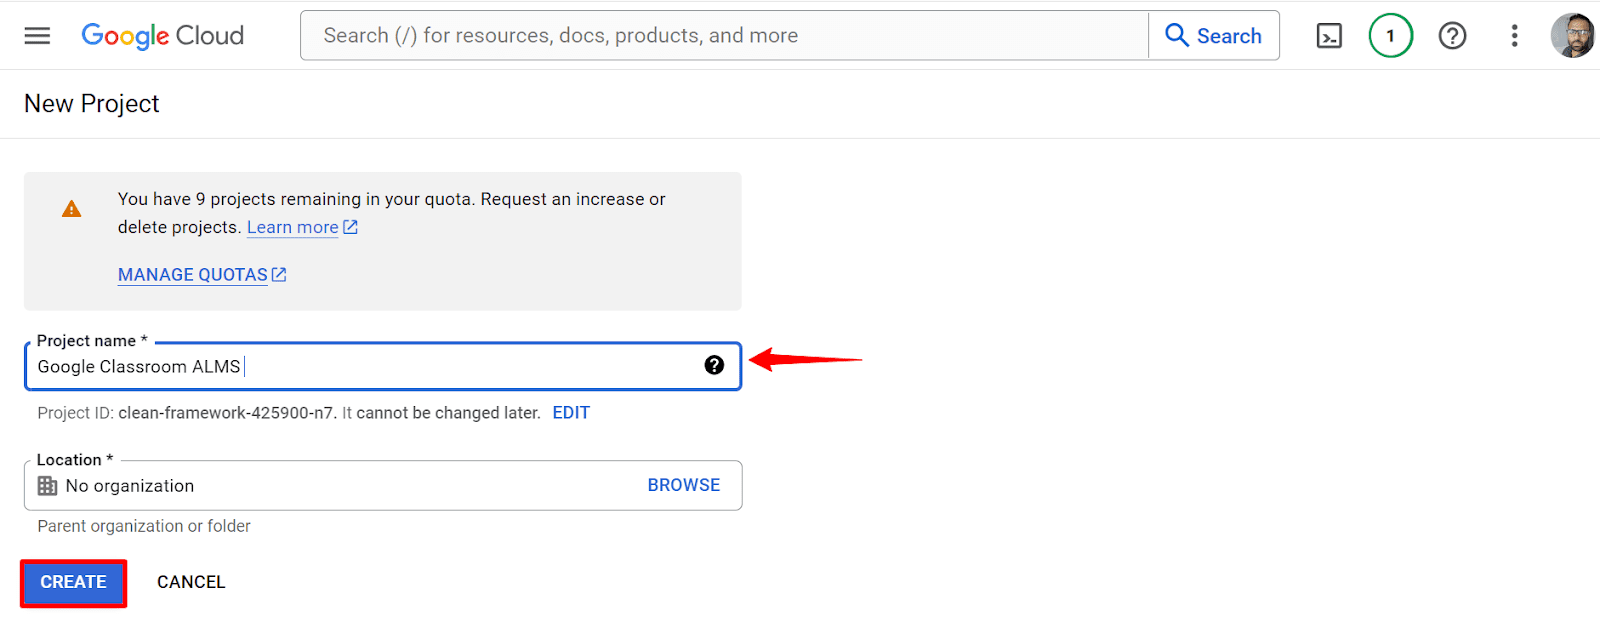
Provide your project name and select the Organization if you are a part of one. Click Create and wait a few seconds.
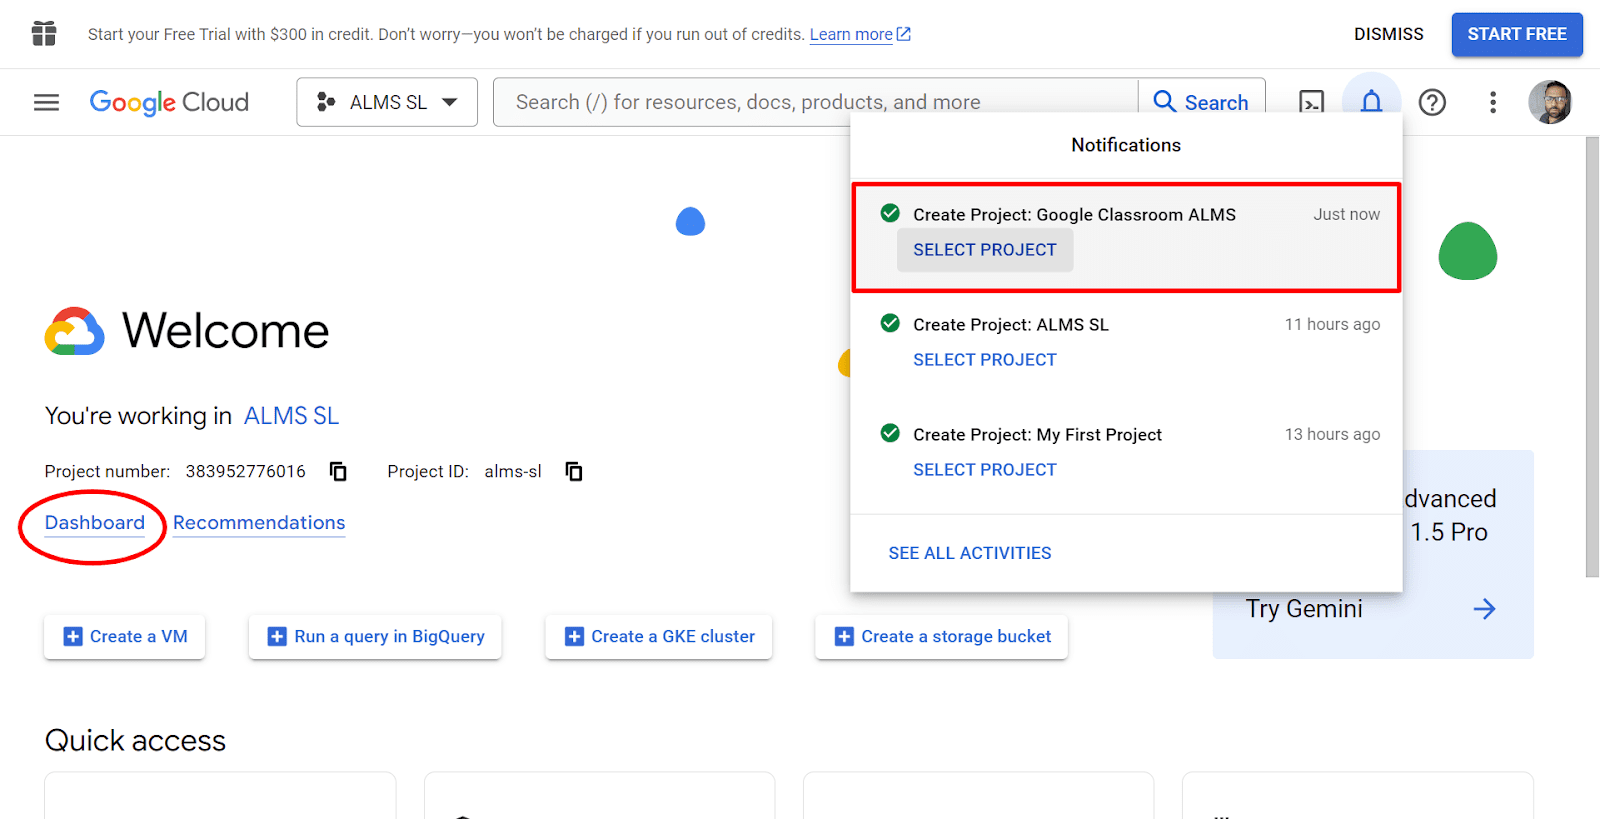
Once the project is created, you’ll be redirected to the front page. From there, click SELECT PROJECT and then click on Dashboard.
Enable Google Classroom API
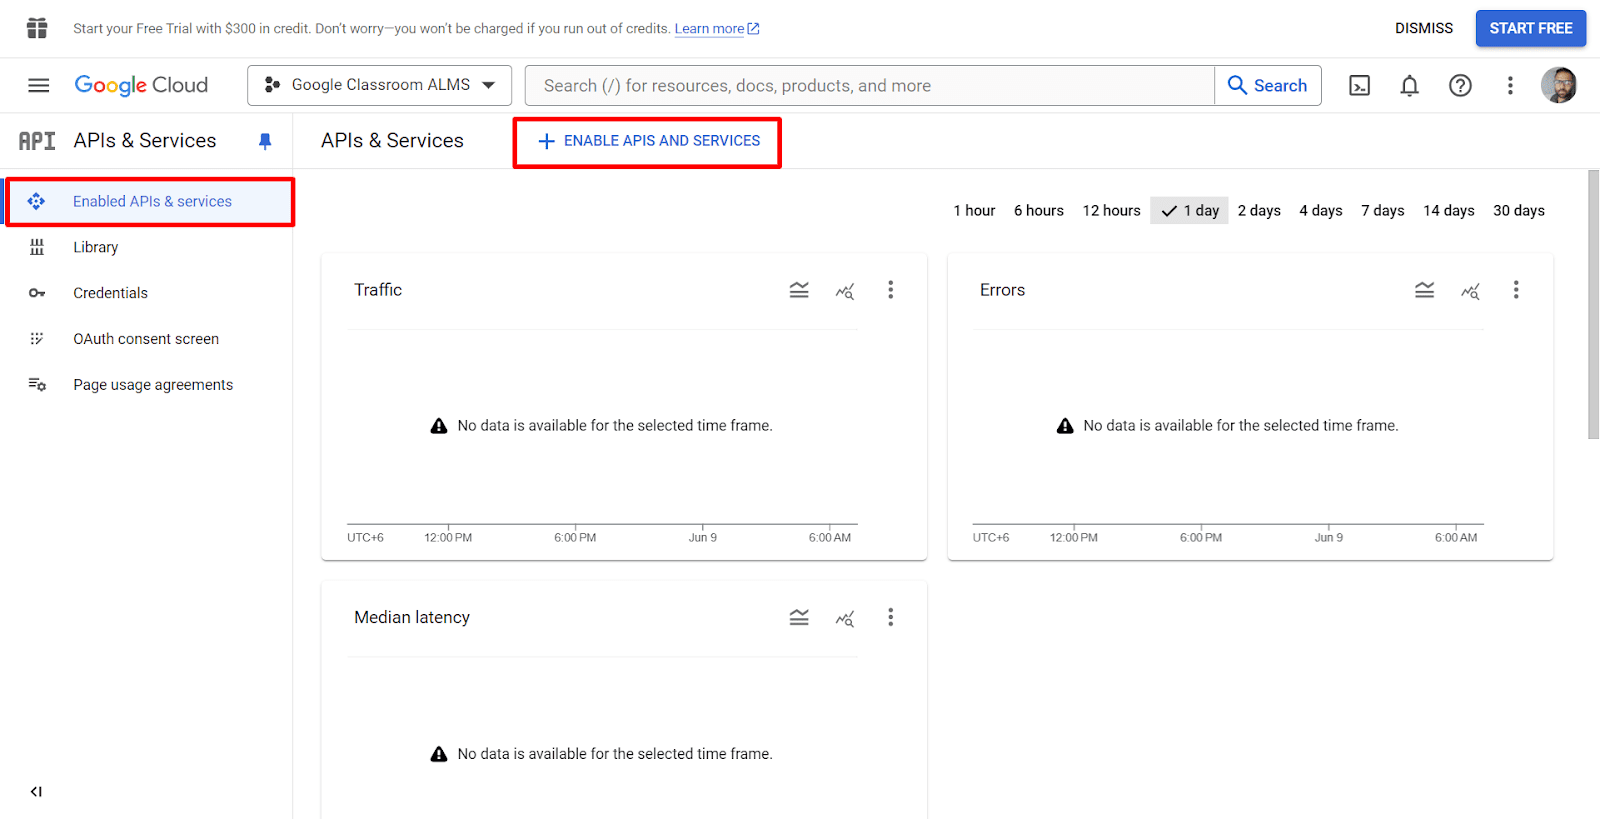
From the Dashboard, click Enable APIs & Services, which will take you to the APIs & Services Page. Now, click + ENABLE APIS AND SERVICES.
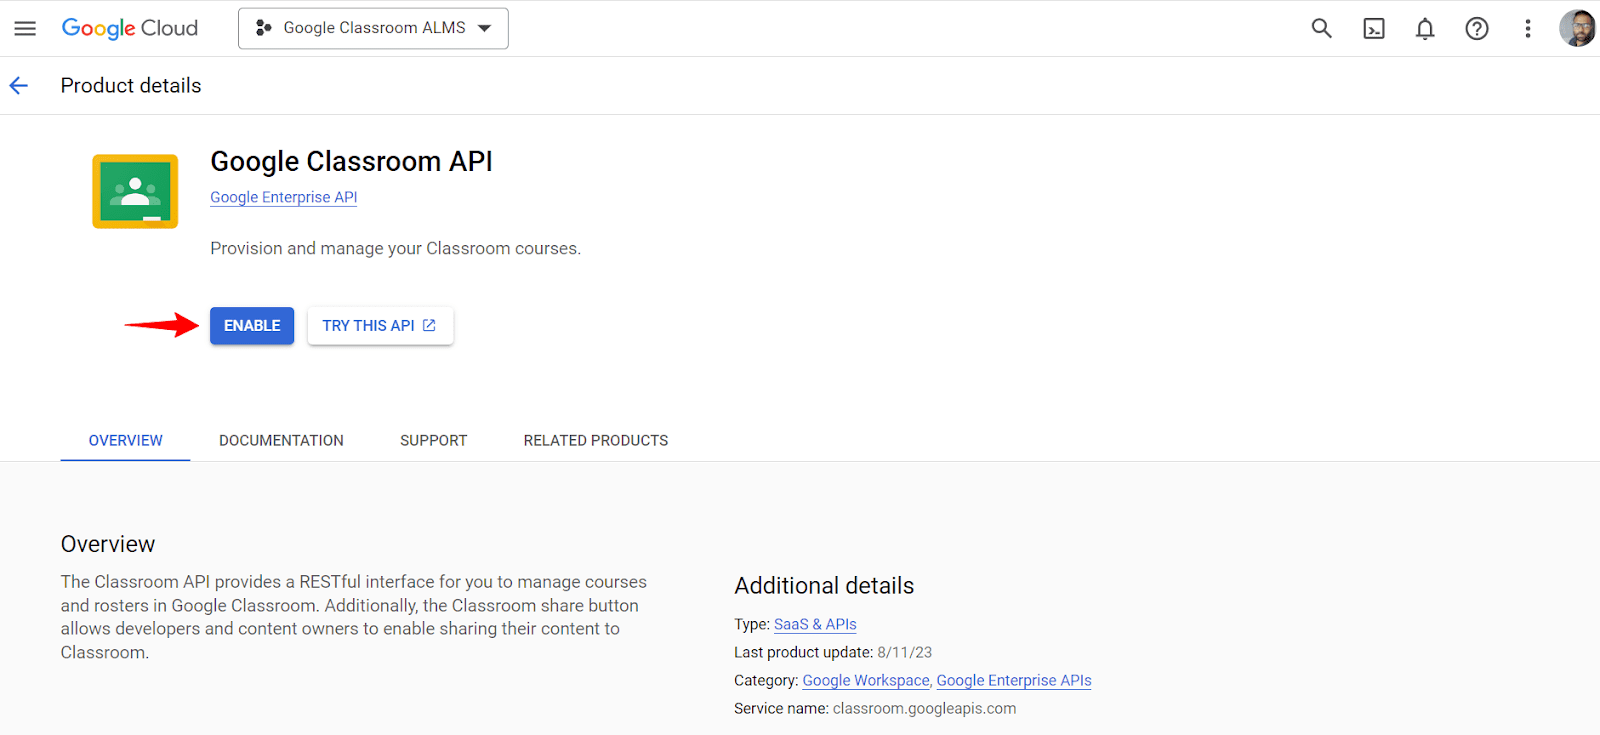
In the search box, enter Google Classroom API and press enter. The Google Classroom API will then appear, which you need to click.

Click the Enable button to activate Google Classroom API for your project.
Create OAuth Client ID
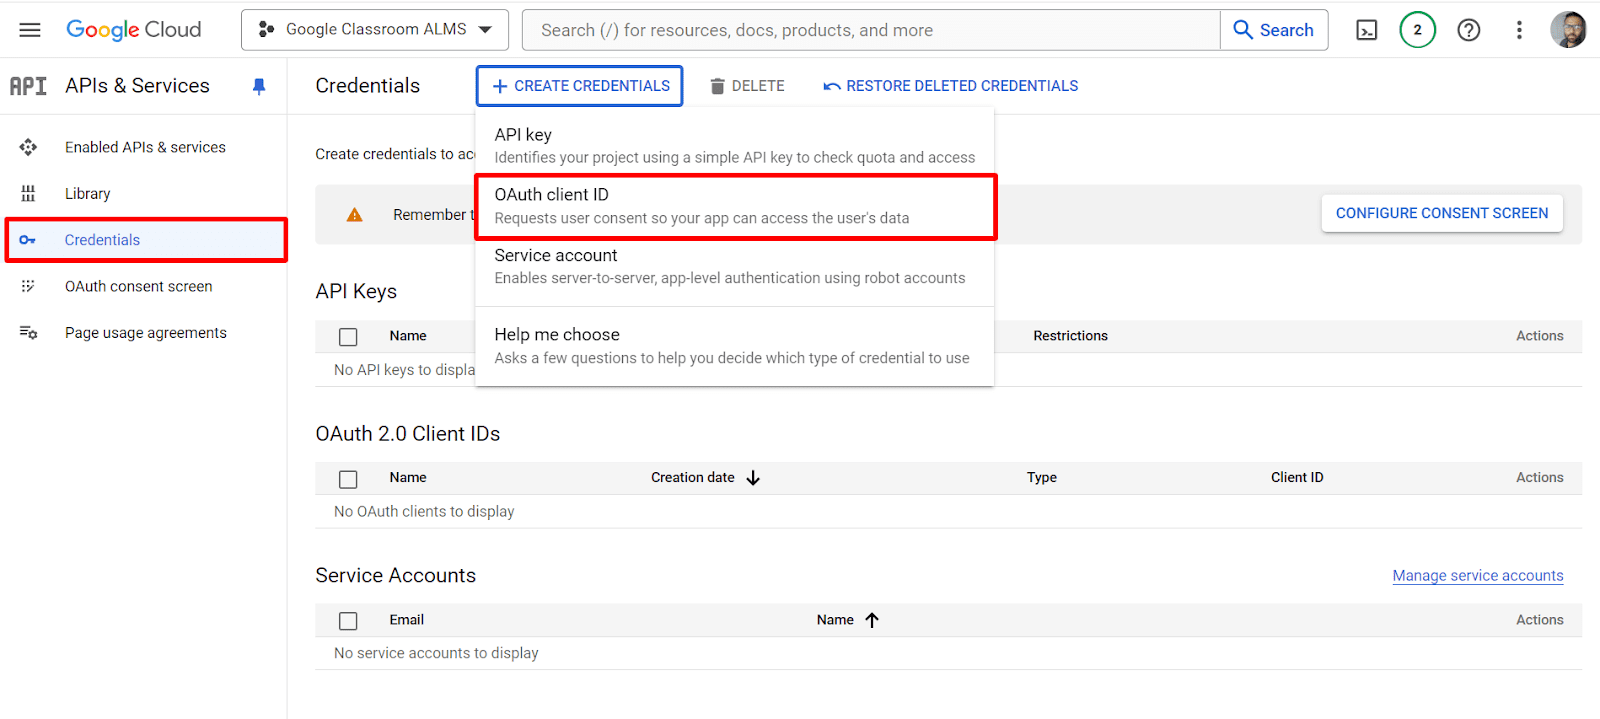
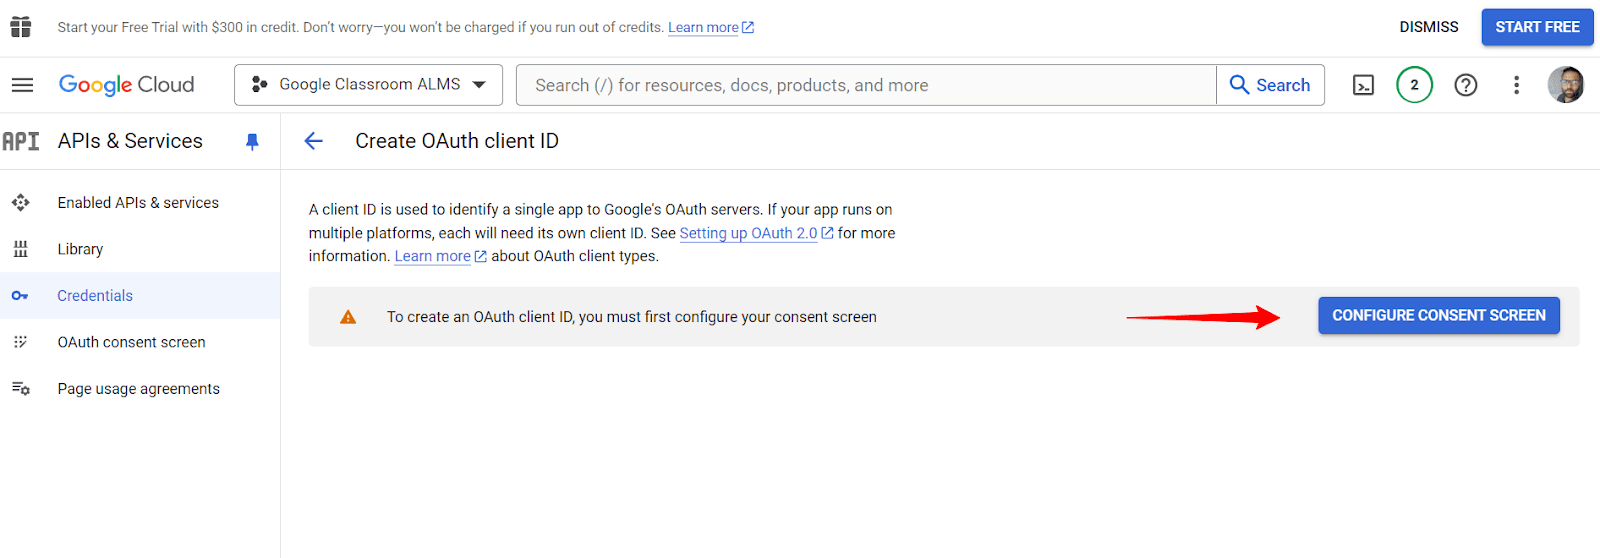
Next, click Credentials from the dashboard’s left-side menu panel. Then click the + CREATE CREDENTIALS option and select OAuth client ID.
Click the CONFIGURE CONSENT SCREEN on the next screen to create your OAuth client ID.
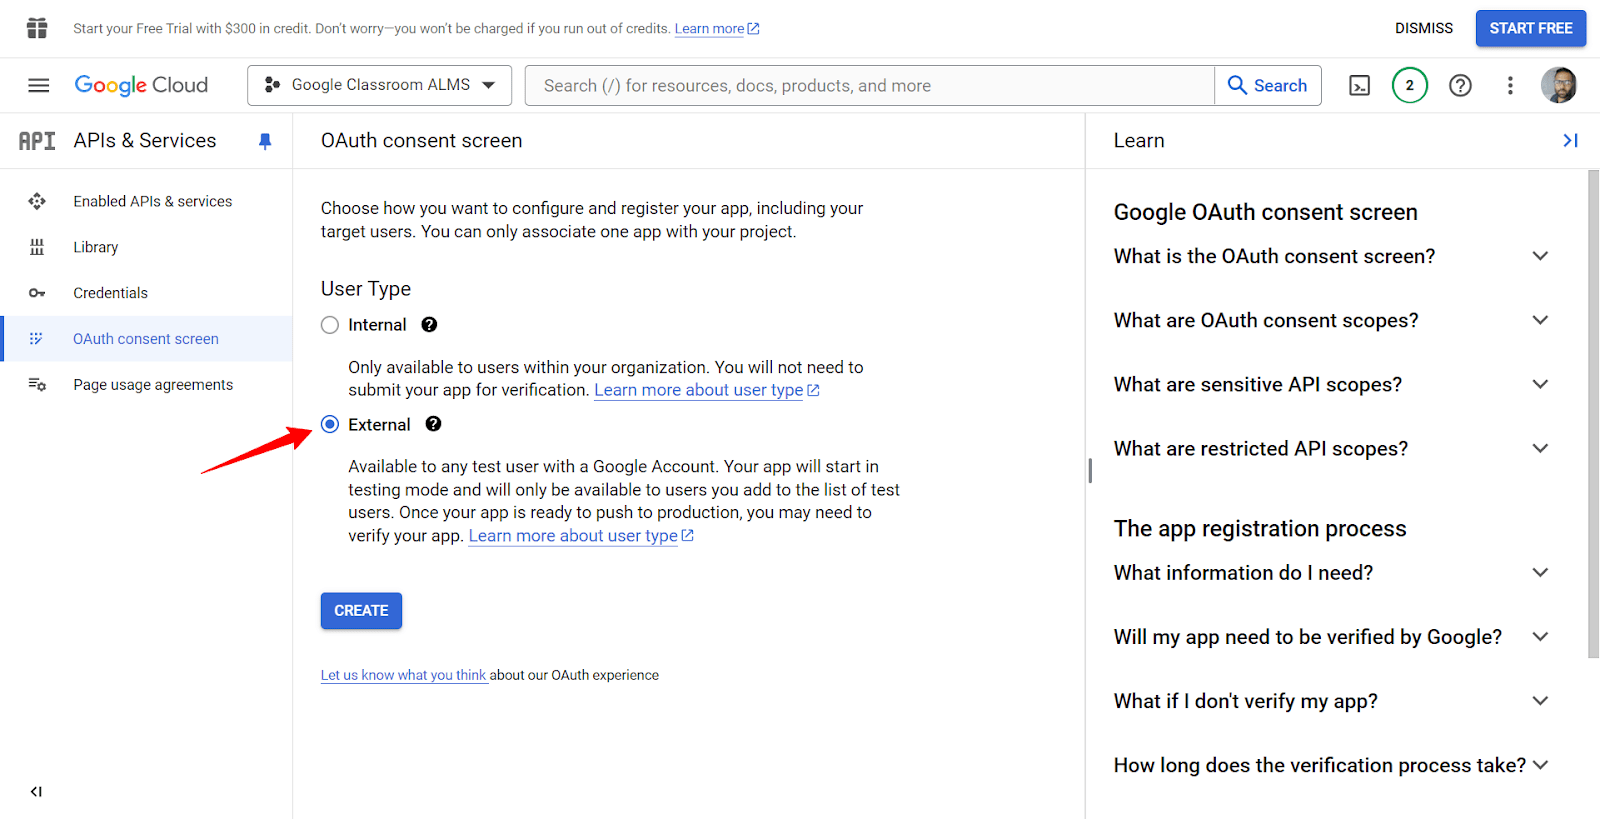
Select External and click the CREATE button to proceed.
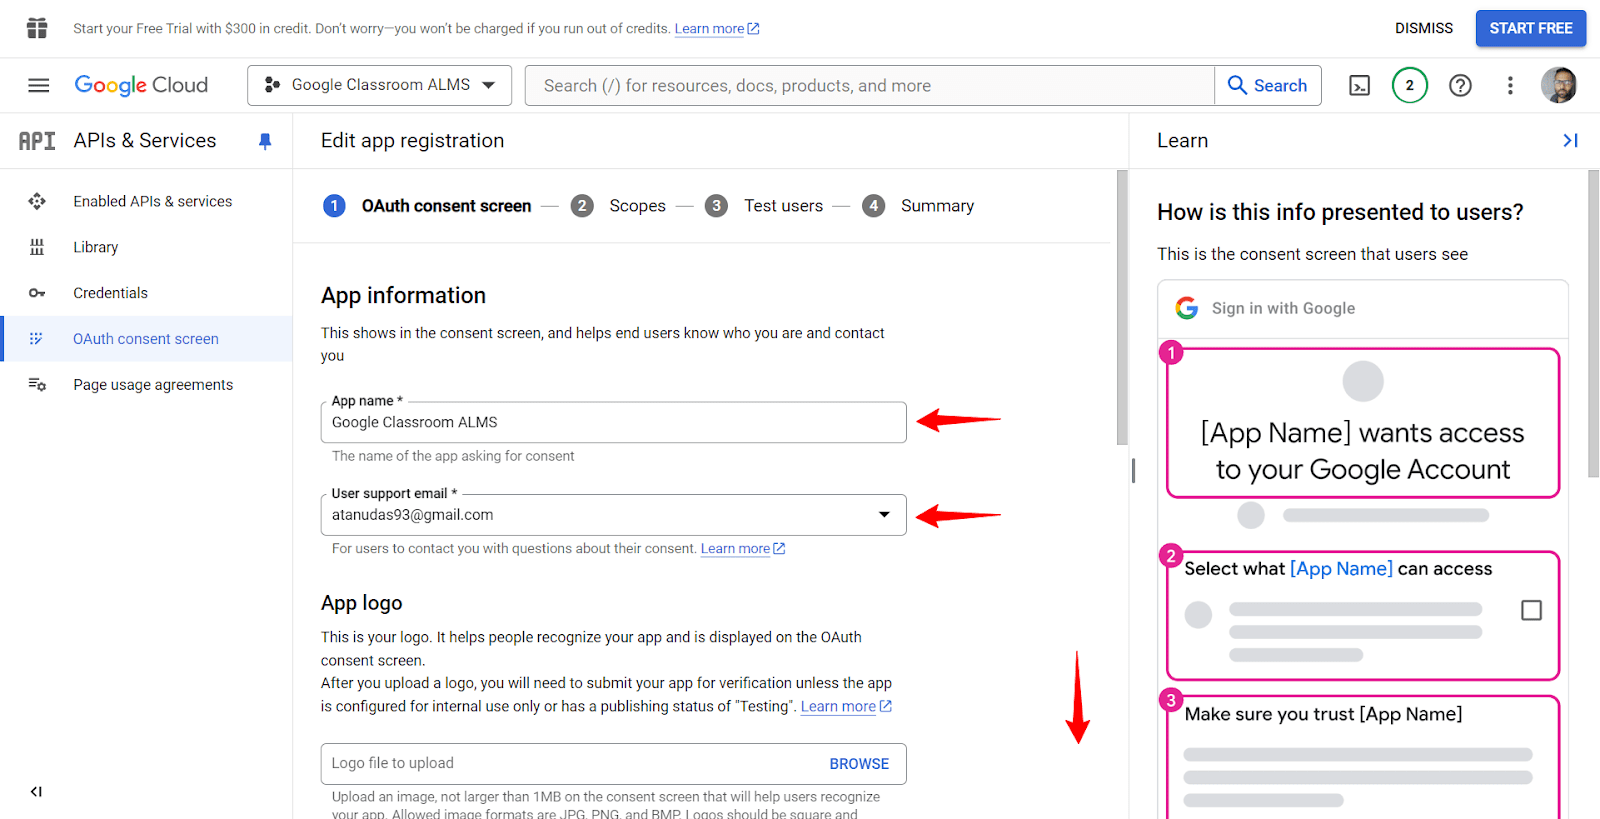
At this step, provide the App name, User support email, and Developer contact information. Then click the SAVE AND CONTINUE button to proceed.
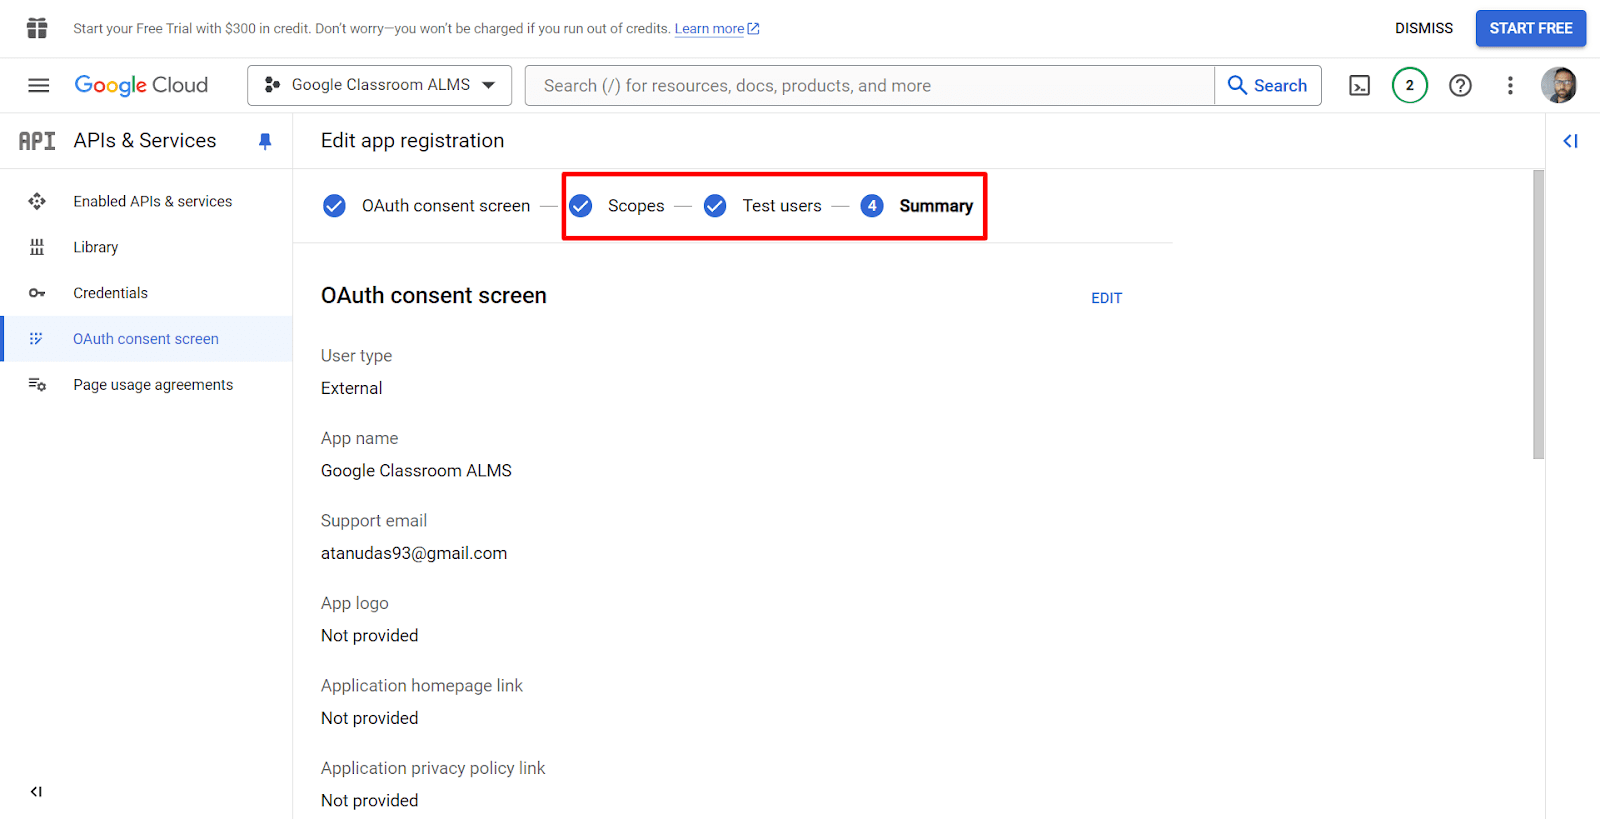
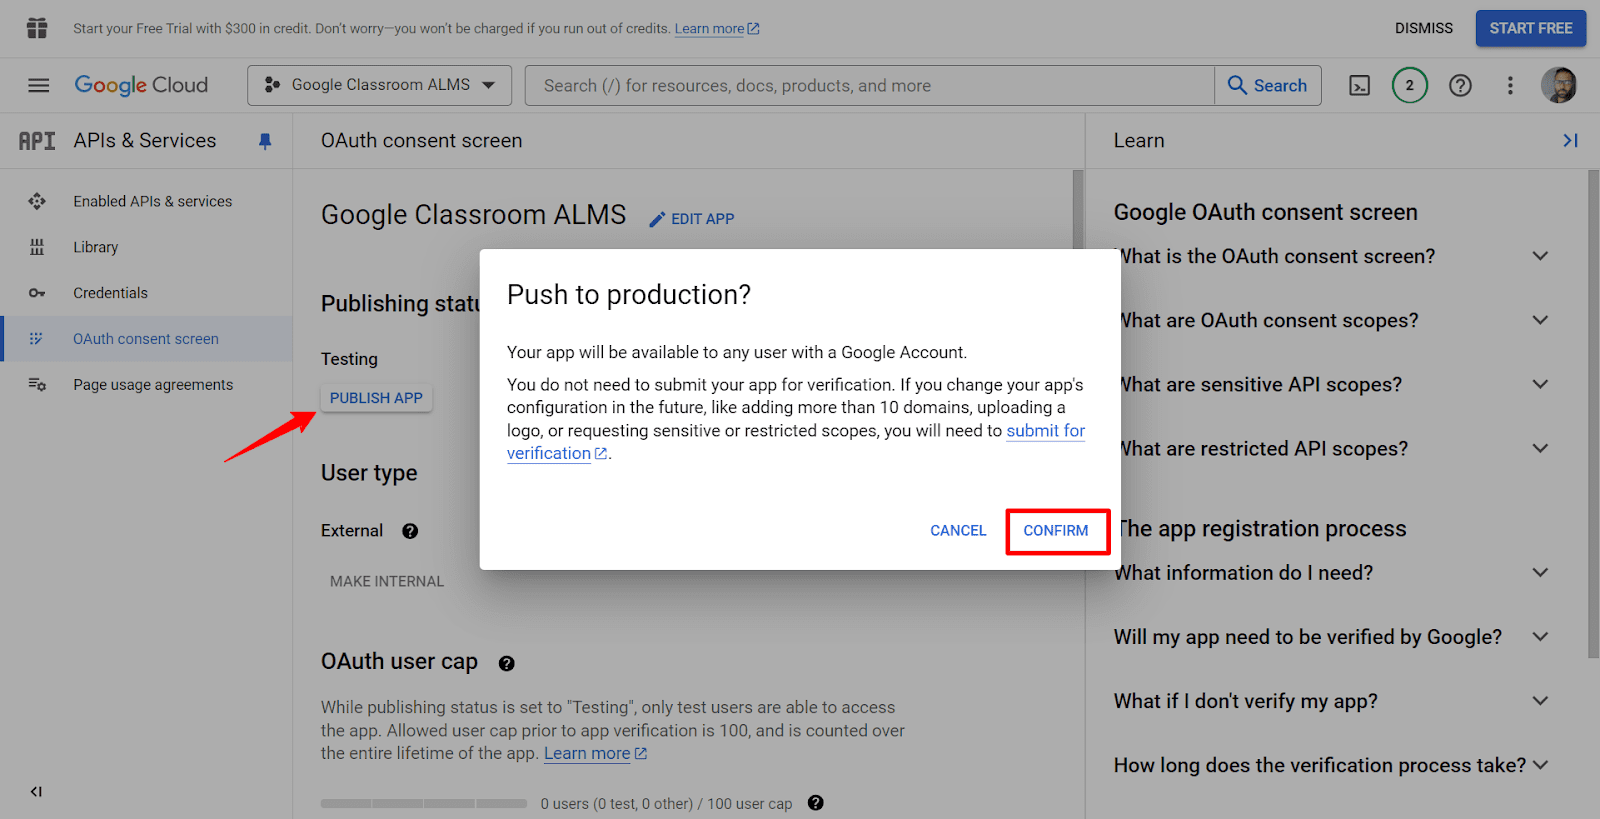
Click SAVE AND CONTINUE for the Scopes and Test users sections. Then click BACK TO DASHBOARD in the summary section.
Now click the PUBLISH APP button and then click CONFIRM to create the app on the console.
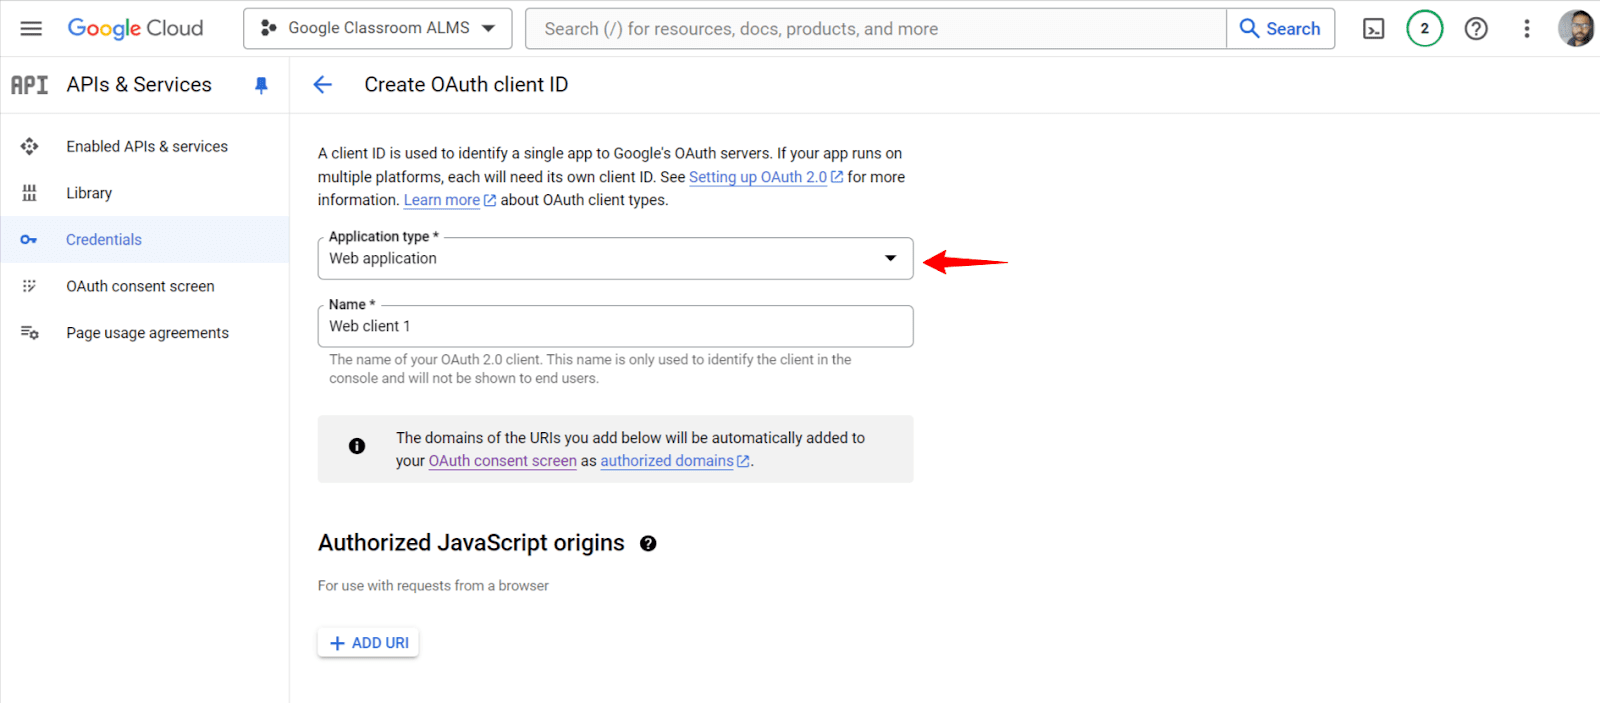
Now, head back to the Credentials tab from the left-hand menu. Then click + CREATE CREDENTIALS and select OAuth client ID.

Select the Application type as Web Application and scroll down a bit to get the Authorized redirect URIs.
Now, go back to your website’s dashboard and navigate to Academy LMS > Google Classroom. Then, copy the address from the browser and go back to Google Console.

In the Authorized Redirect URIs section, click the ADD URL button, paste the URL, and click Create.
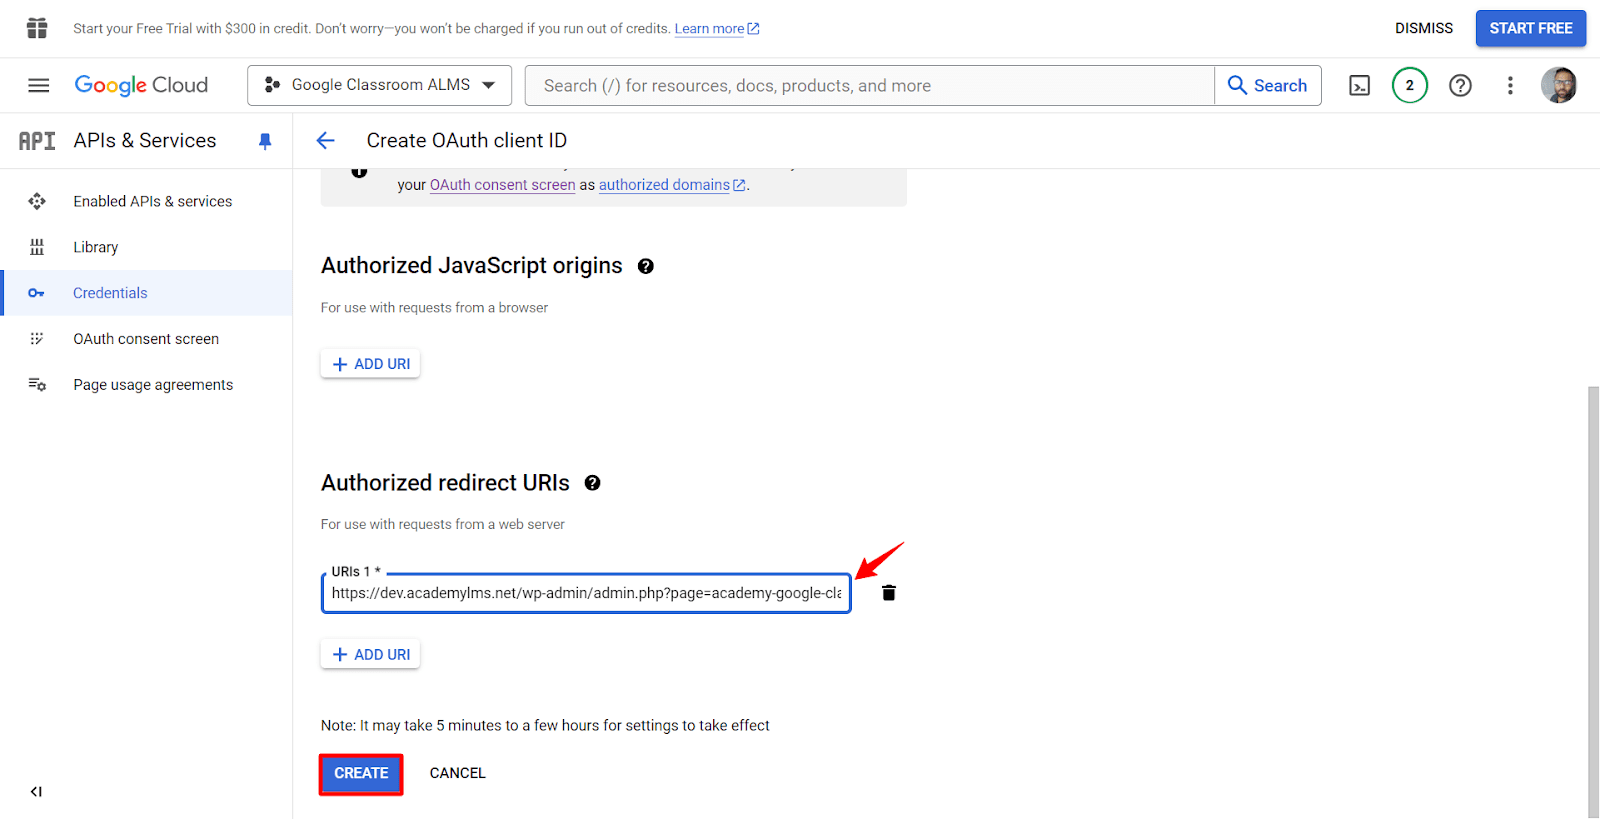
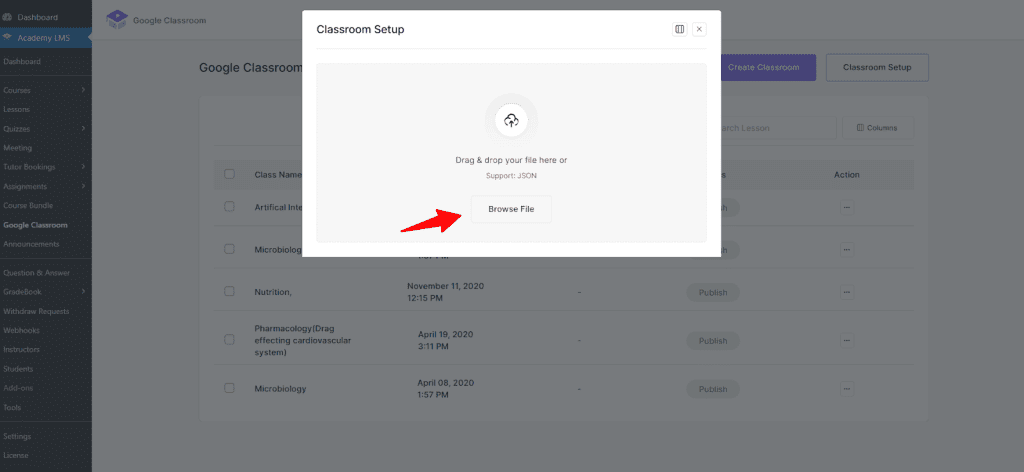
The OAuth client is now created. From this window, click DOWNLOAD JSON file. Save the file in your local directory and head back to your website.
Configure Google Classroom
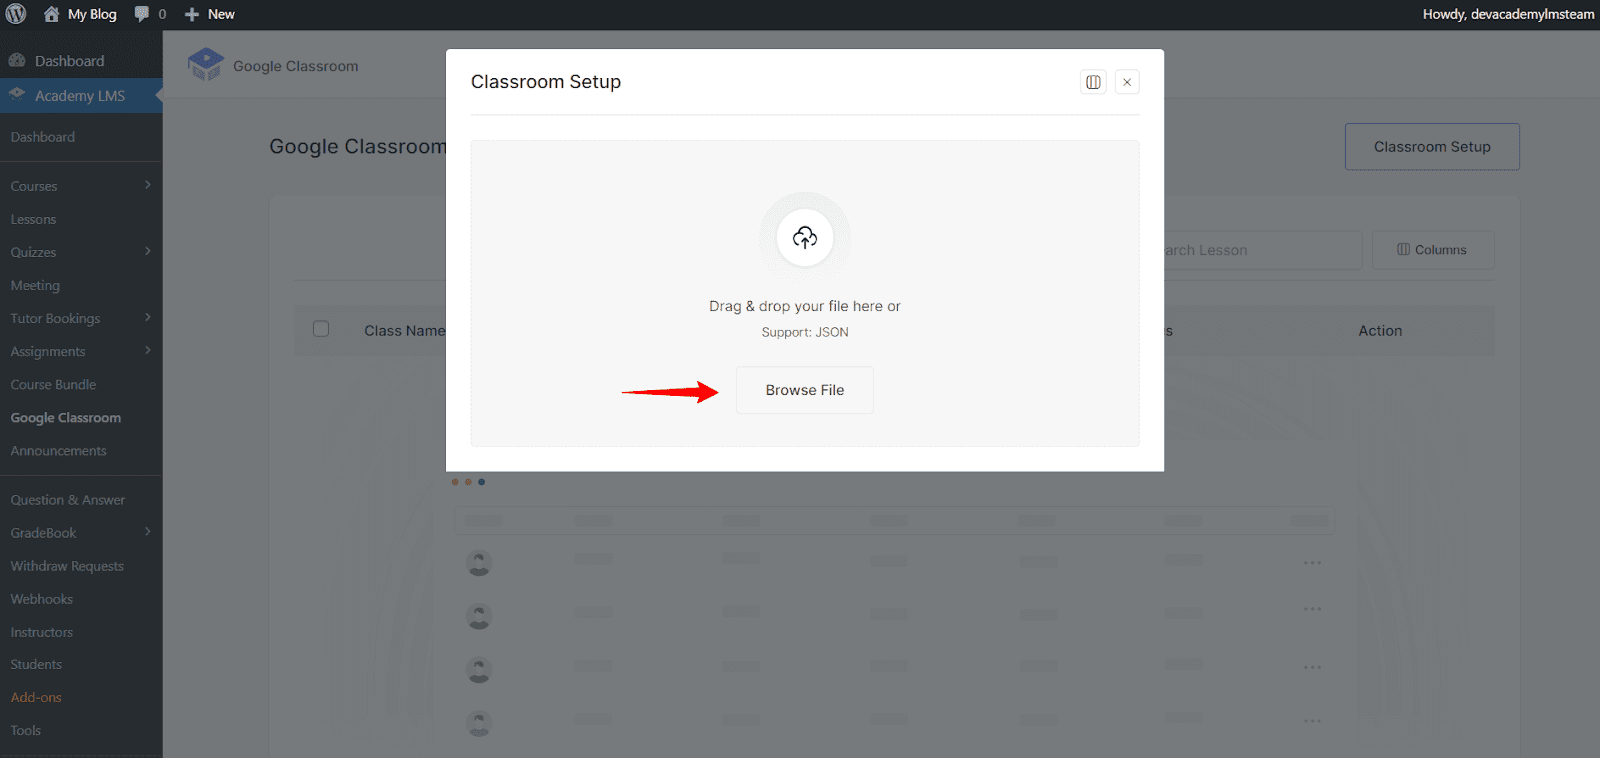
Now, you need to insert the JSON file you downloaded in the previous step. Click Browse File and insert the JSON file from your local directory.
After inserting the JSON file, you will be asked to click Redirect to continue the Google Classroom setup.
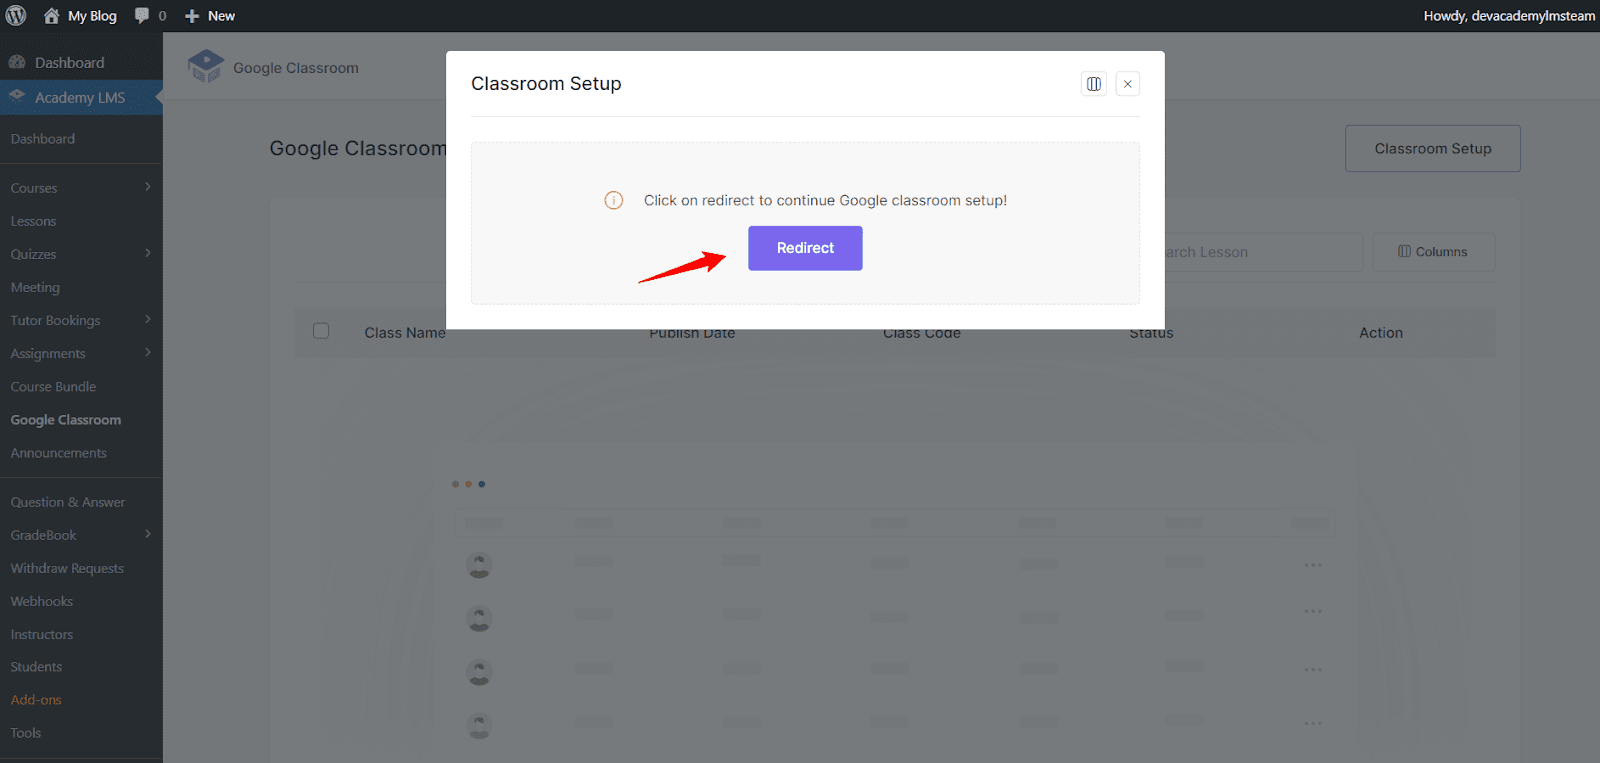
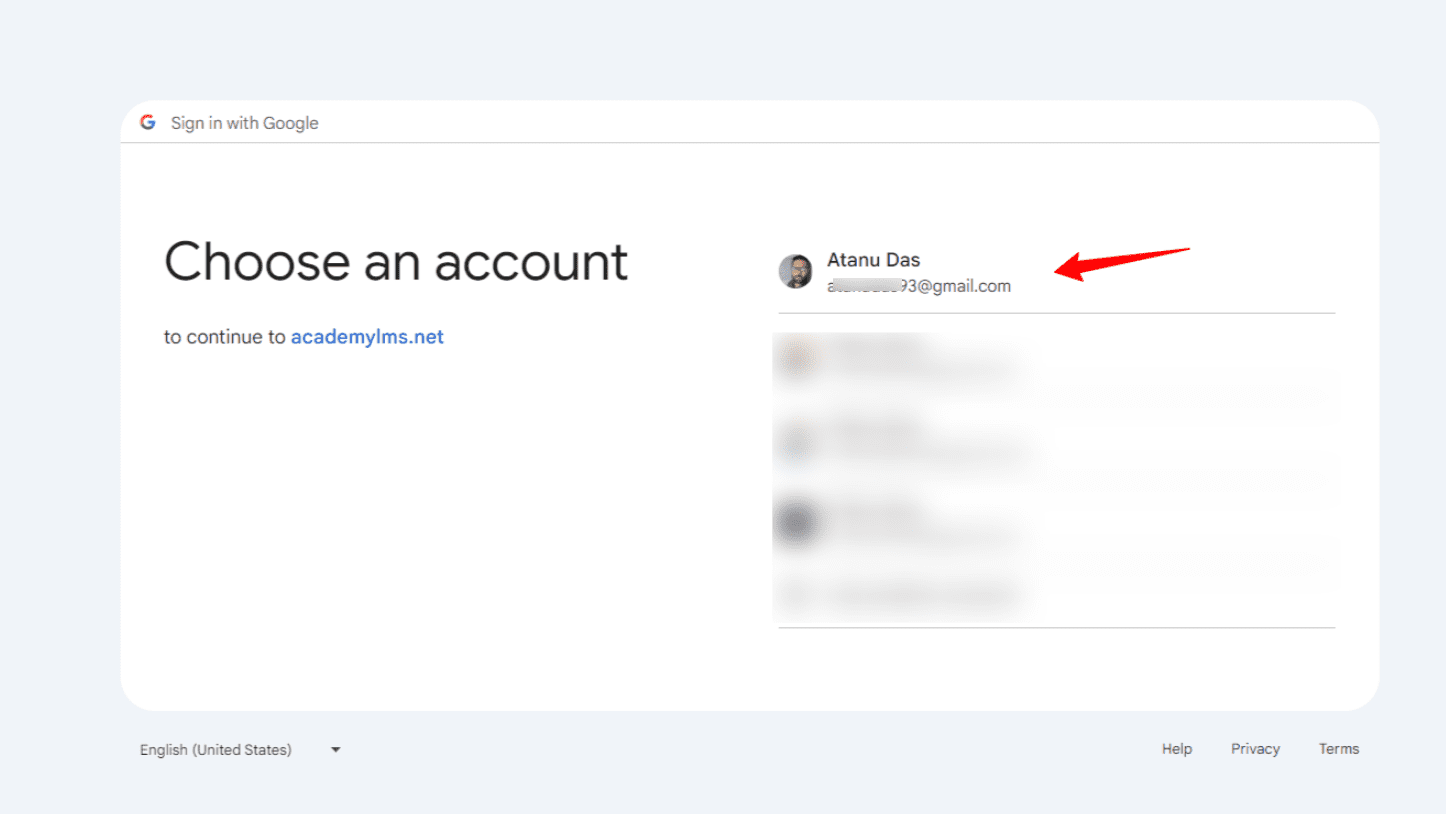
You will be redirected to the Sign in with Google option, where you need to select your email ID to set up Google Classroom.
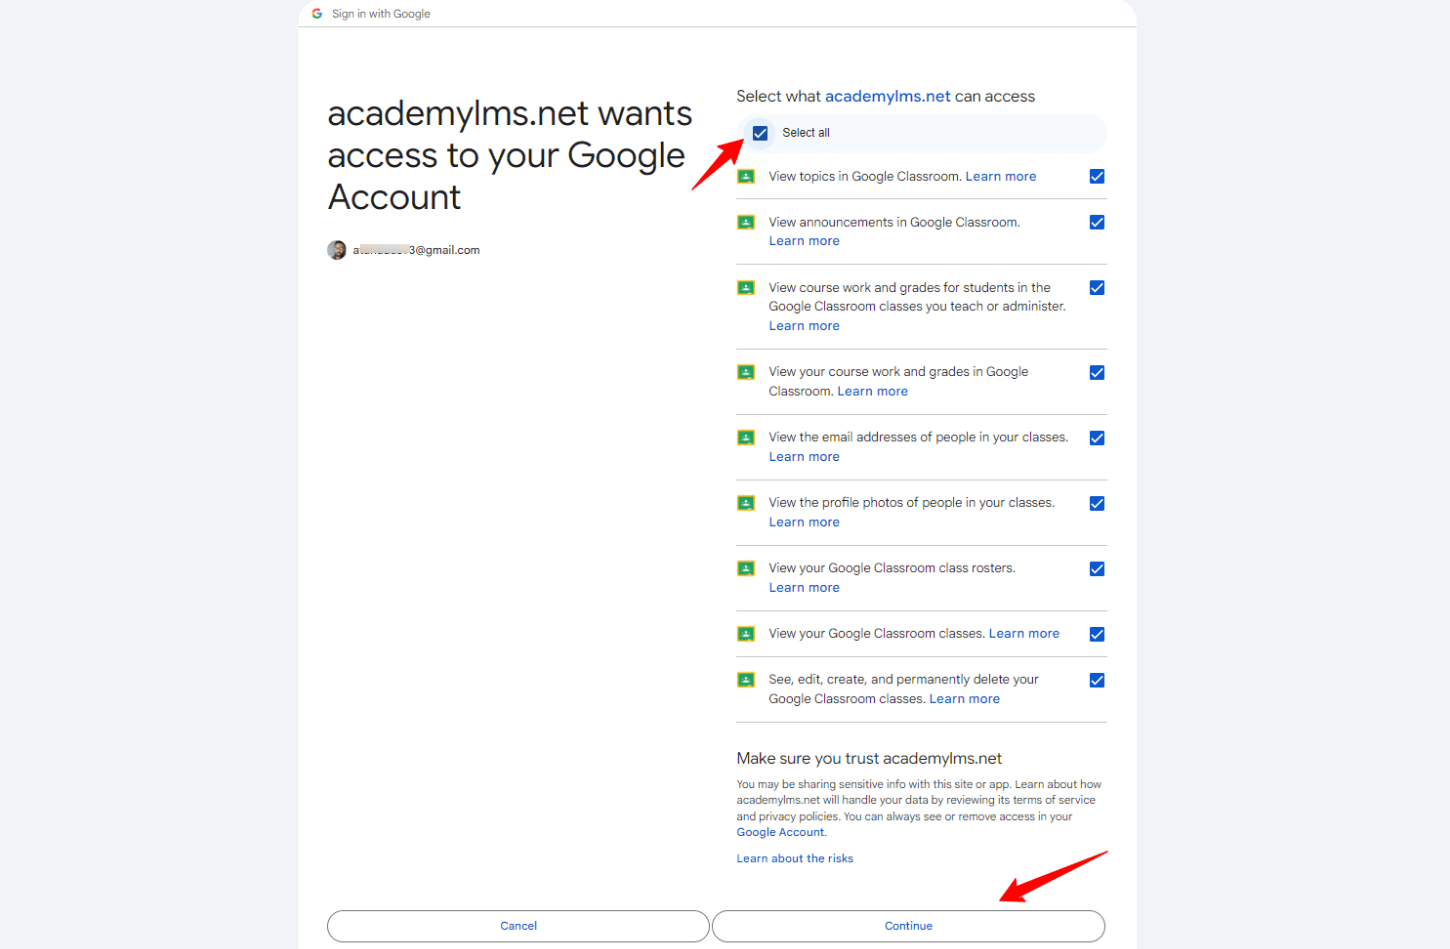
You may now see this message since Google takes time to verify the app. Simply click Advanced and then click the website address below your email address. 
Now, put a tick mark on Select All so that your website can access your Google Classroom data. Then click Continue.
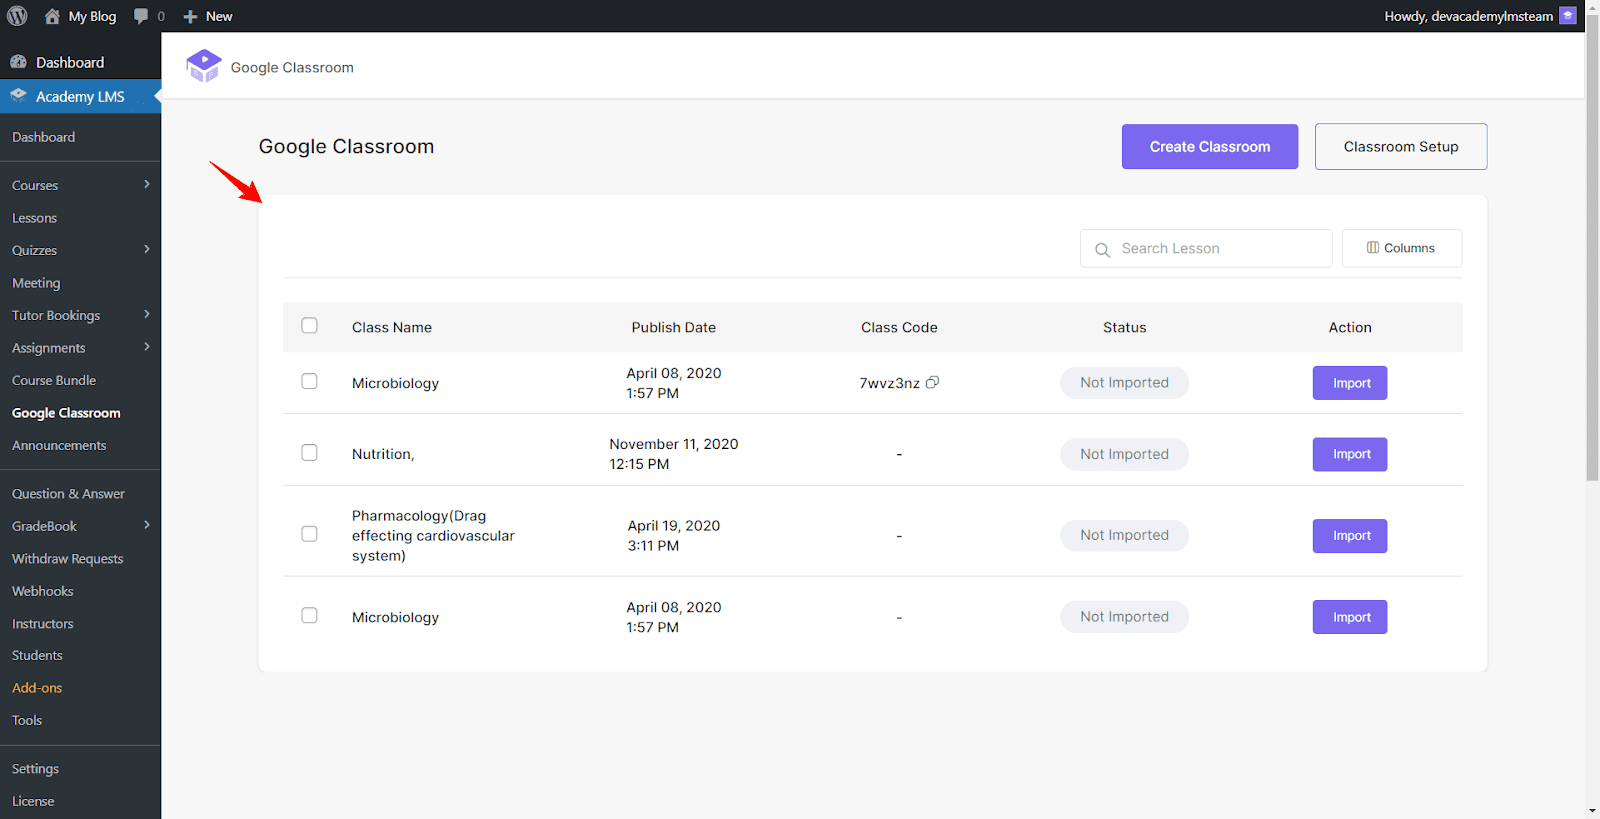
You will now be redirected to your website, where you can see all the classes in your Google Classroom that are available within the Academy LMS.
Using Google Classroom with Academy LMS
At this stage, you’ve successfully synced Google Classroom with Academy LMS. Now, let’s explore the options available in Google Classroom.
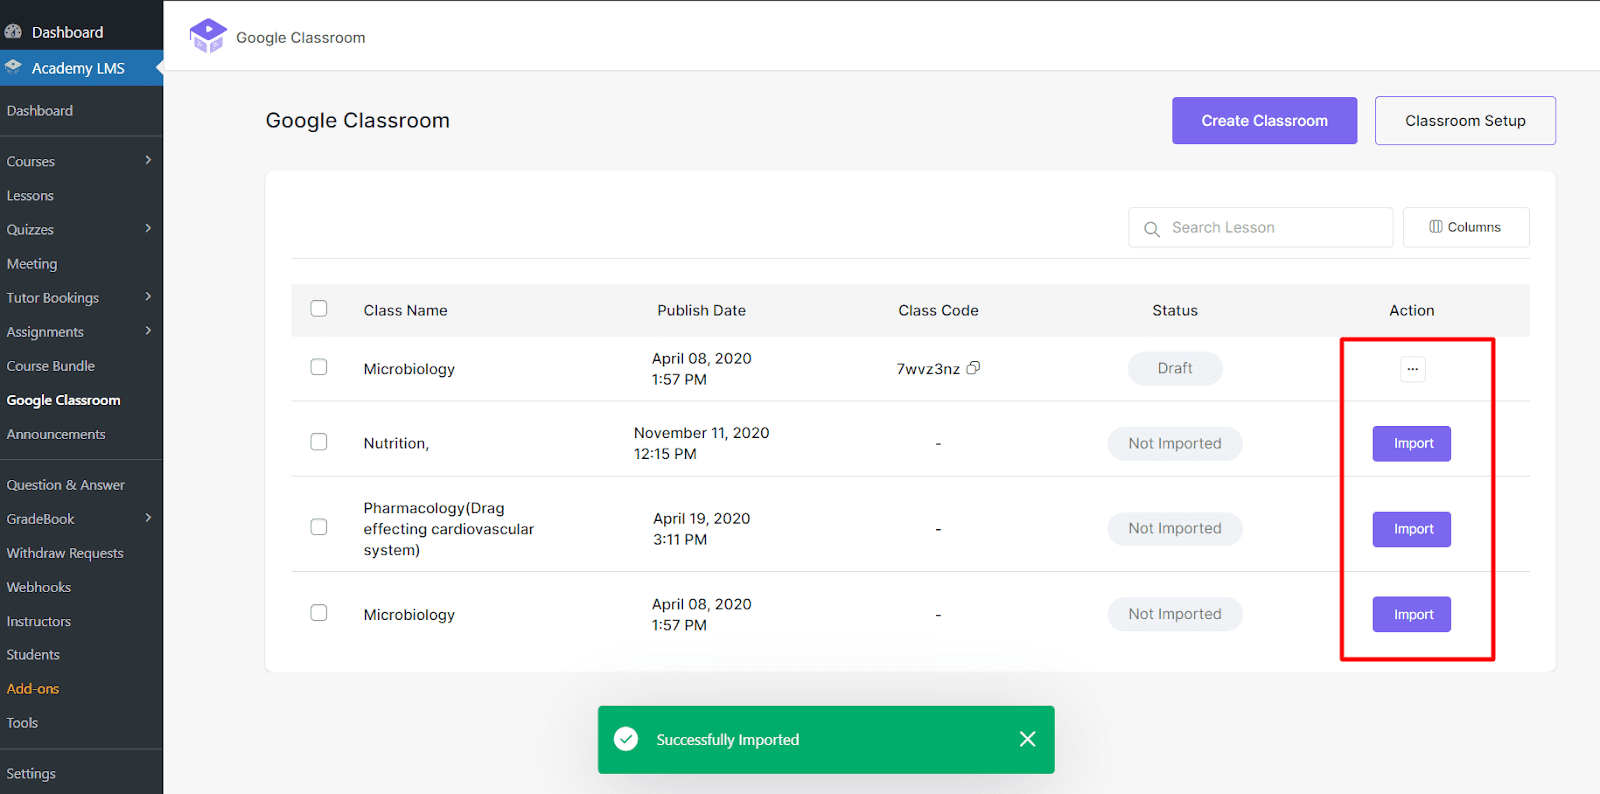
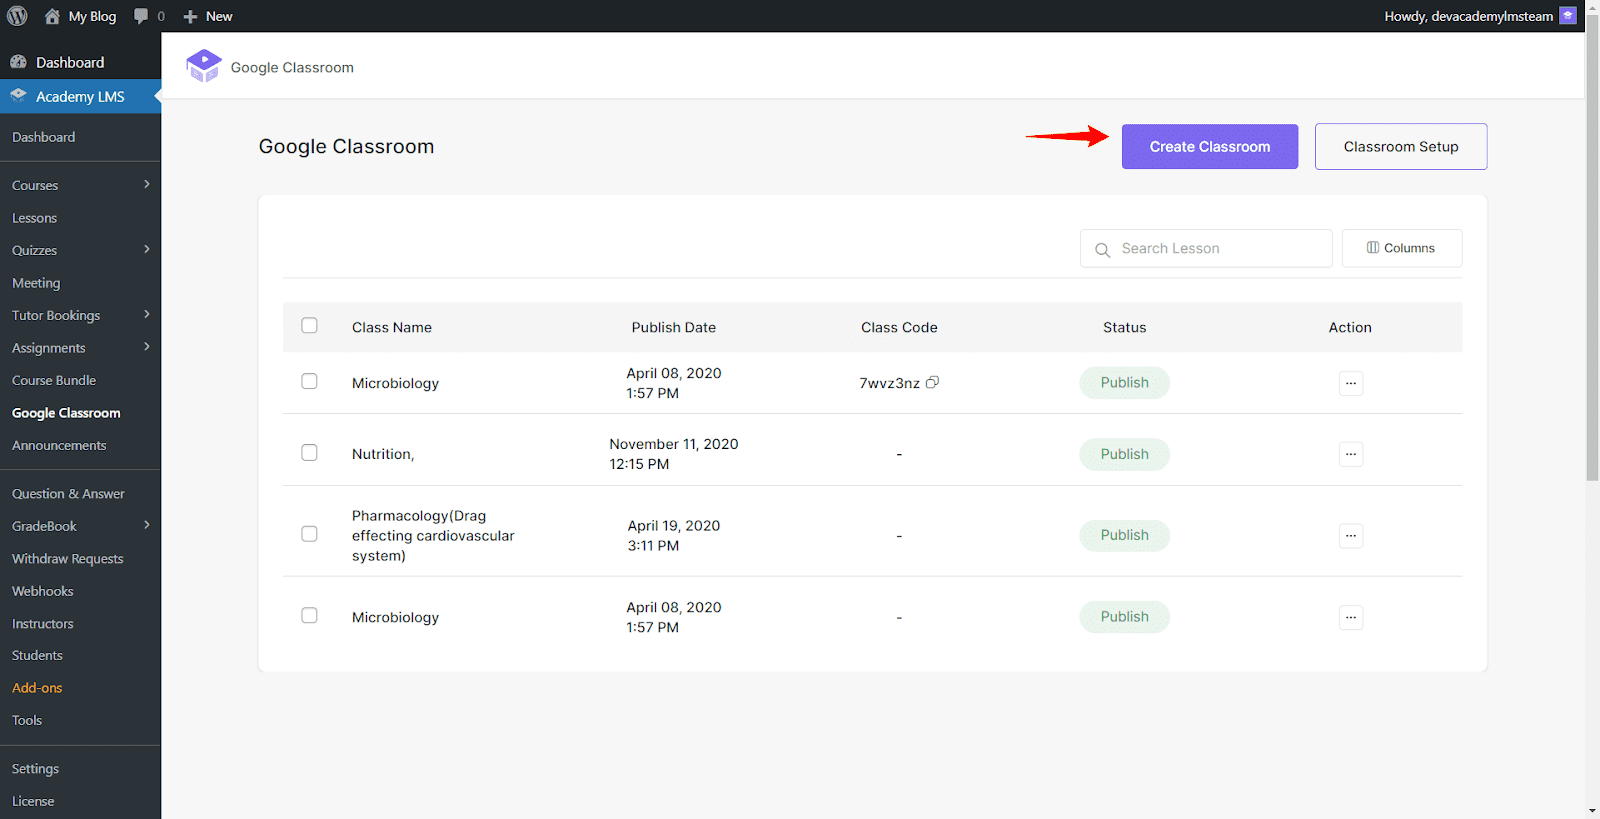
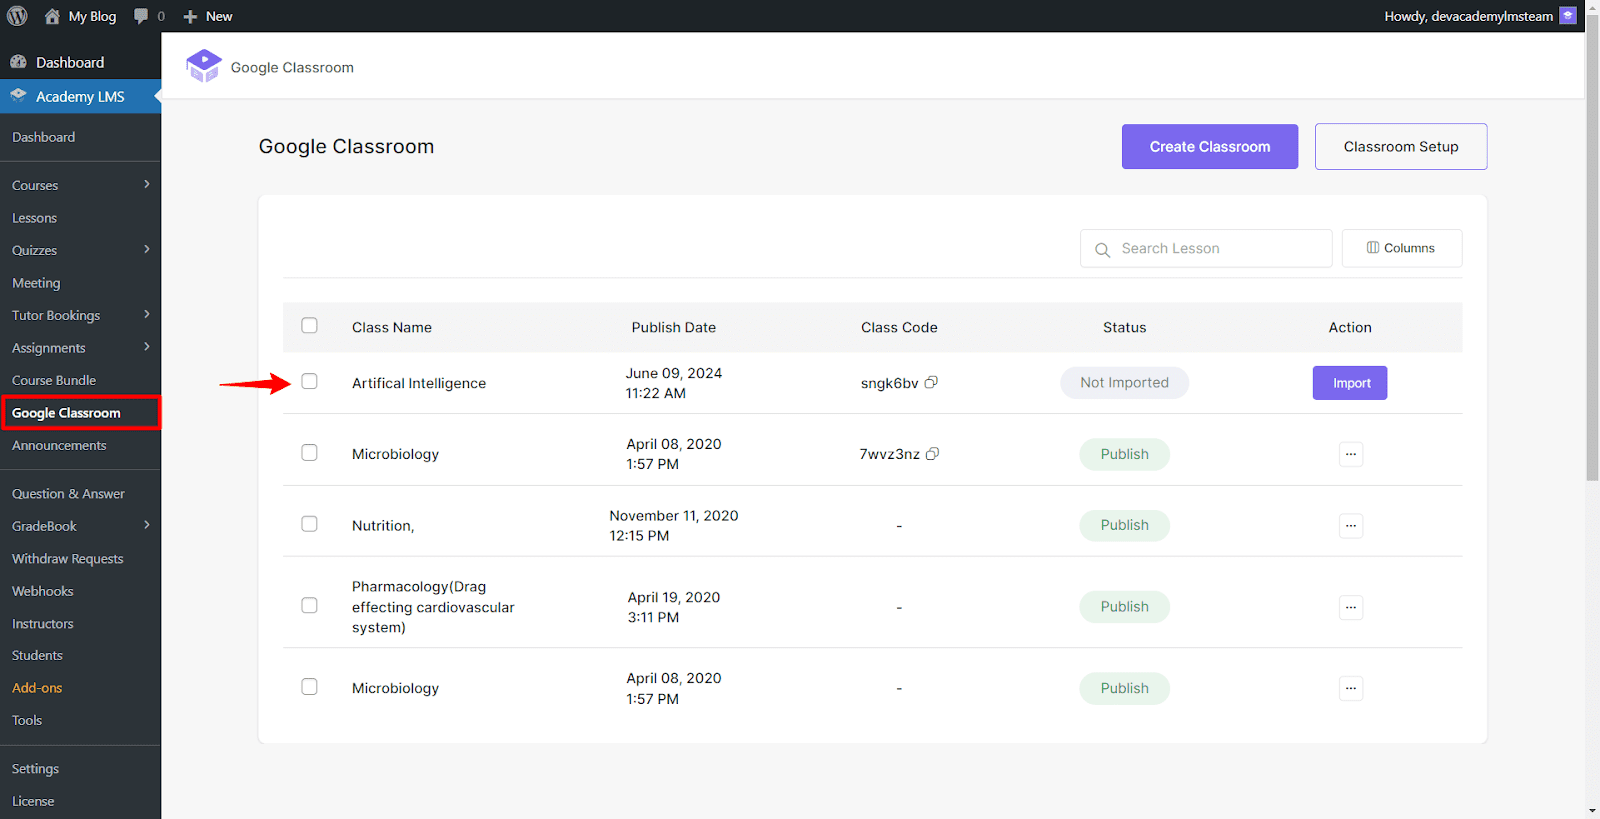
Import Classes
If you click the Import button, the class will be imported to Academy LMS, and you will receive a notification that it has been successfully imported.
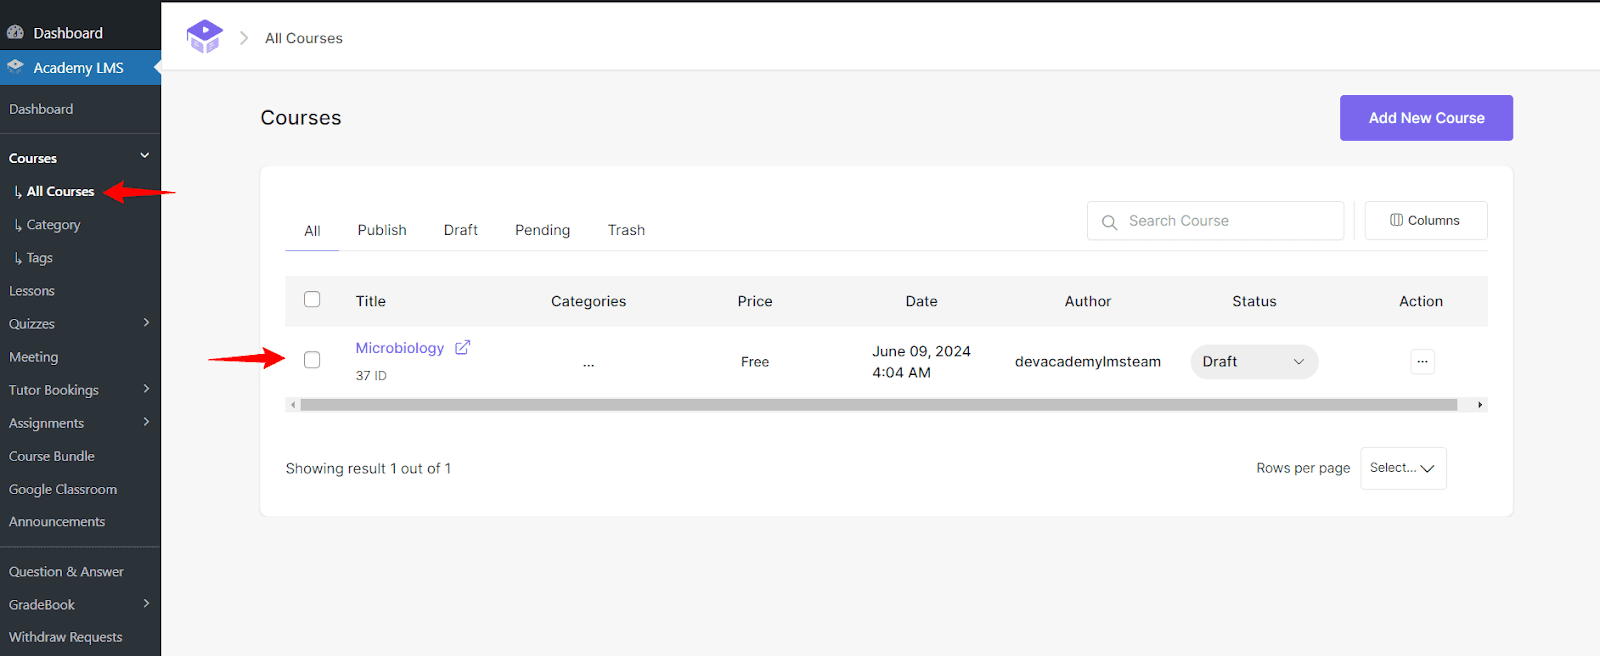
Head back to Academy LMS > Course to view the imported course. As you can see, it is available in the All Courses section.
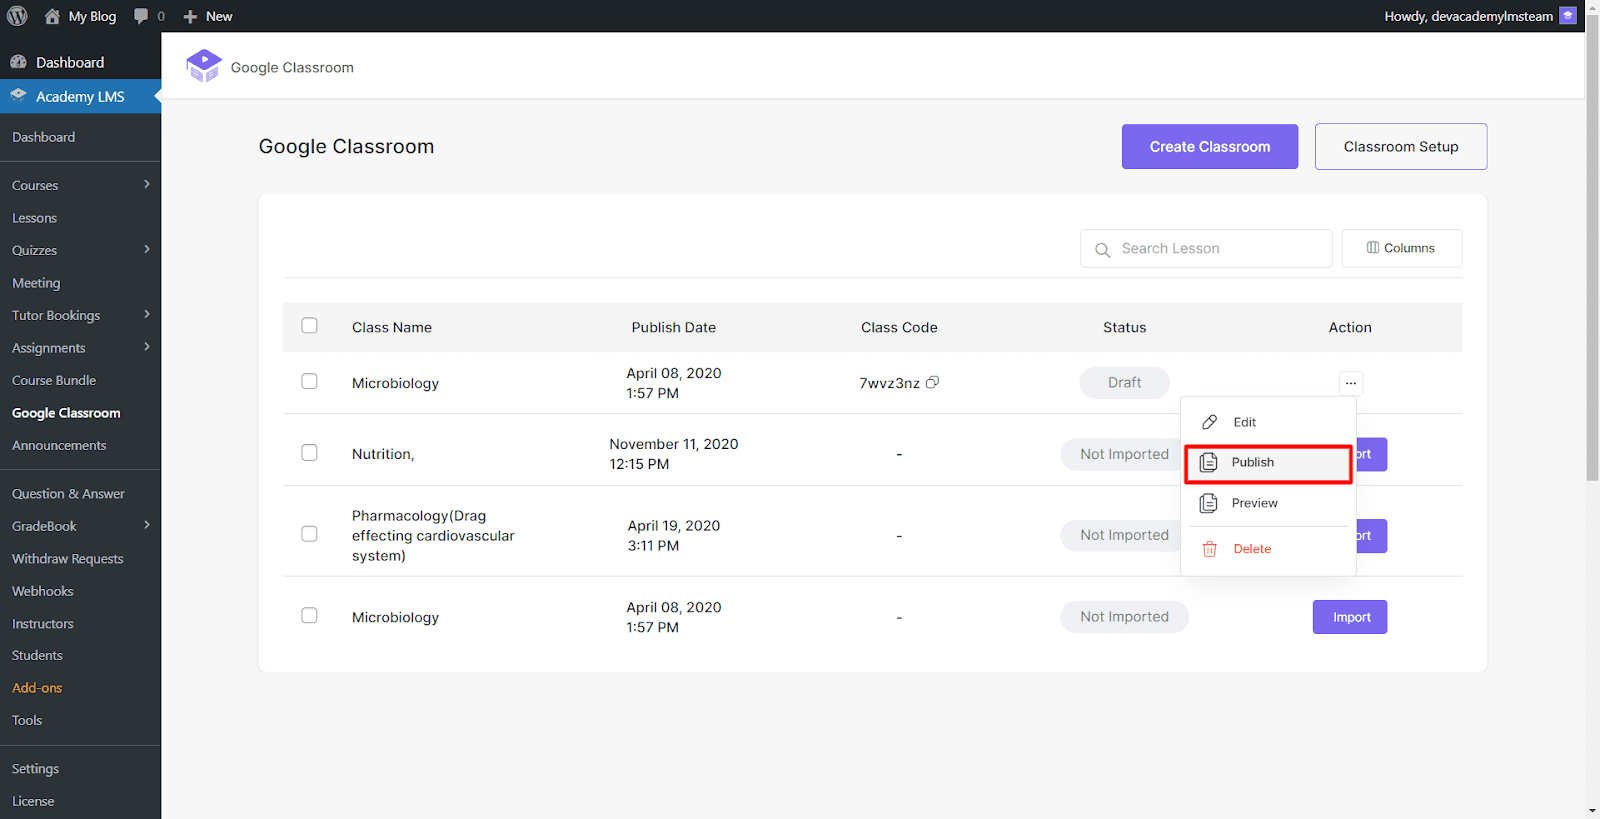
Publish Course
Go to Google Classroom and explore the options related to a course. The imported course status is currently in Draft. To publish the course, click Publish and wait for the success notification.
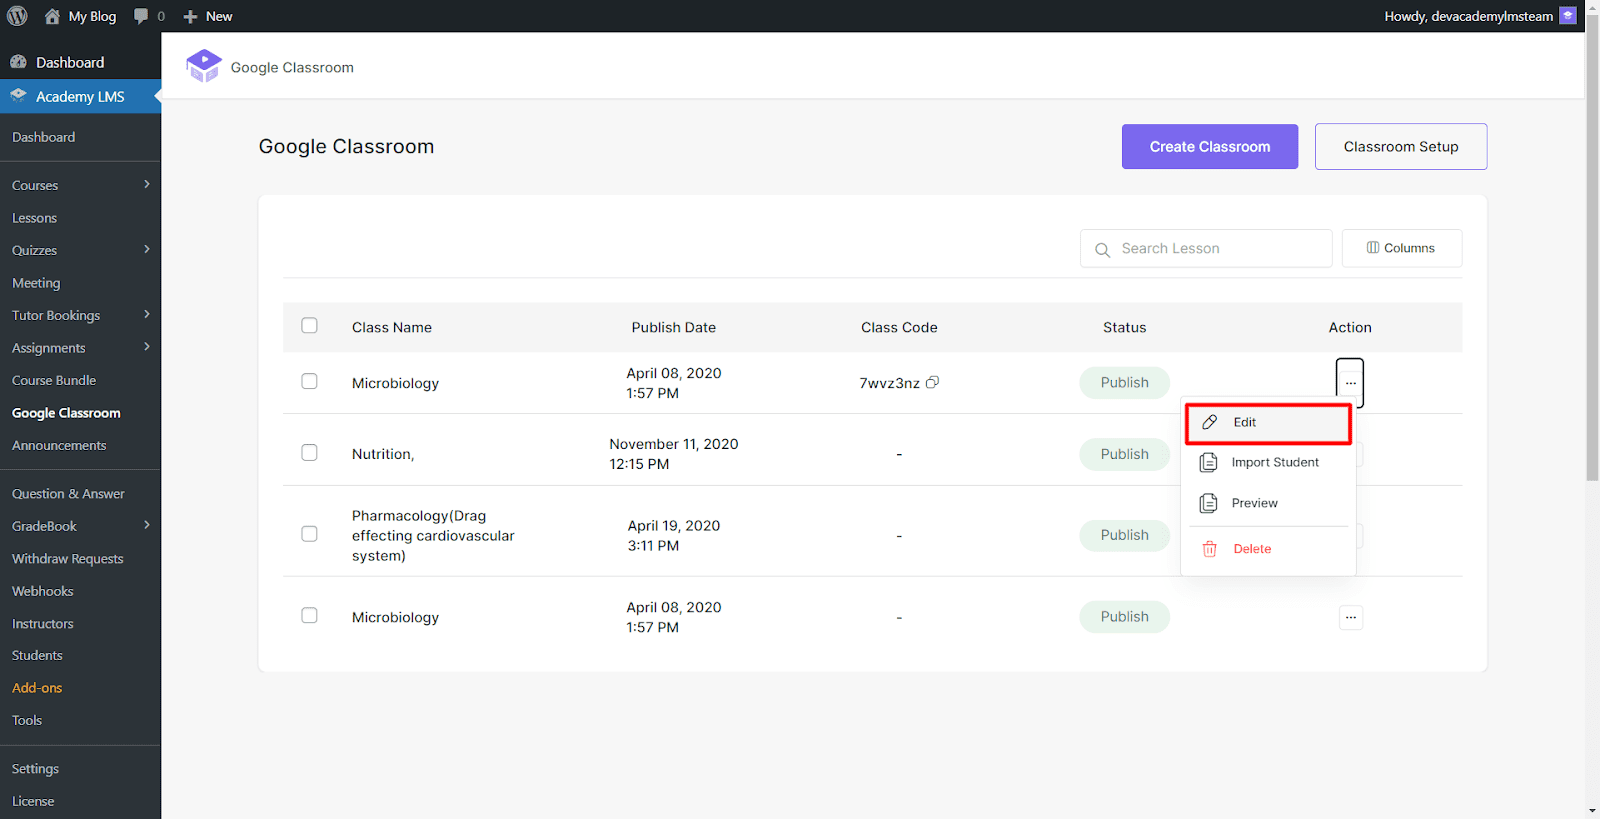
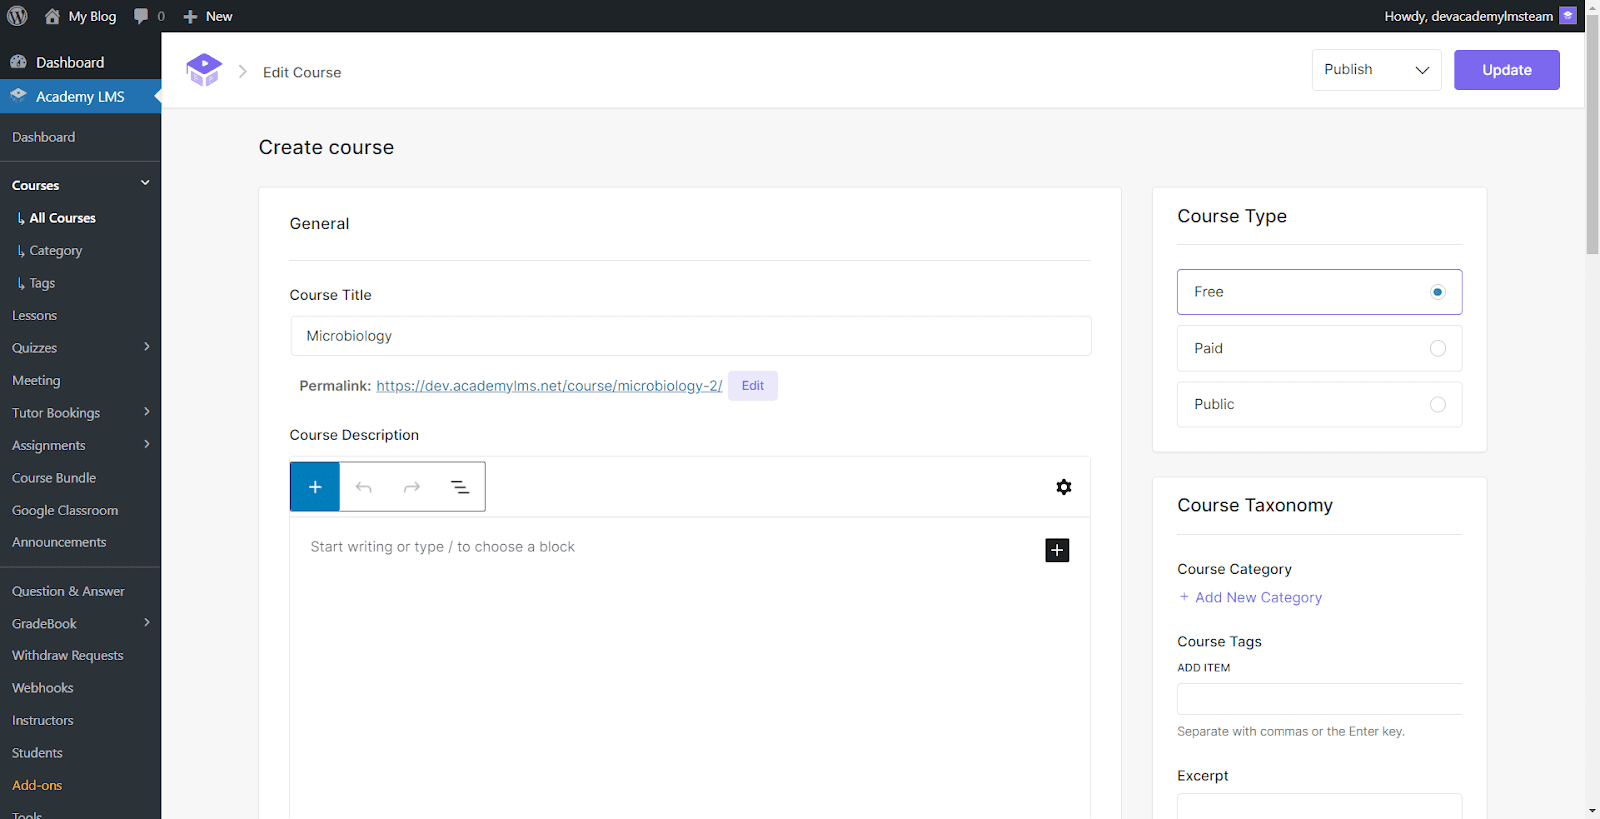
Edit Course
Once published, you can edit the course, Import students, preview the course, and delete it from your courses. Click Edit to view the course details.
You can now view the course in detail and edit it as necessary. When you are done, click the Update button to save your changes.
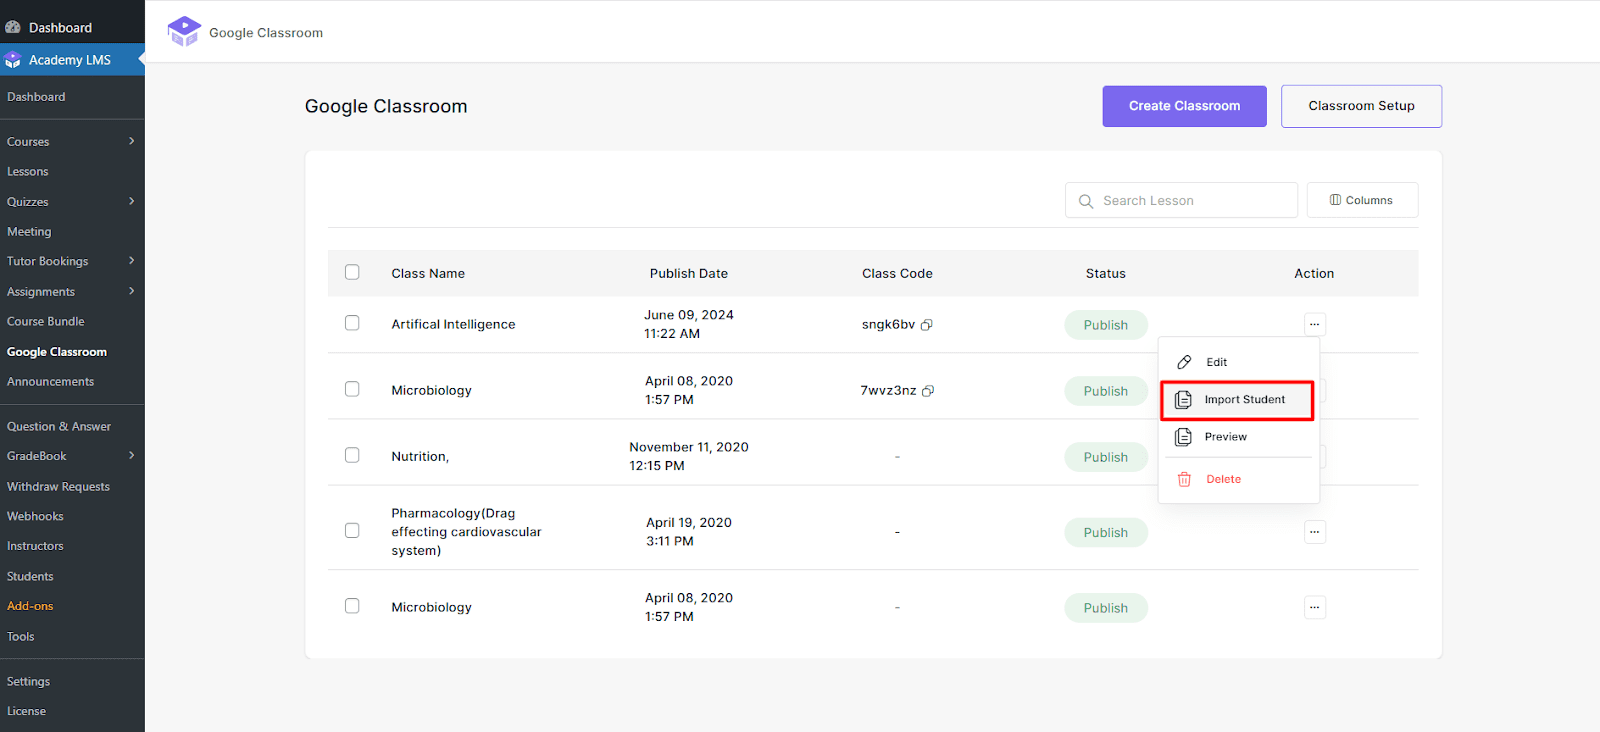
Import Students
Head back to Google Classroom, click on the button below the Action tab, and select the Import Student option. You will get a notification saying Student Data is imported. Your Google Classroom’s student data is imported into your website.
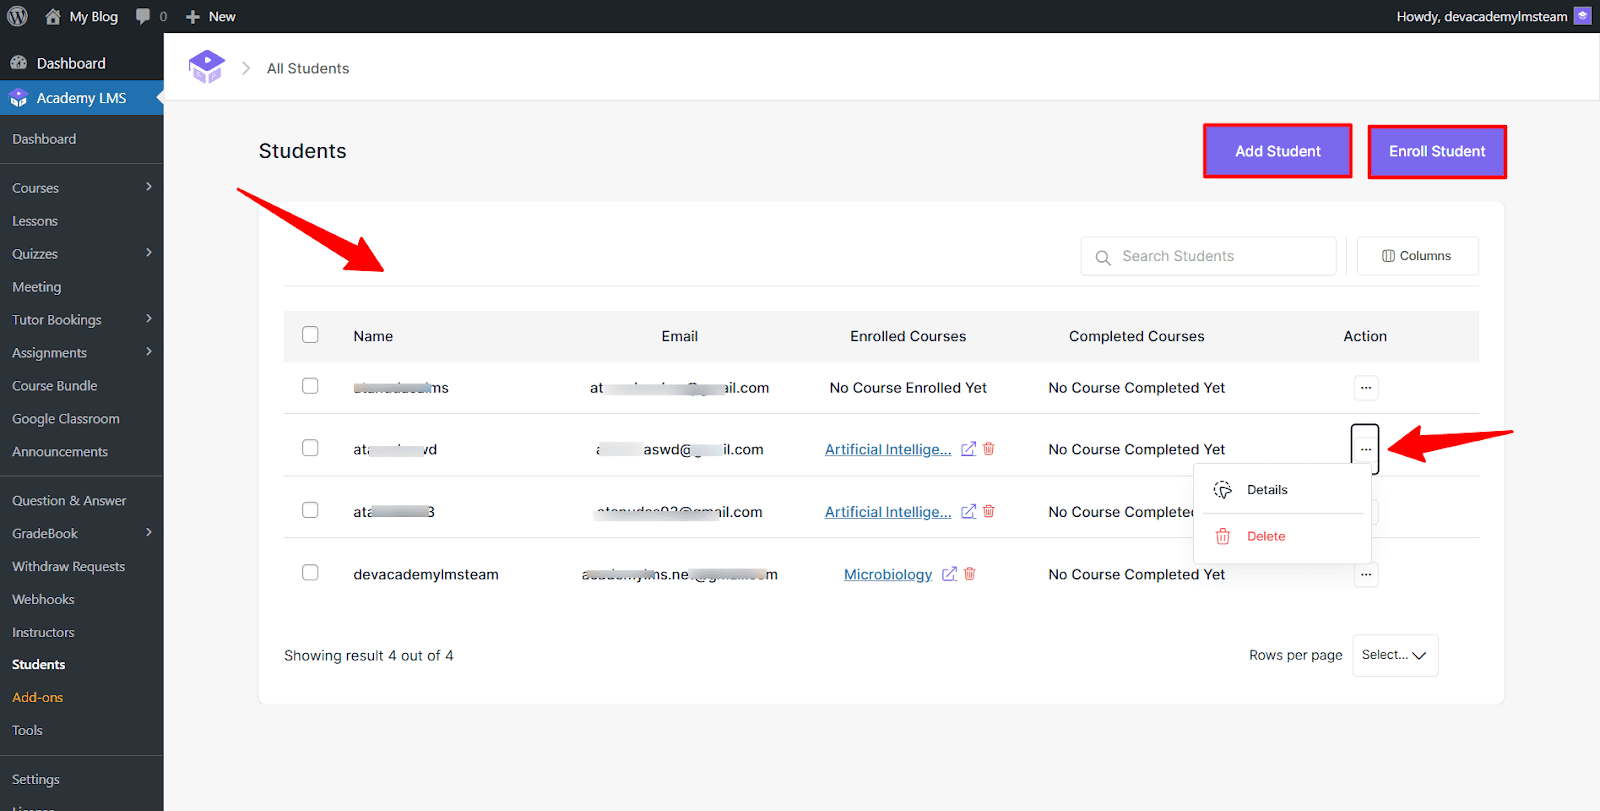
Go to Students to check your imported students. Here, you can see all the imported student information. To view more details about a student, click the button below the action tab and select Details. You can also delete a student’s information, add students, or enroll students in different courses.
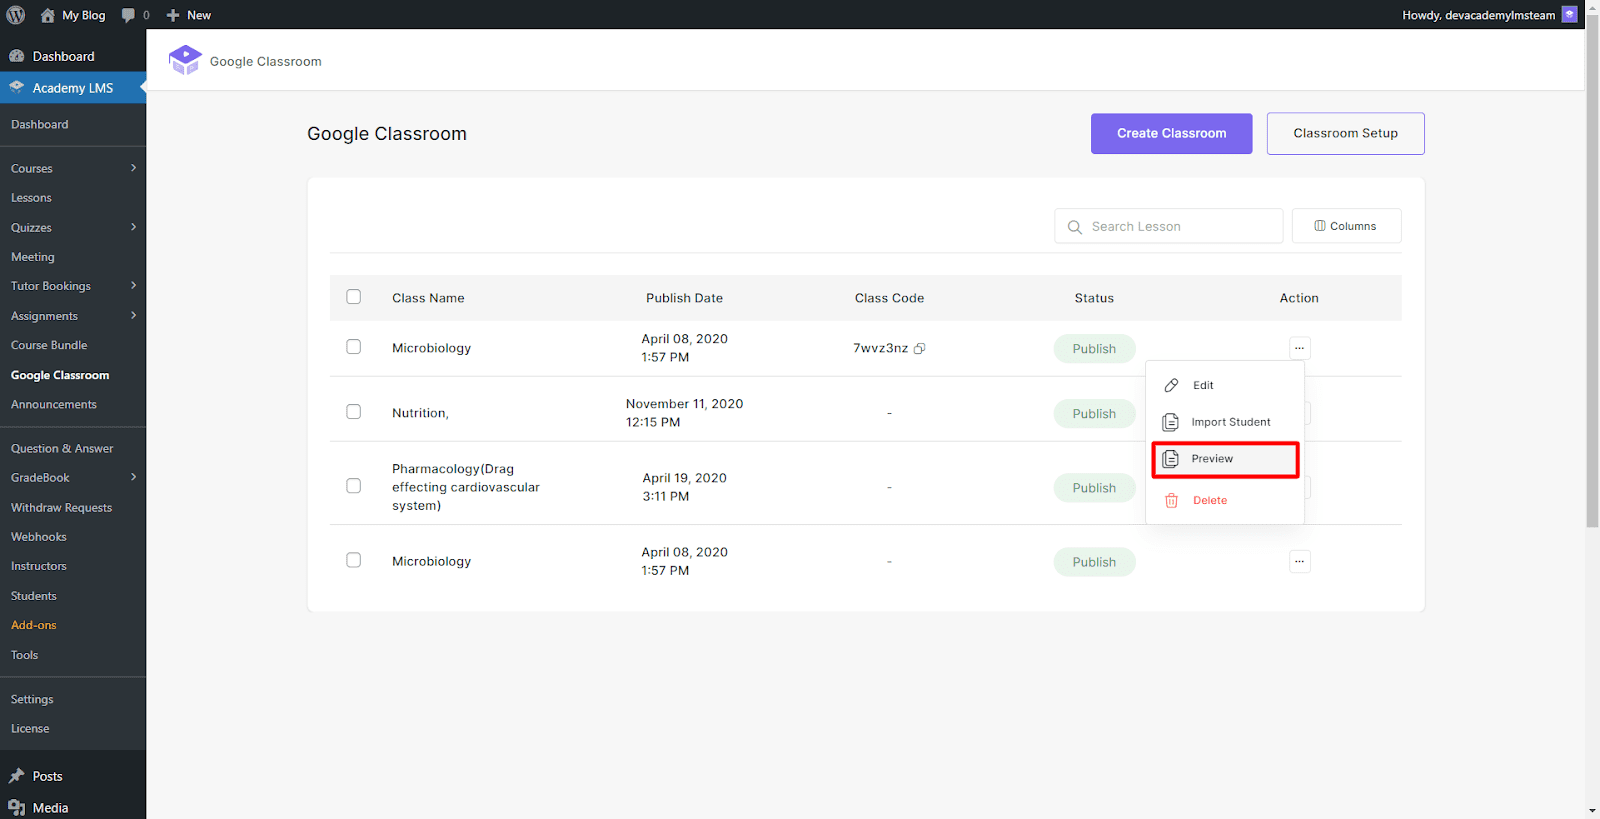
Preview Course
Go back to Google Classroom and click the Preview option to view the course created on your website.
This course preview page will be available at the front end of your website. By clicking Enroll Now, the student will enroll, and the Google Classroom information will be available here.
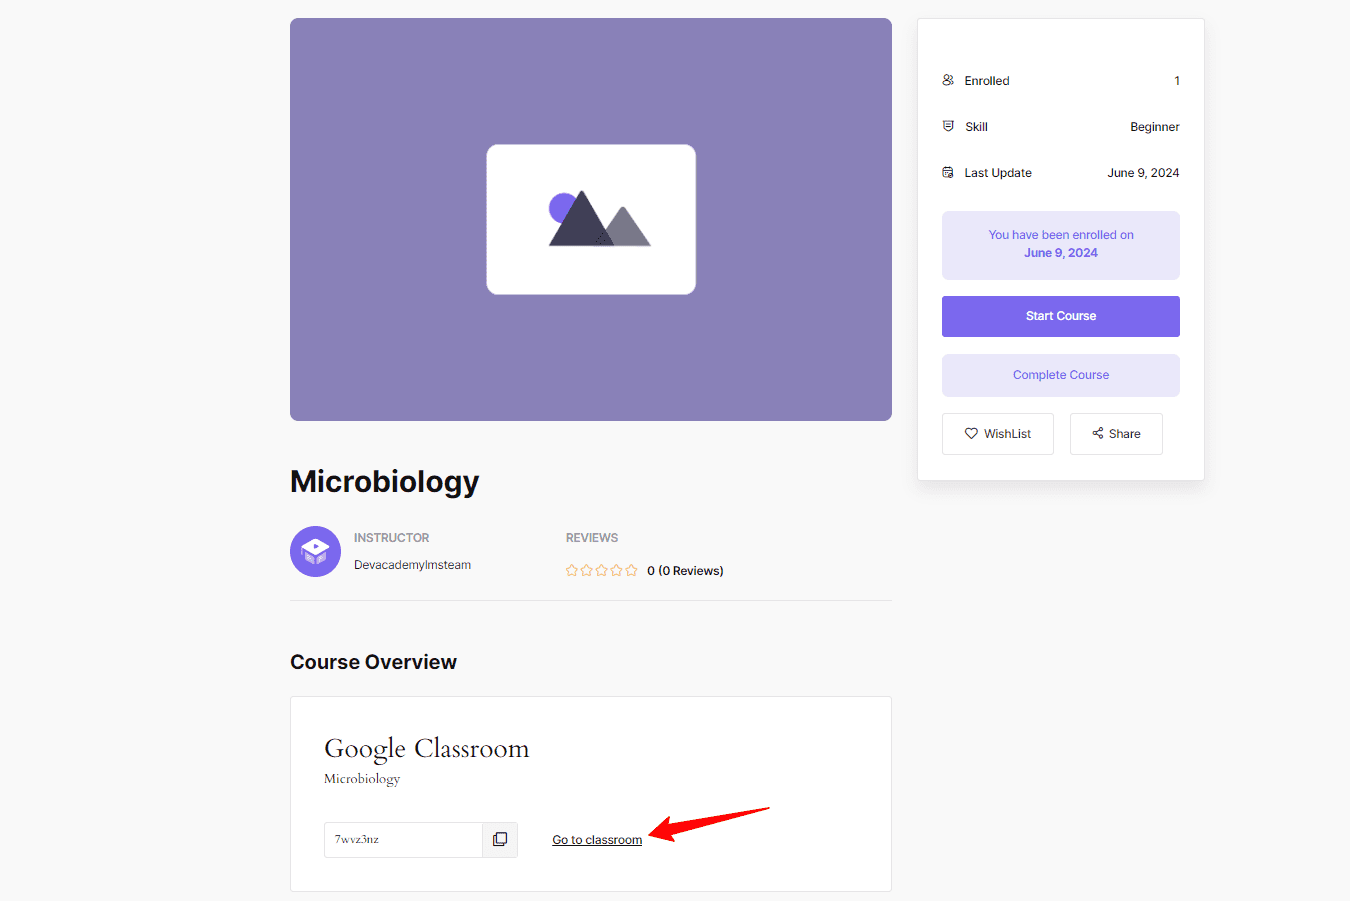
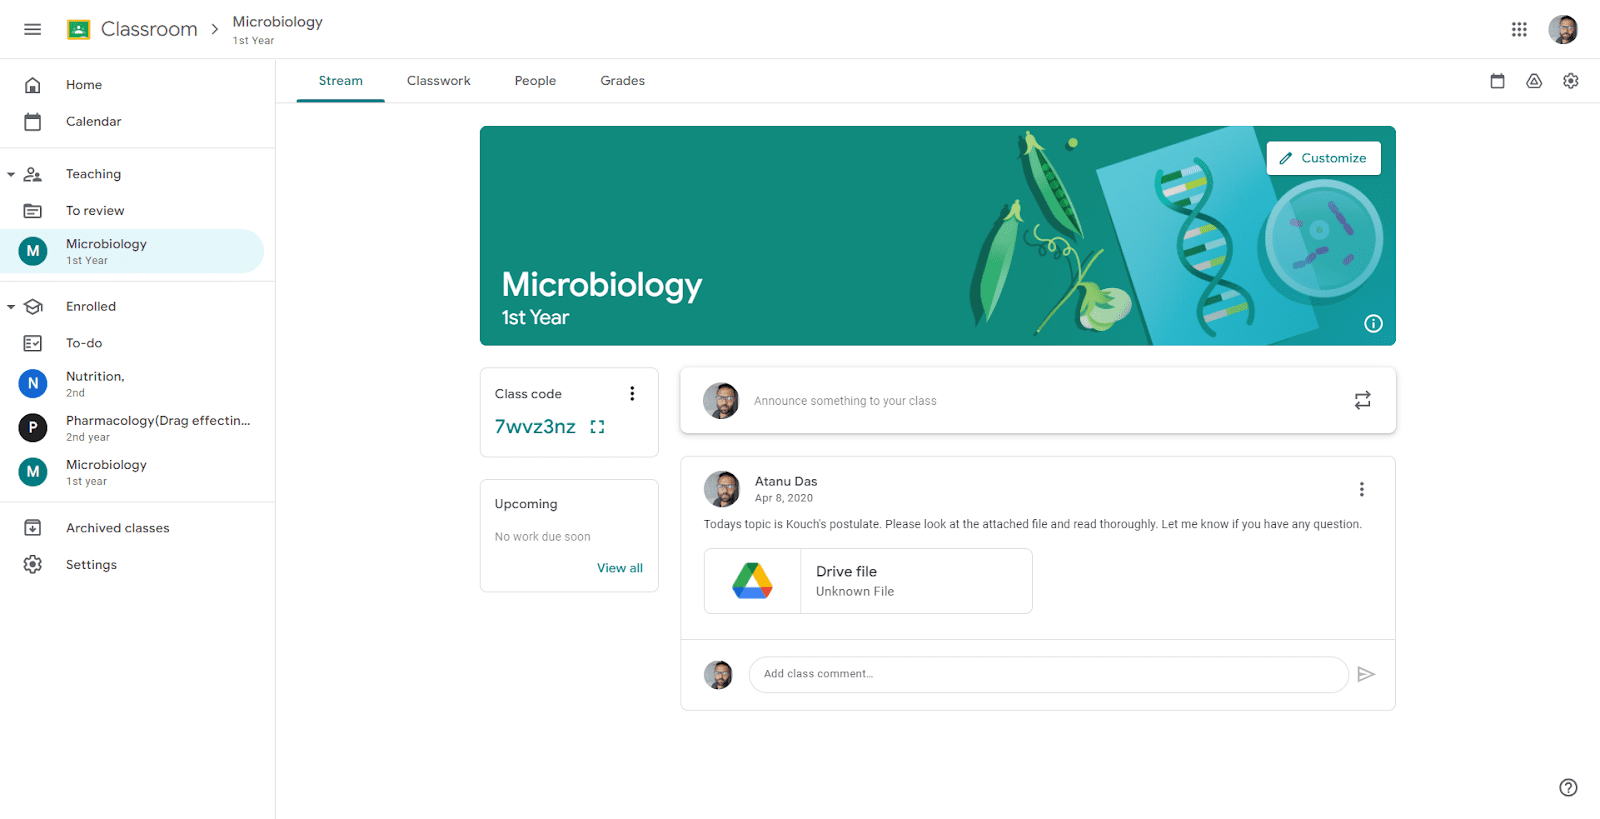
Students can directly get into their Google Classroom by clicking Go to Classroom.
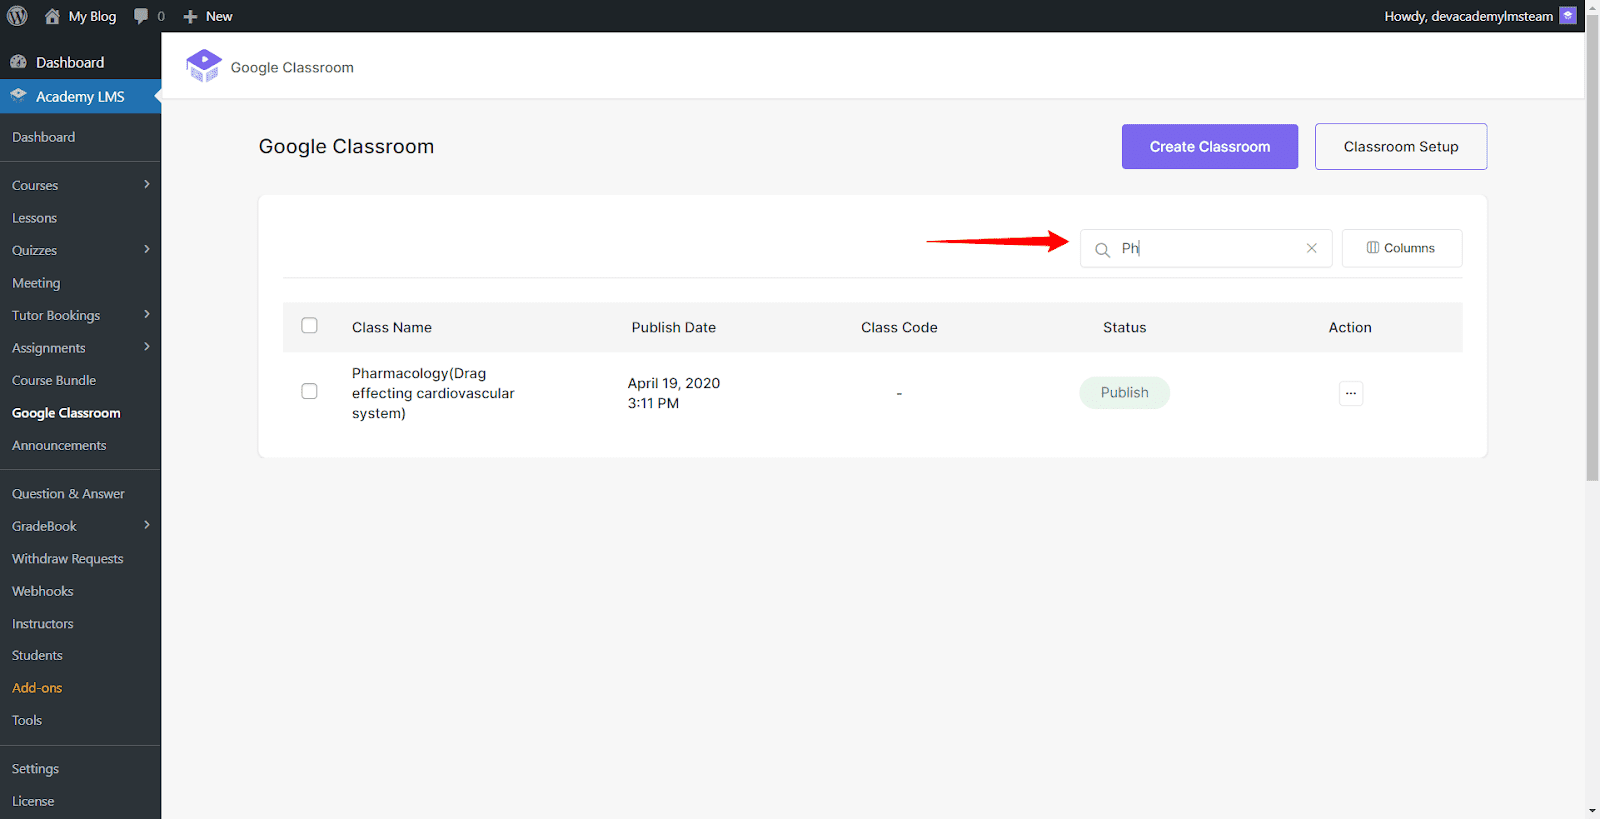
Search Courses
Again, head back to your Google Classroom and use the search option to find your preferred course. As you can see, it can filter out the course you are looking for.
Create a Classroom
Surprisingly, the Google Classroom Add-on lets you create a classroom from your website and take classes directly there. From Google Classroom, click the Create Classroom button.
Now, provide all the necessary information regarding your classroom and click Create.

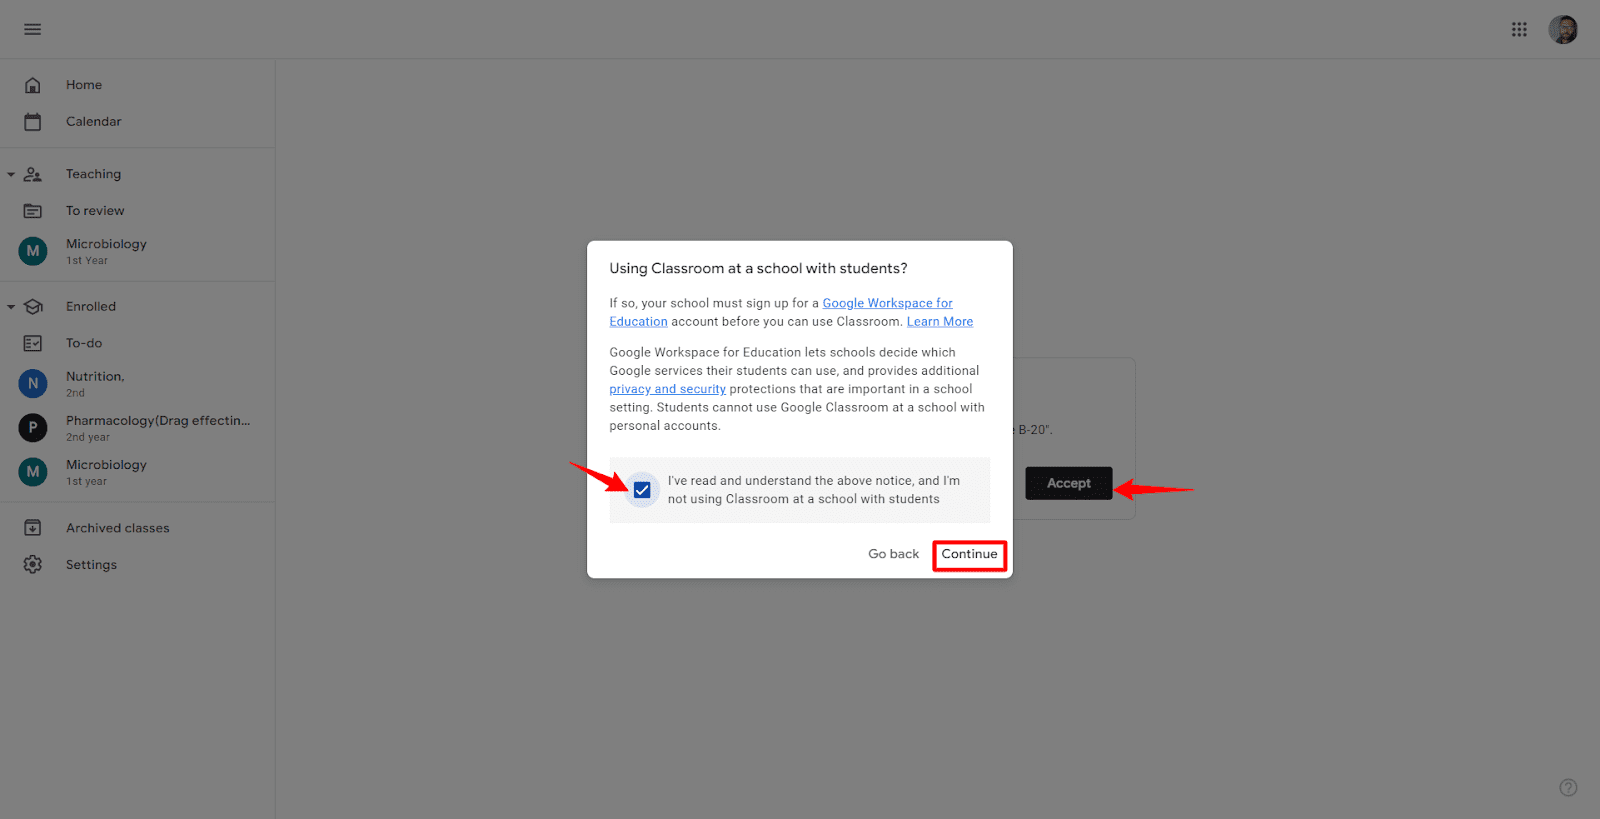
You will now be redirected to Google Classroom, where you need to click Accept. Then, you will be prompted with a window where you need to put a tickmark and click Continue.
As you can see, the classroom is available at Google Classroom with all the details that you provided earlier.

Head back to your website and click Google Classroom. The classroom you created is also available there within the Academy LMS.
That is how the Google Classroom add-on works with Academy LMS. You can improve the eLearning experience with live classes, sessions, and more!