


Academy LMS, the most growing LMS plugin for WordPress now integrates with FluentCRM. FluentCRM is another popular CRM and marketing automation plugin for WordPress. This integration lets you streamline customer relationship management and enhance communication with your course users.
It’s an Academy LMS pro feature. Now let’s show you how to use FluentCRM with ACademy LMS.
Step 1: Install And Activate the FluentCRM free and pro plugin. This is necessary for using Academy LMS FluentCRM integration.
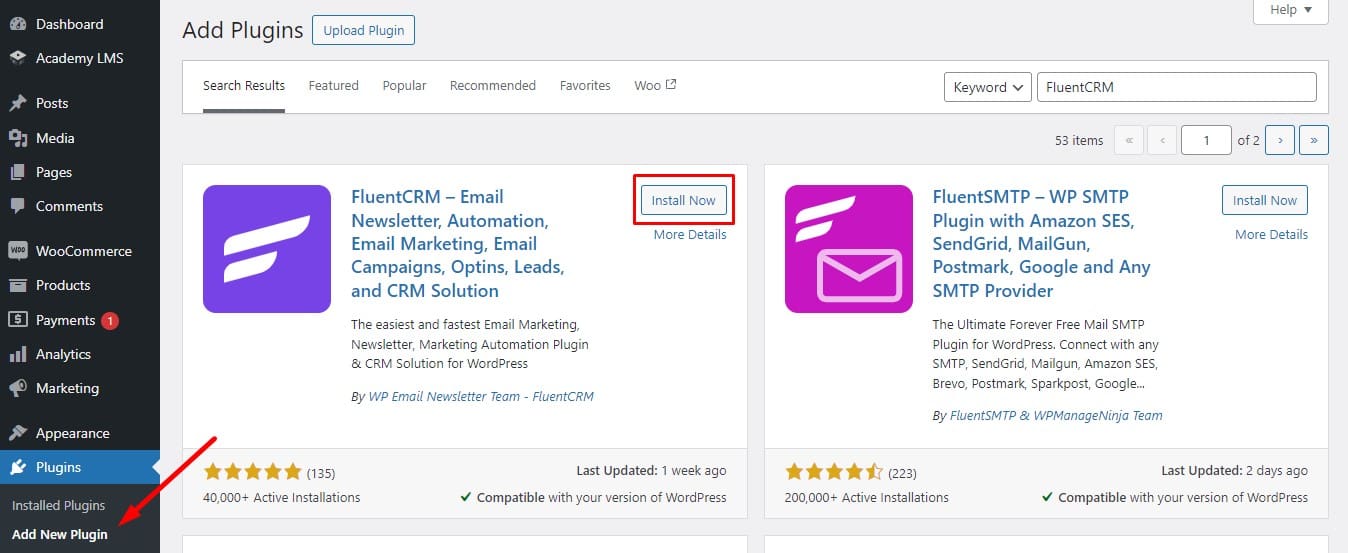
Step 2: Now Enable FluentCRM Addon.

Go to Academy LMS > Add-ons menu. Here you’ll find all the available add-ons. Look for the FluentCRM Addon and enable it using the toggle.
What Features FluentCRM With Academy LMS Offers?
Let’s explore the integration features one by one of Academy LMS with FluentCRM.
Use For Lead Generation
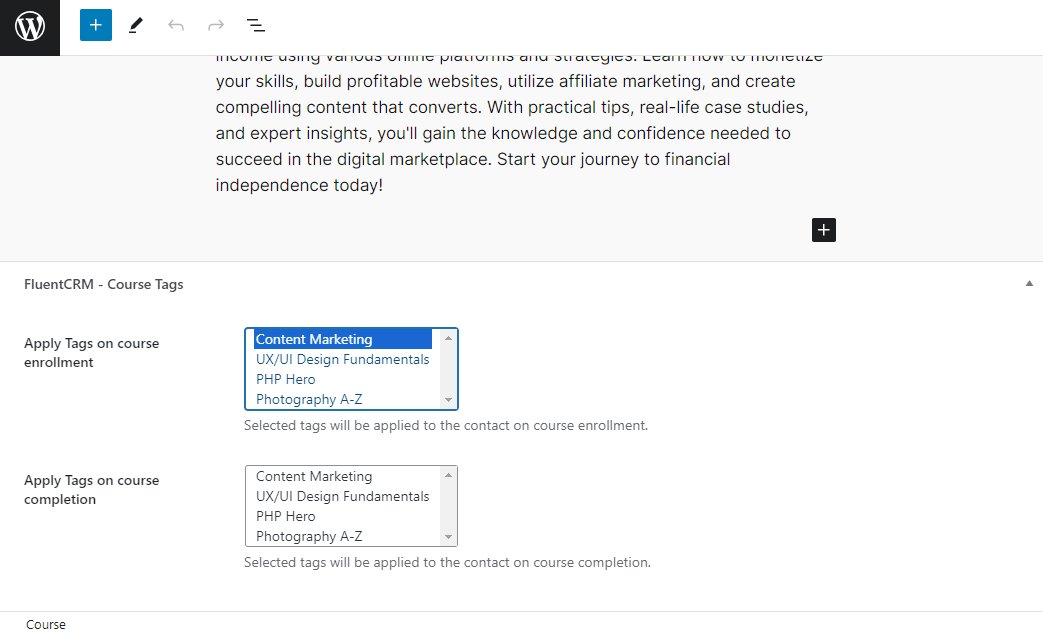
FluentCRM lets you capture your Academy LMS students as leads and lets you tag contacts based on course enrollment and course completion.
To automatically assign tags to users based on their course activity in Academy LMS, follow these steps:
- Edit your desired course: Locate the course you want to manage tags for and open it in edit mode.
- Scroll down to “FluentCRM Course Tags”: Within the course editing options, navigate down the page until you find a section labeled “FluentCRM Course Tags” or something similar.
- Select tags for enrollment and completion: This section will likely have options to choose tags you want to apply to users when they enroll in the course and when they complete the course. Select the appropriate tags for each action.
Marketing Automation
FluentCRM empowers you to automate various email marketing tasks, saving you time and effort. Here’s a breakdown of its key elements:
1. Triggers: The Spark That Starts It All:
Triggers are the foundation of any automation. They act as the starting point, initiating the automation sequence based on user behavior (e.g., signing up for a newsletter) or specific timeframes (e.g., a welcome email after registration).
2. Action Blocks: Taking Automated Action:
These blocks define the actions that unfold within your automation funnel. Examples include sending personalized emails, adding users to specific lists, or updating contact information based on their actions.
3. Benchmarks: Tracking User Behavior:
Benchmarks allow you to evaluate user behavior within your automation. You can track whether they performed specific actions, such as purchasing a product or clicking on a link in your email.
4. Conditionals: Branching Out Based on Choices:
Conditionals introduce flexibility by enabling you to create branching paths in your automation. You can set conditions (like if/else statements) to determine the next steps based on a user’s actions. This allows for highly personalized experiences.
To create an automation funnel in FluentCRM, navigate to the Automations section within your dashboard and click the “Create a New Automation” button.

We will see all the automation options. Now, navigate to the automation section called Academy LMS.
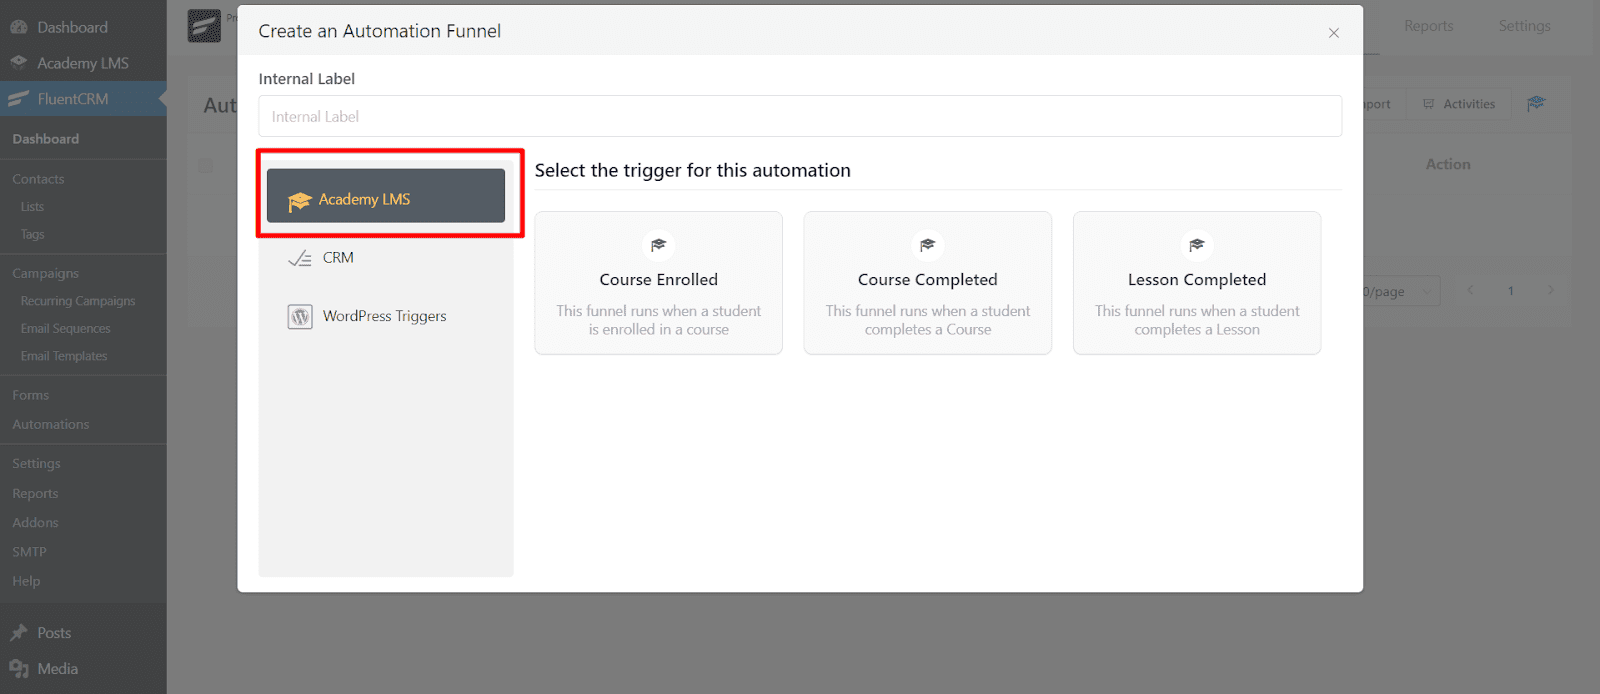
First you see the option Internal Label. Here, you can enter a name for this automation funnel. This label is for internal use to identify the funnel easily. This field is a must to fill.
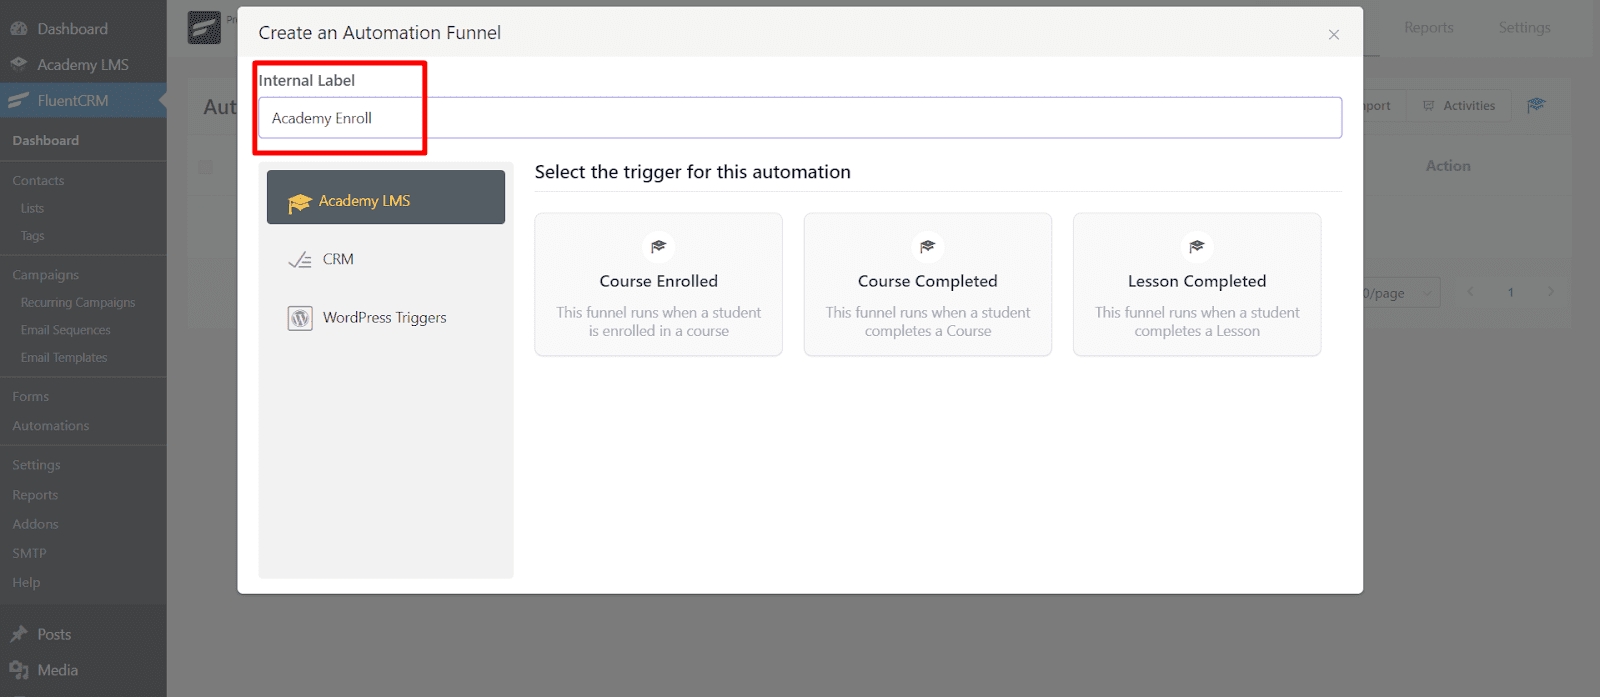
Now, you will see 3 different options for triggering automation. Which are:
- Course Enroll: Choose Course Enrolled trigger if you want the automation to start when a student enrolls in a course.
- Course Completed: Choose Lesson Completed trigger if you want the automation to start when a student completes a course.
- Lessons Completed: Choose this trigger if you want the automation to start when a student completes a lesson.

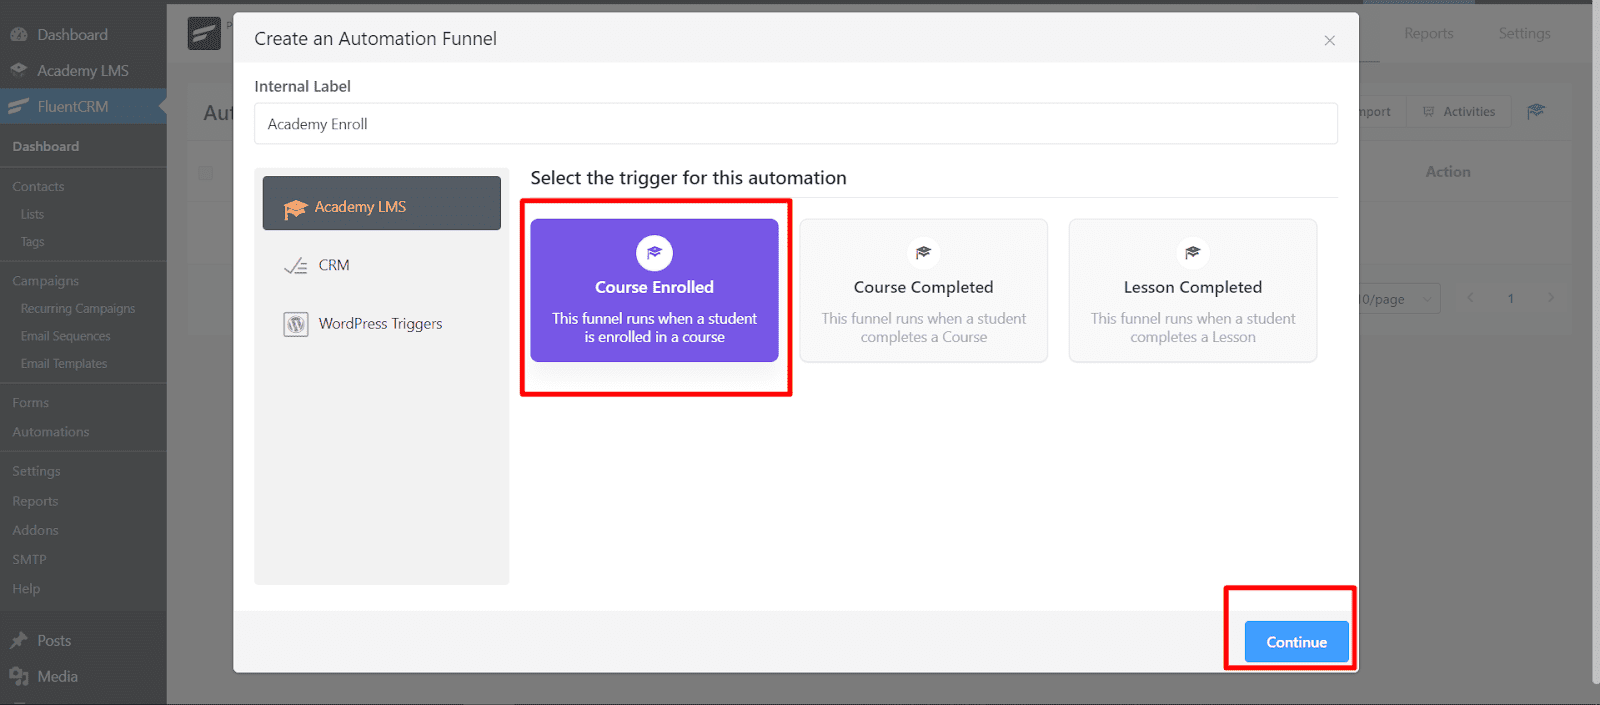
The settings are similar for each so I’m going to show you only one: “Course Enroll.” Select it and press continue.
You’ll now see some basic fields to fill up: Automation Name, Internal Description, Subscription Status.

In the Conditions section, you’ll see the option to choose “If Contact Already Exist?“ You can choose between: “Update if Exist” and “Skip this automation if contact already exist”.
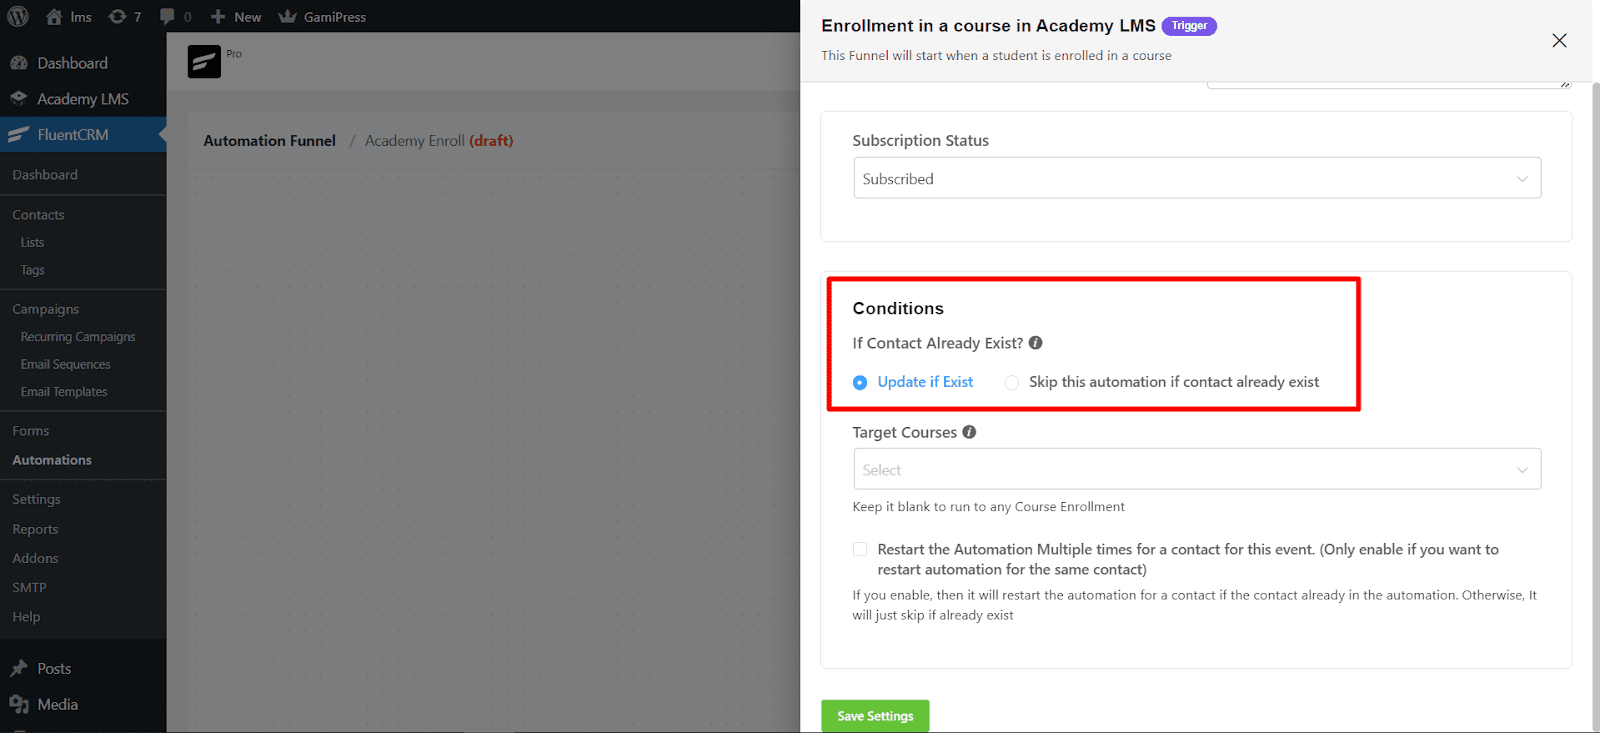
Then, you have to select “Target Courses.” Here you can choose the courses you created with Academy LMS. even you can select multiple if you want.

If you want to Restart the Automation Multiple times, you can do so by ticking this checkbox. Then just press “Save Settings.”

Now, click the “+” icon to add actions/goal or conditional action.
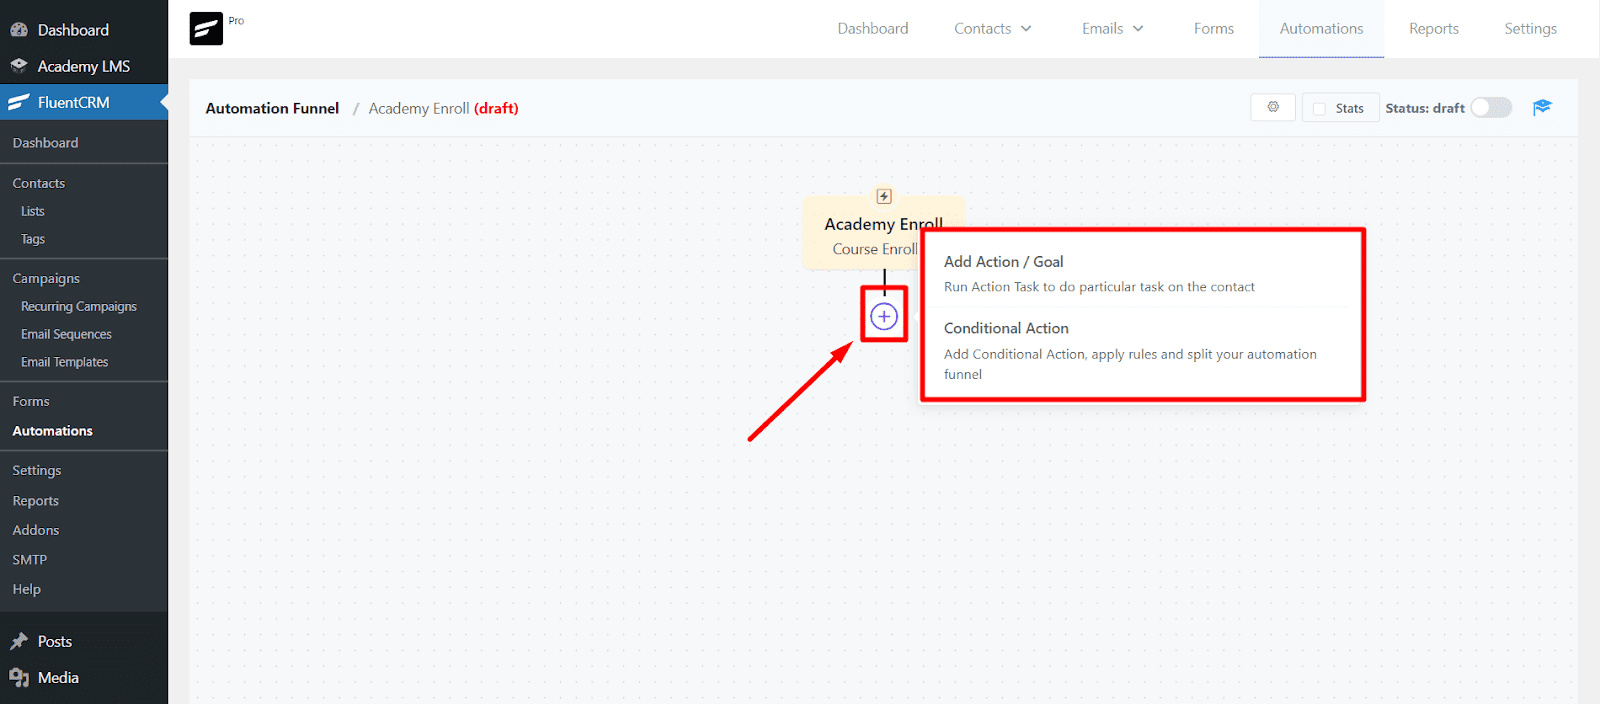
In the Action tab you’ll see Action Blocks to choose from. Scroll down and you’ll see Academy LMS. Currently it provides two options:
- Enroll To Course
- Remove From a Course
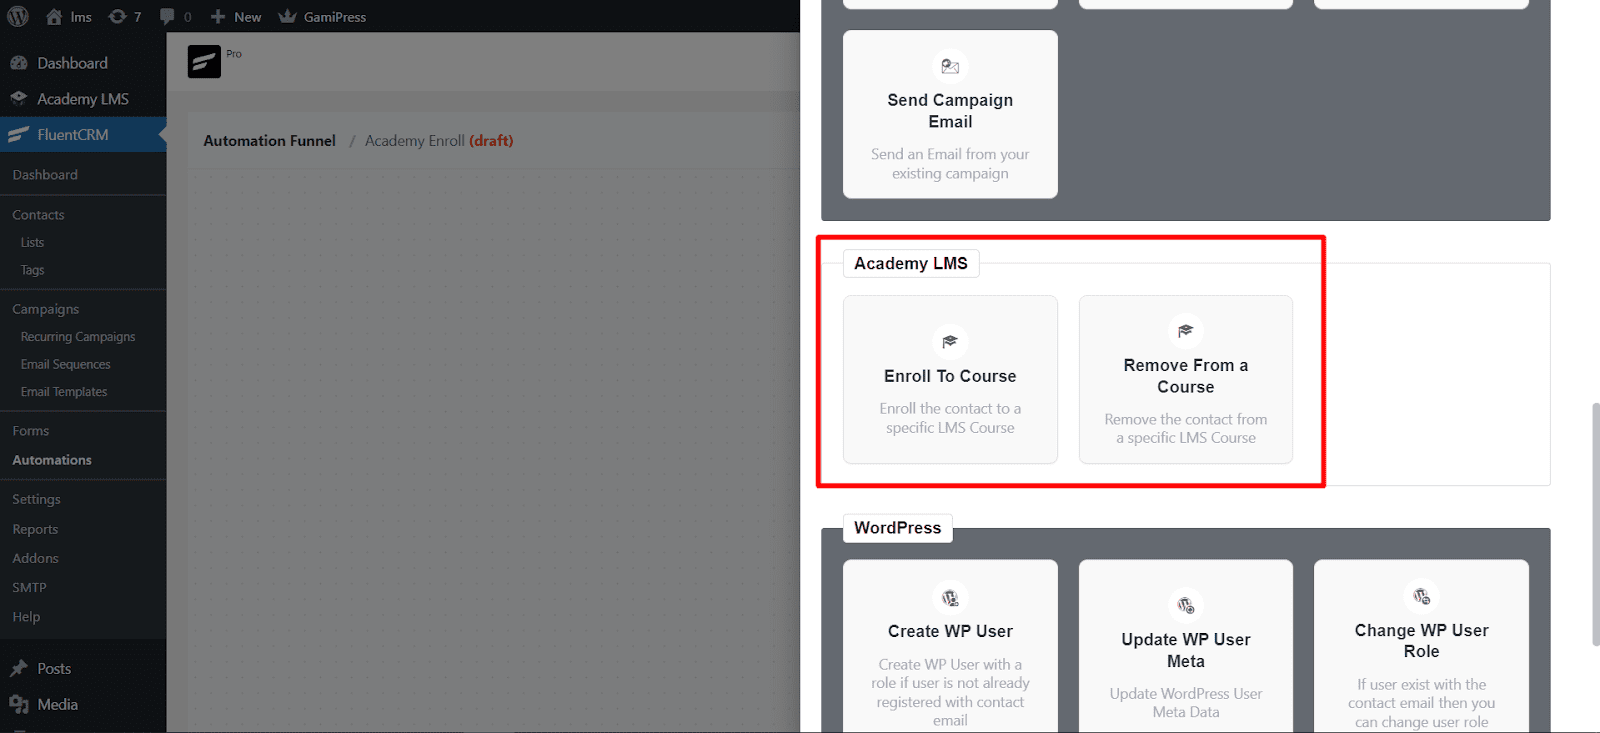
Let’s select “enroll to course”. And you can see the basic options, quite similar to what we have shown in the Start new integration option. Fill them and click save settings.

Now, click the “+” icon again and go to the conditions tab. Then click “Check Conditions.”

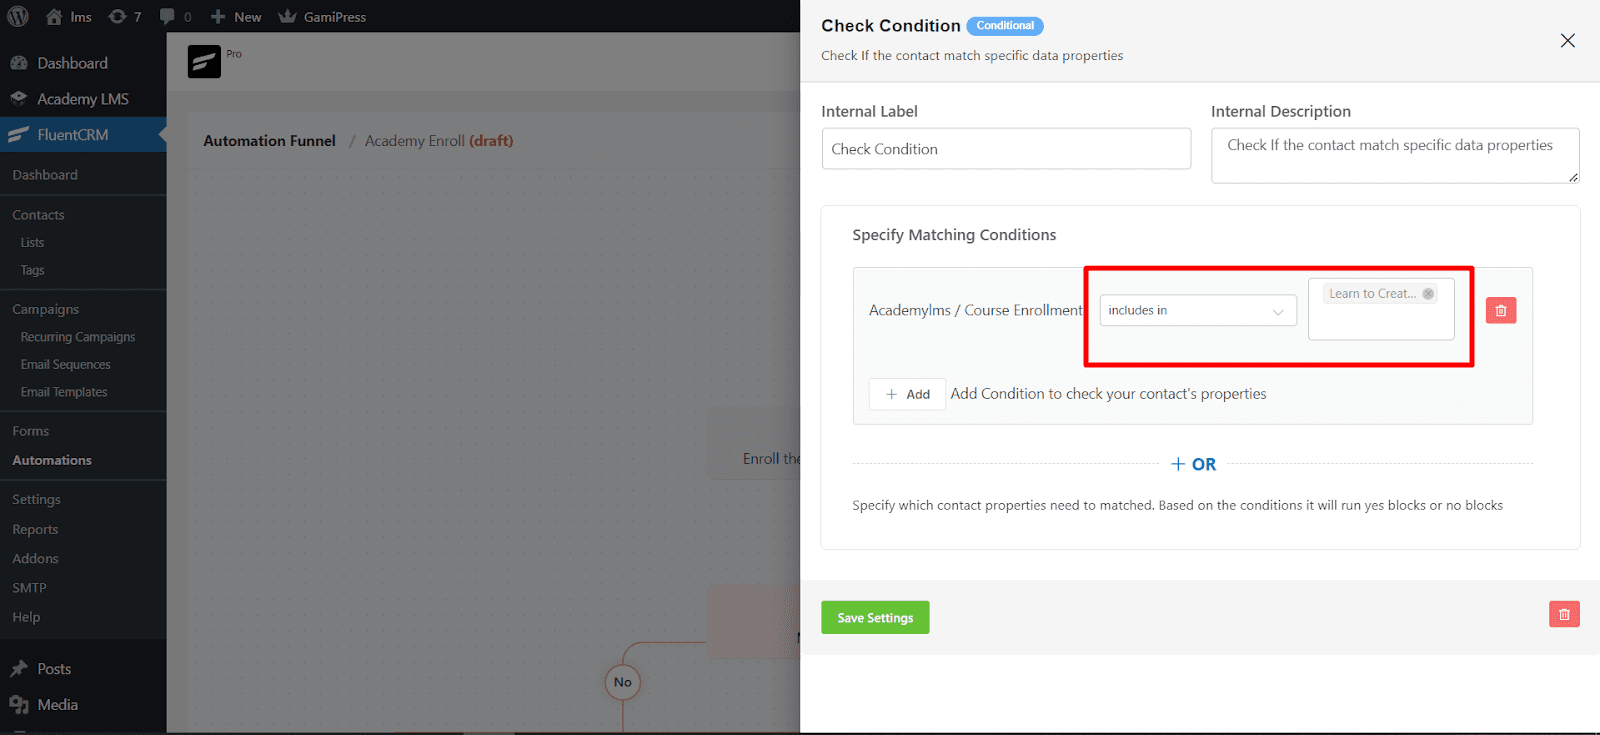
Now from the “Specify Matching Conditions,” select “+Add.” And you will see Academy LMS with “Course Enrollment” and “Course Completed.”
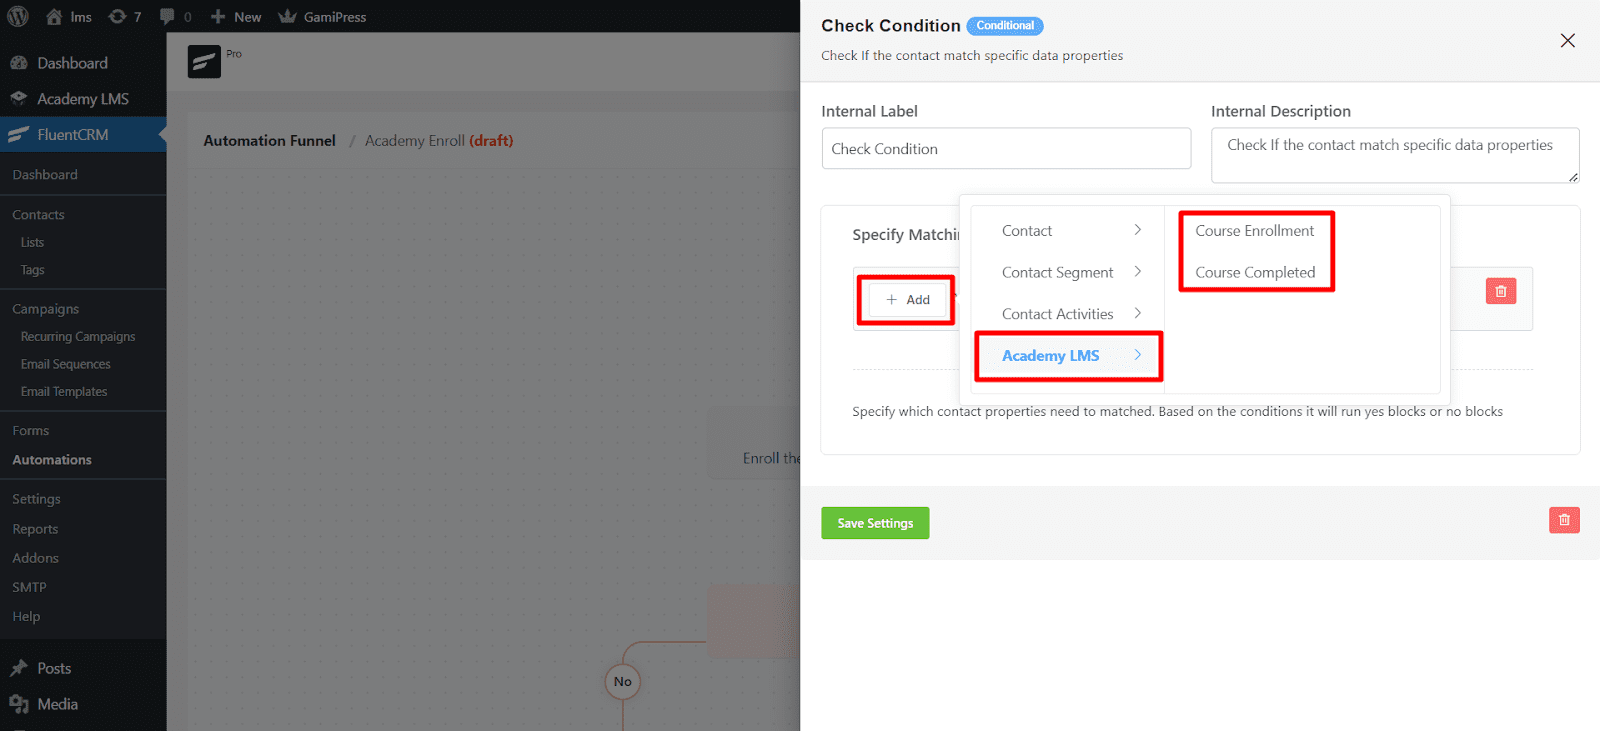
Now Choose, “includes in” and “not includes in” and after that the course from Academy LMS. Then, simply press the save settings buttons again.
Email Automation
Academy LMS provides some shortcodes for Email Automation. Let’s see them.
When selecting the “+” icon to add actions/goal or conditional action go to the Email Section.

Then click the shortcode button and select Academy LMS to get shortcodes for the following options:
- User Enrolled Course Names
- User Enrolled Course with links (list)
- Current Course Title
- Current Course Title with Hyperlink
- HTTP Link of the current course

Synchronization
Now, let’s see the Synchronization option. To do that, you need to have Tags and Lists. You can use the GENERAL & DYNAMIC SEGMENTS documentation from FluentCRM to understand better.
Then, Let’s go to the FluentCRM Settings > Integration Settings > Academy LMS.
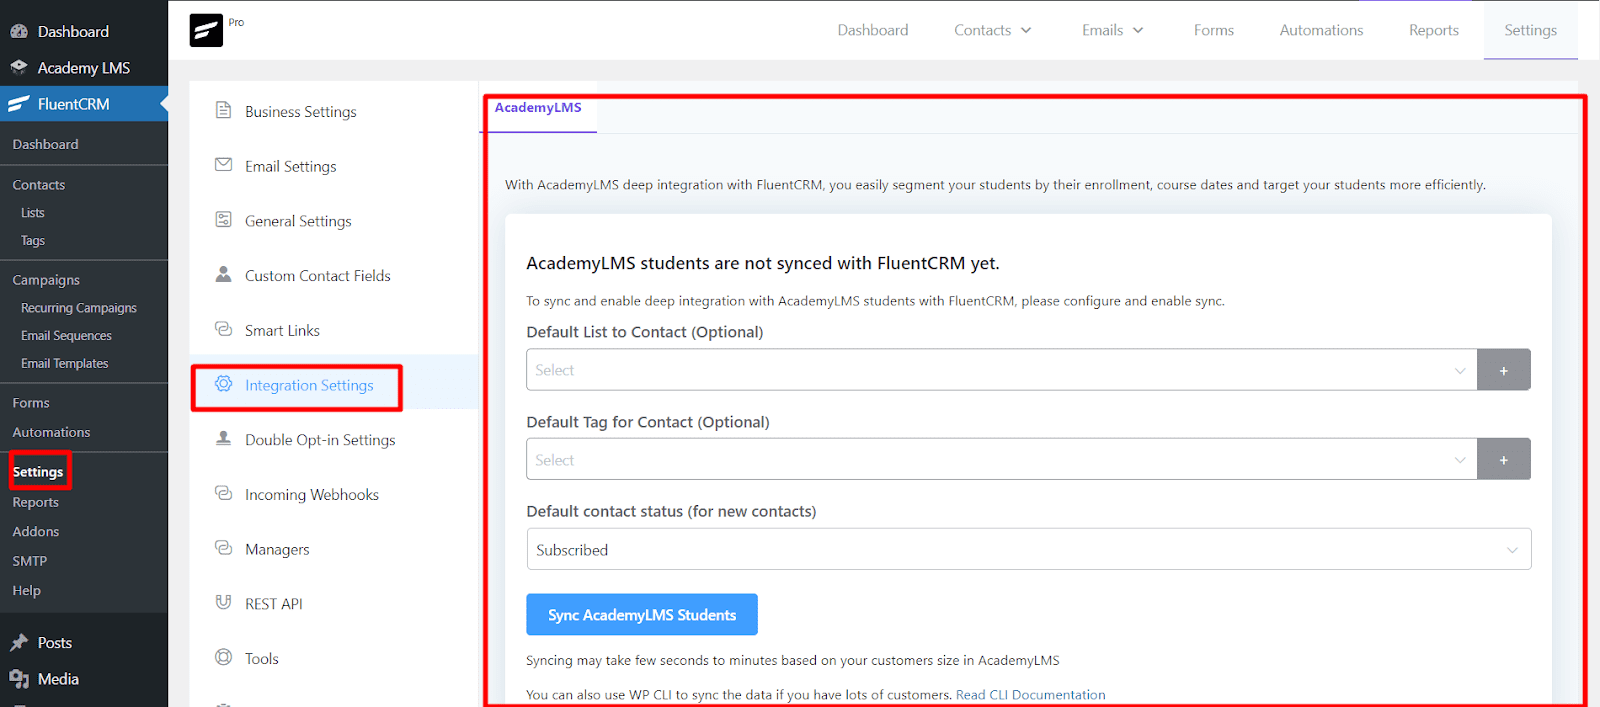
Once you have the default tags and list created, you can enter them in the fields, and select default contact status. After that, simply click the “Sync AcademyLMS Students” button. And the student data will be synced according to tags or lists or both!
Checking Reports
Now, Let’s show you how to check the reports from FluentCRM.
Let’s go to the FluentCRM Settings > Reports > Academy LMS. And you can see the advanced reports for your students.

Importing Student Data
You can also import student data from Academy LMS with this FluentCRM Integration.
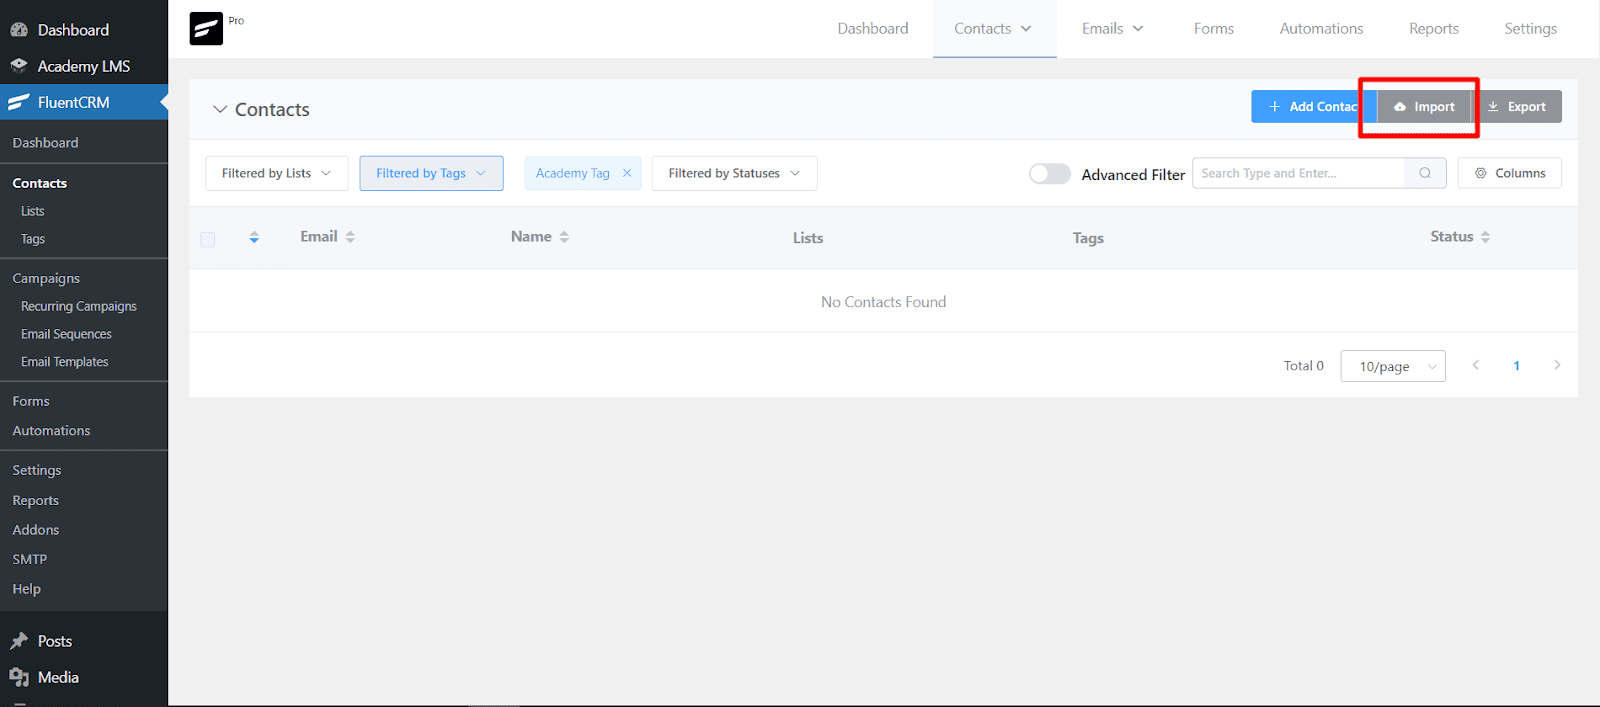
Let’s go to FluentCRM > Tags. Select your desired Tag.

Now, select the import option.
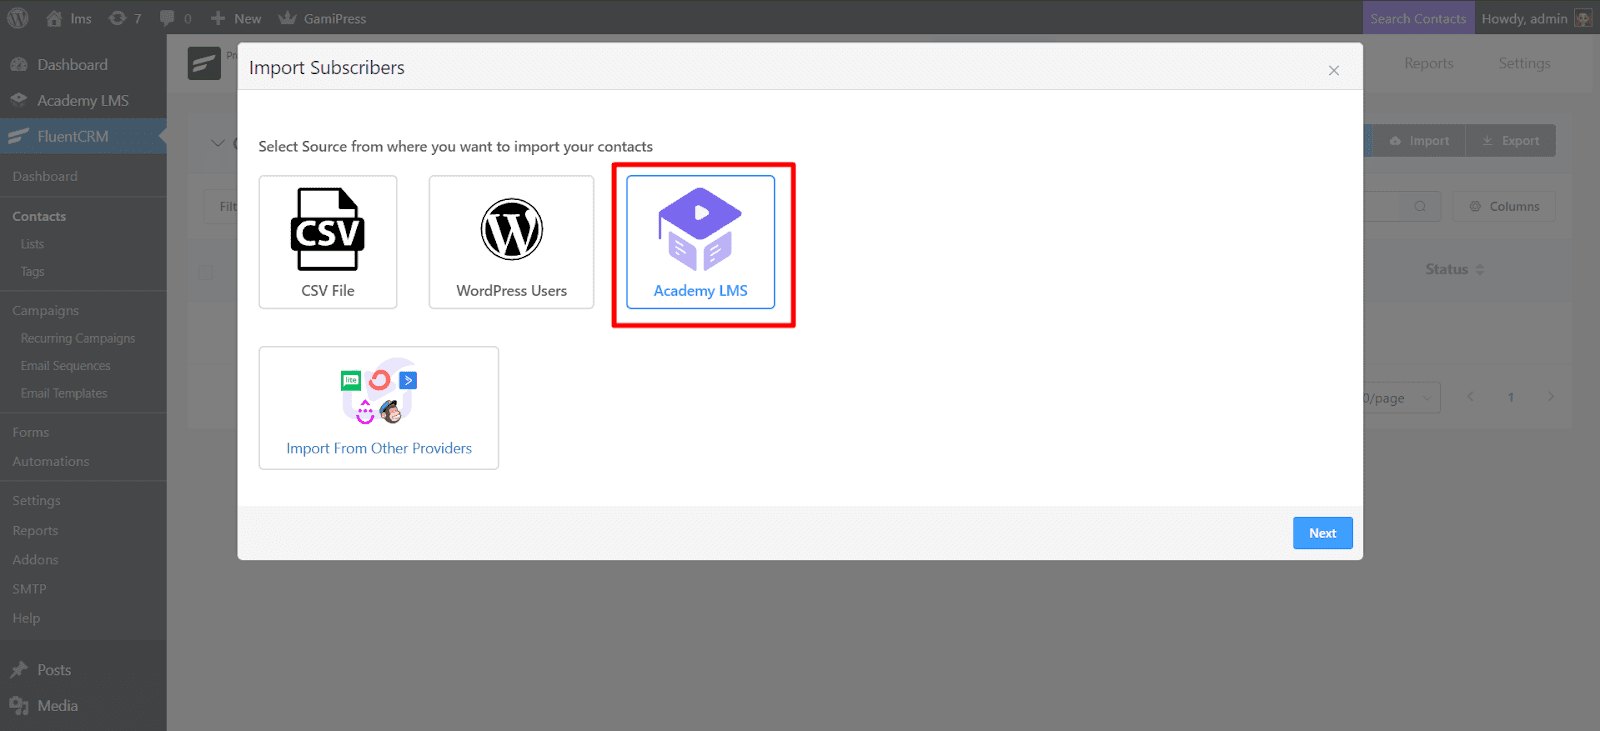
Now select the source as Academy LMS, and Click next.
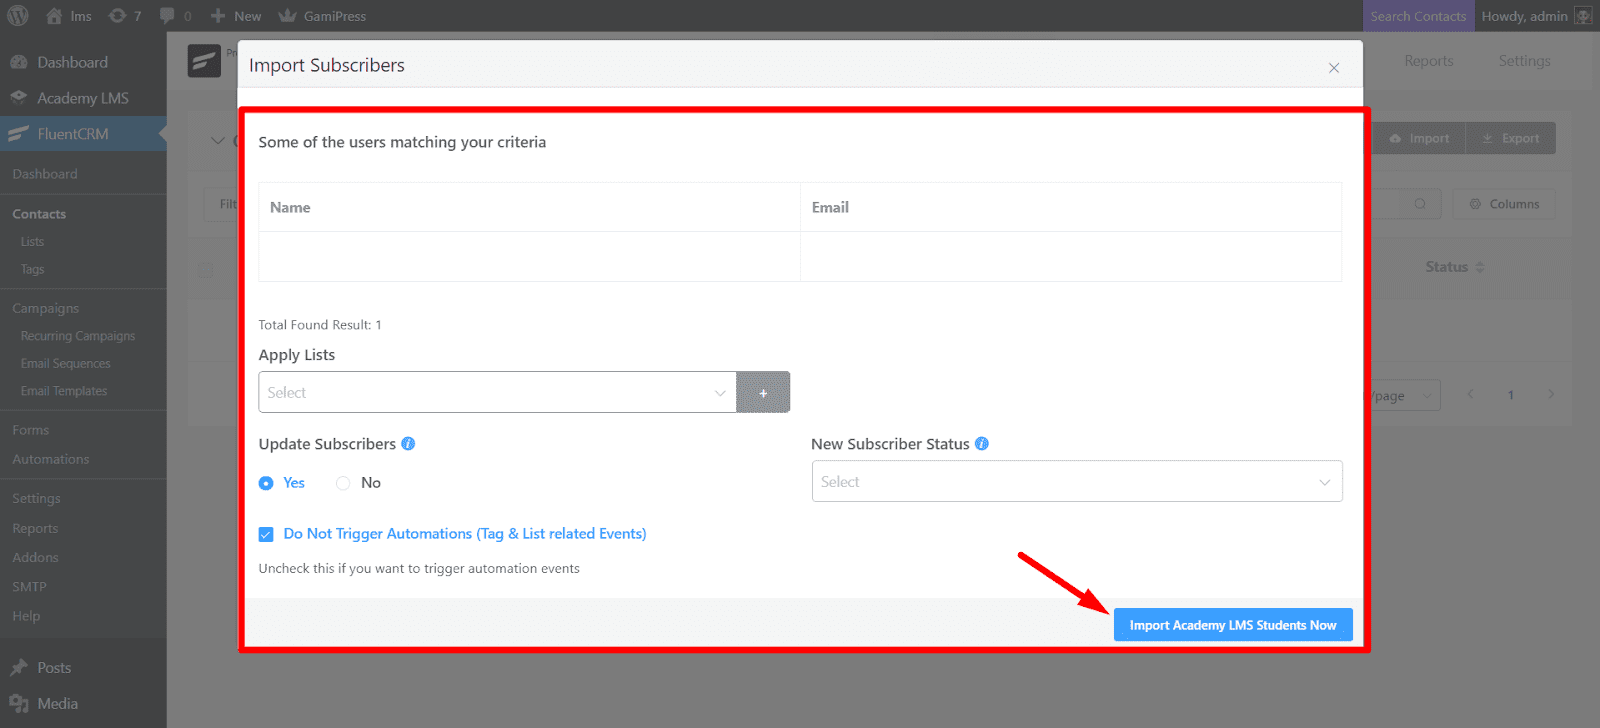
Now, you have to select a course from which the data will be imported and a tag to which the data will be imported. Then, click “Next [Review Data].”

Then, you will have some data for the users, which will meet your criteria. You can create a list as well and determine “New Subscriber Status”. After that, click Import Academy LMS Students Now.
And you’re done, your student data is now imported successfully. You can see the data from the FluentCRM Contacts section.

You can see more details by clicking on each contact for further details.
This is all for the Academy LMS and FluentCRM integration. And, you can easily use it after learning from this documentation. Best wishes!