


With the Easy Content Manager (ECM) integration, you can extend Academy LMS by adding custom fields and custom taxonomies to your courses.
This gives you more flexibility to:
- Organize courses smarter with custom taxonomies
- Add extra details with custom fields (text, image, video, switches, dates, and more)
- Manage course data more efficiently right inside WordPress
In this guide, we’ll walk you step by step through setting up and using ECM with Academy LMS so you can fully customize your courses to match your teaching needs.
Prerequisites
Before starting, make sure you have:
- Academy LMS plugin installed and activated
- Easy Content Manager (ECM) plugin installed and activated
Creating Custom Taxonomies for Courses
Custom taxonomies help you organize courses beyond categories and tags.
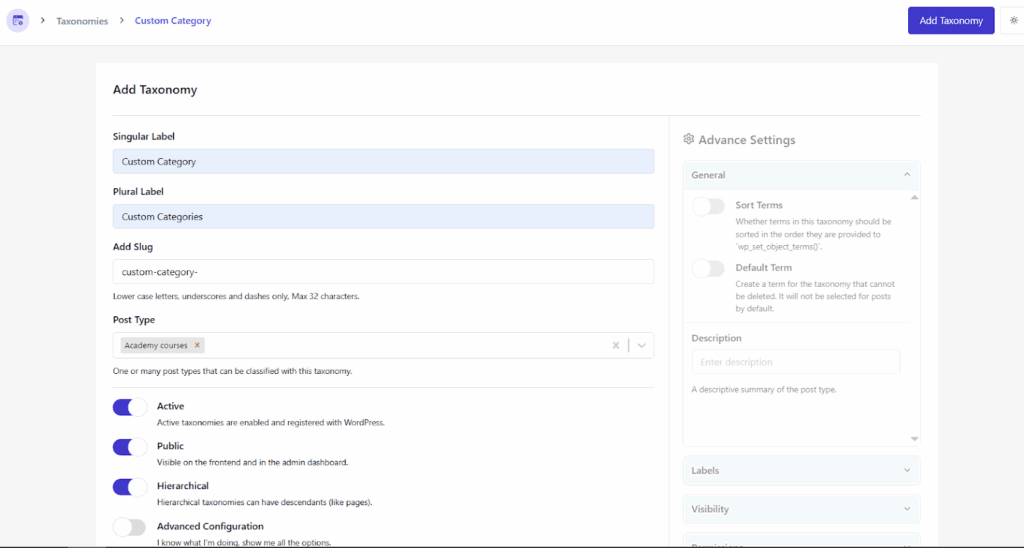
- Navigate to ECM → Taxonomies.
- From the Taxonomies page, click Add New Taxonomy.
- Set a Singular Label and Plural Label.
- Define the Slug.
- From the Post Type dropdown, select Academy Courses.
- Configure other settings as per your needs.
- Click the Add Taxonomy button to save.
Finally, go to Academy LMS → Add New Course. Here, you’ll find your newly created taxonomies available in the course editor.
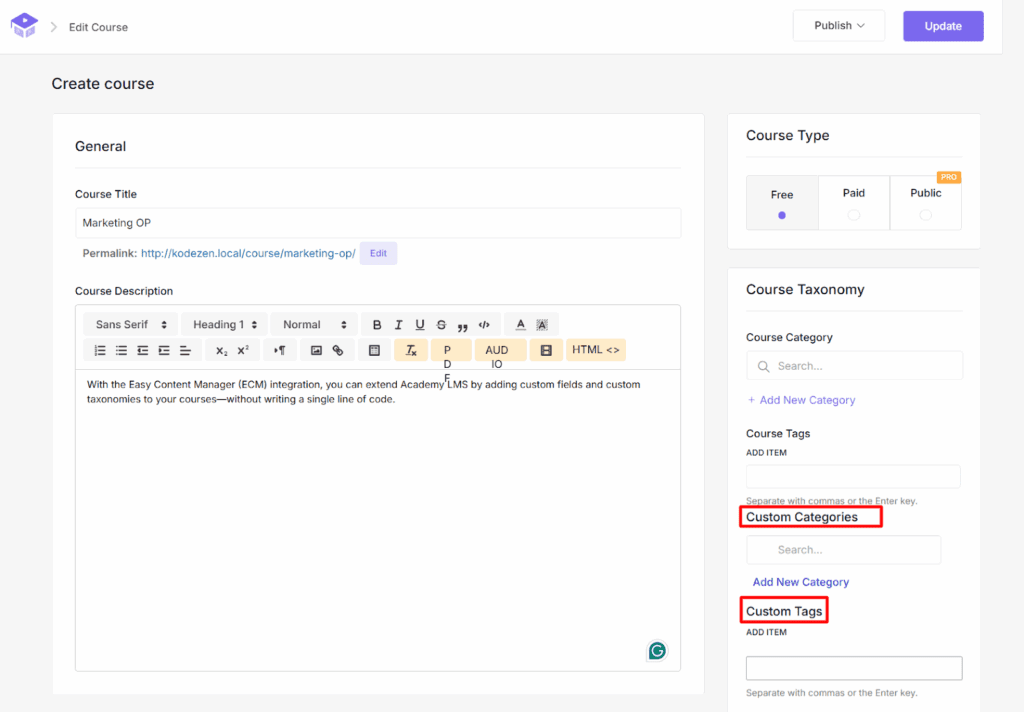
With this, you can now organize your course structure more efficiently, categorize courses beyond default options, and give learners a smoother browsing experience.
Adding Custom Fields to Courses
Custom fields let you add extra details to each course beyond the default options.
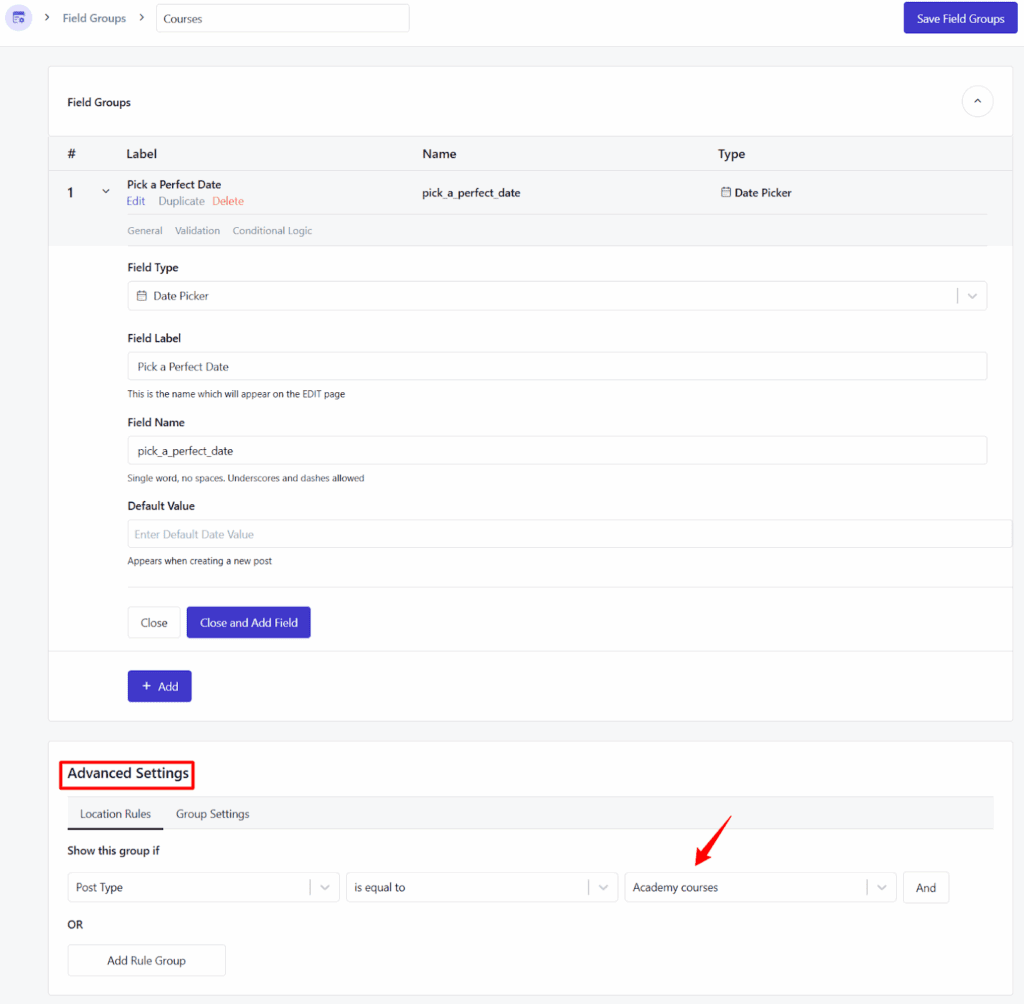
- Go to Easy Content Manager → Field Groups.
- Click on Add Field Group and set a name for the group.
- Choose a field type from the 35+ available options (text, image, video, date, switches, uploads, etc.).
- From the Advanced Setting Rule option, set the condition to show this group if Post Type Academy Courses.
- Once done, click Save Field Group.
Now, navigate to Academy LMS → Add New Course. You’ll see your newly created custom field(s) added to the course editor.
