




00
Days
|
00
Hours
|
00
Minute
|
00
Second

No posts found.

Frontend Dashboard Course Creation

Instructors can build and publish a full course from the frontend dashboard, without opening the WordPress admin. The editor has the same three steps as the admin one: Overview, Builder and Settings. Features marked Pro need Academy LMS Pro.

1. Let instructors create courses

An admin sets this first. Go to Academy LMS → Settings → Pages → Instructor Page, turn on the instructor options you need and click Save.

Instructors can publish only when the Allow publishing course is on. Otherwise their courses wait for admin review.
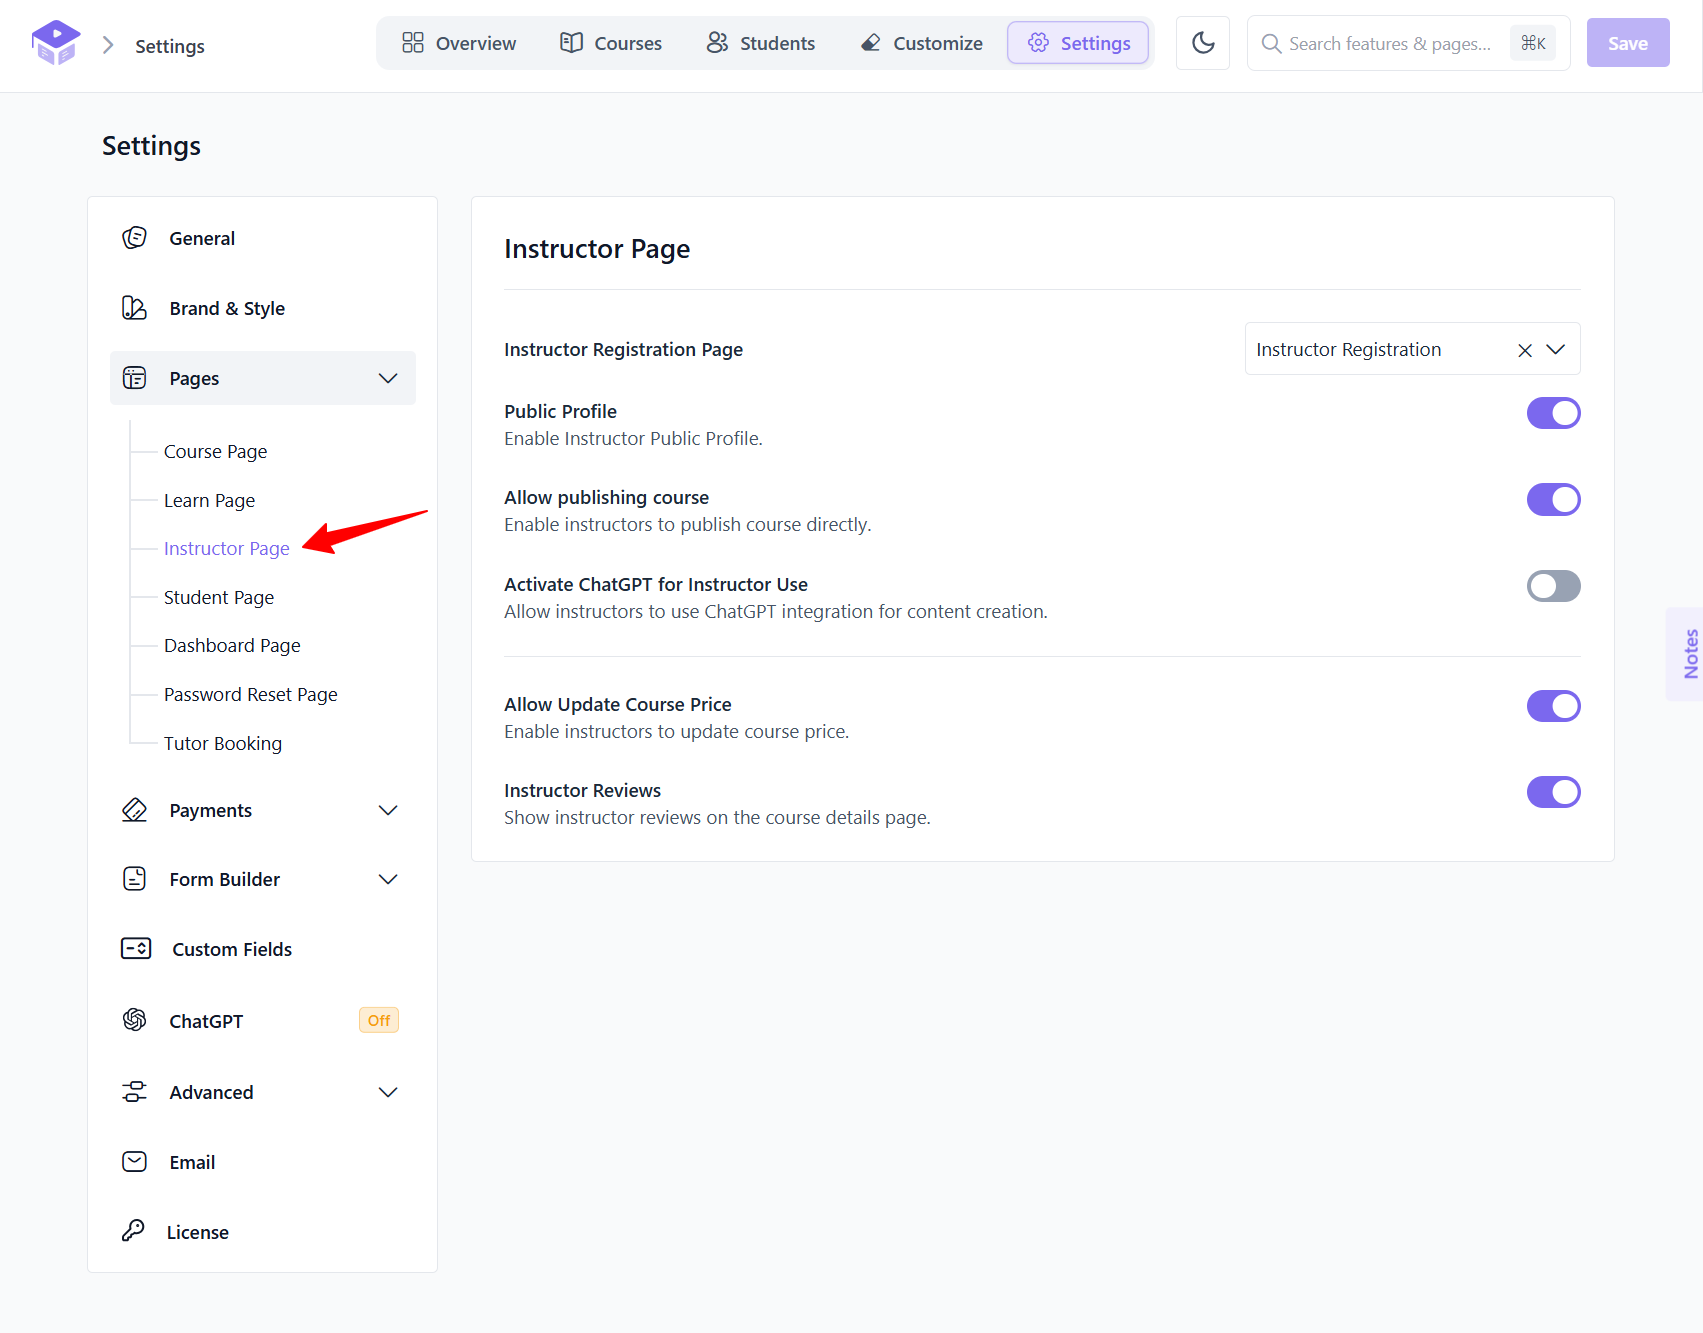
Allow publishing course to instructors

2. Open the course editor

In the instructor dashboard, go to Courses → All Courses and click Add New Course.
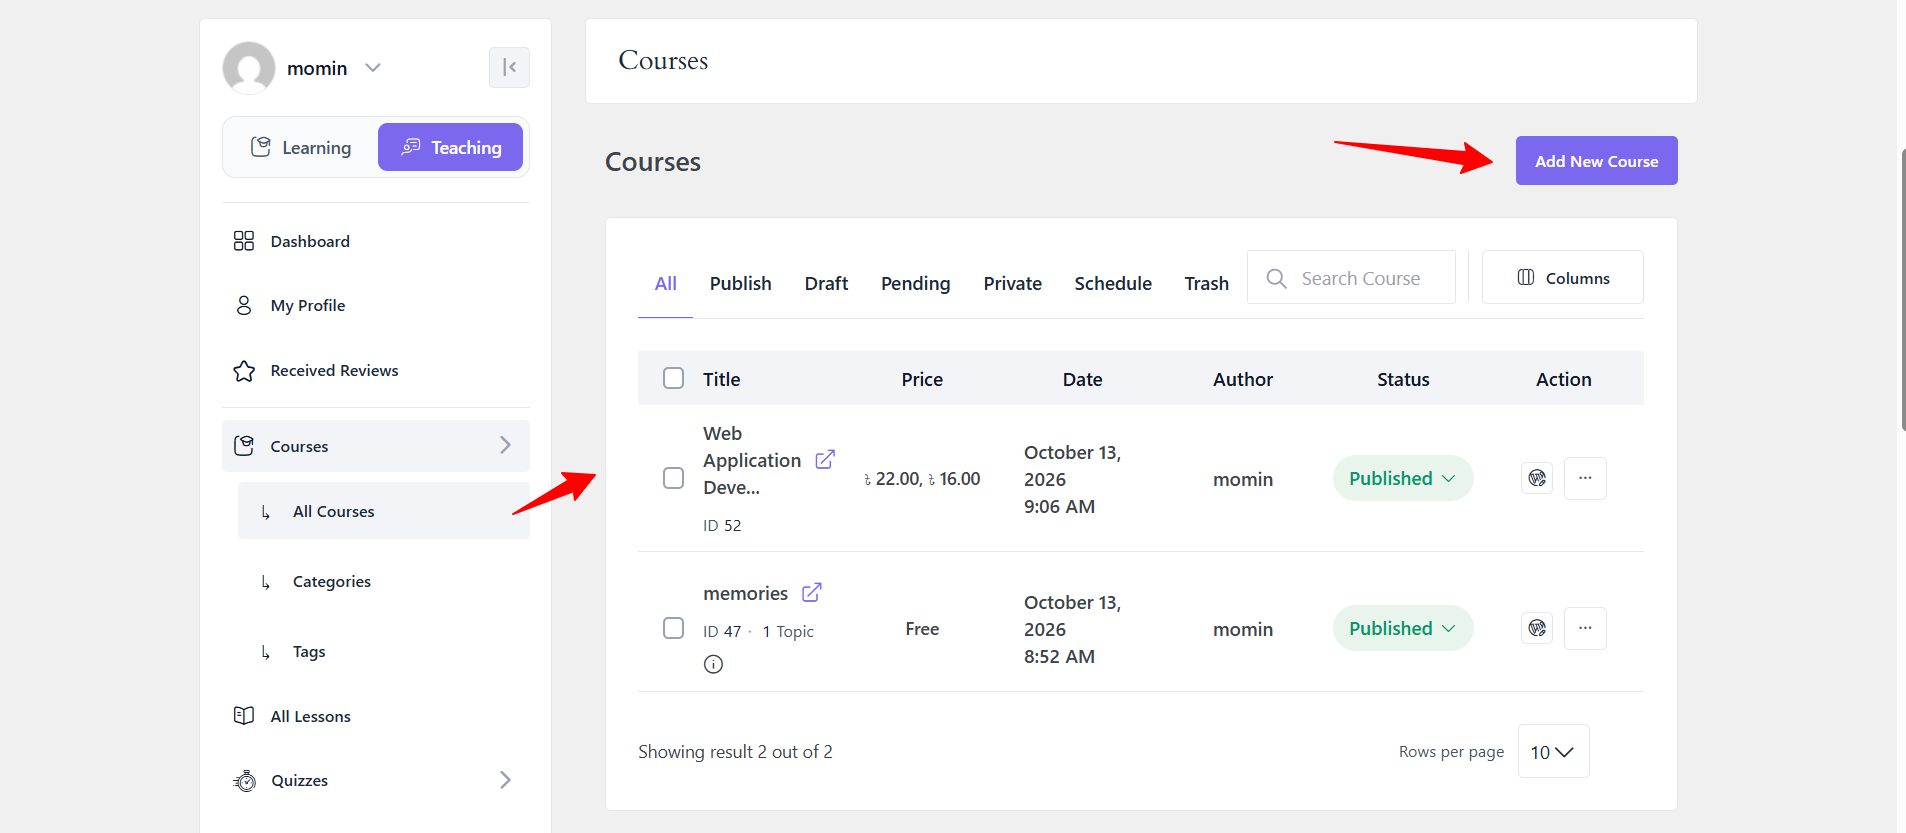
open the course

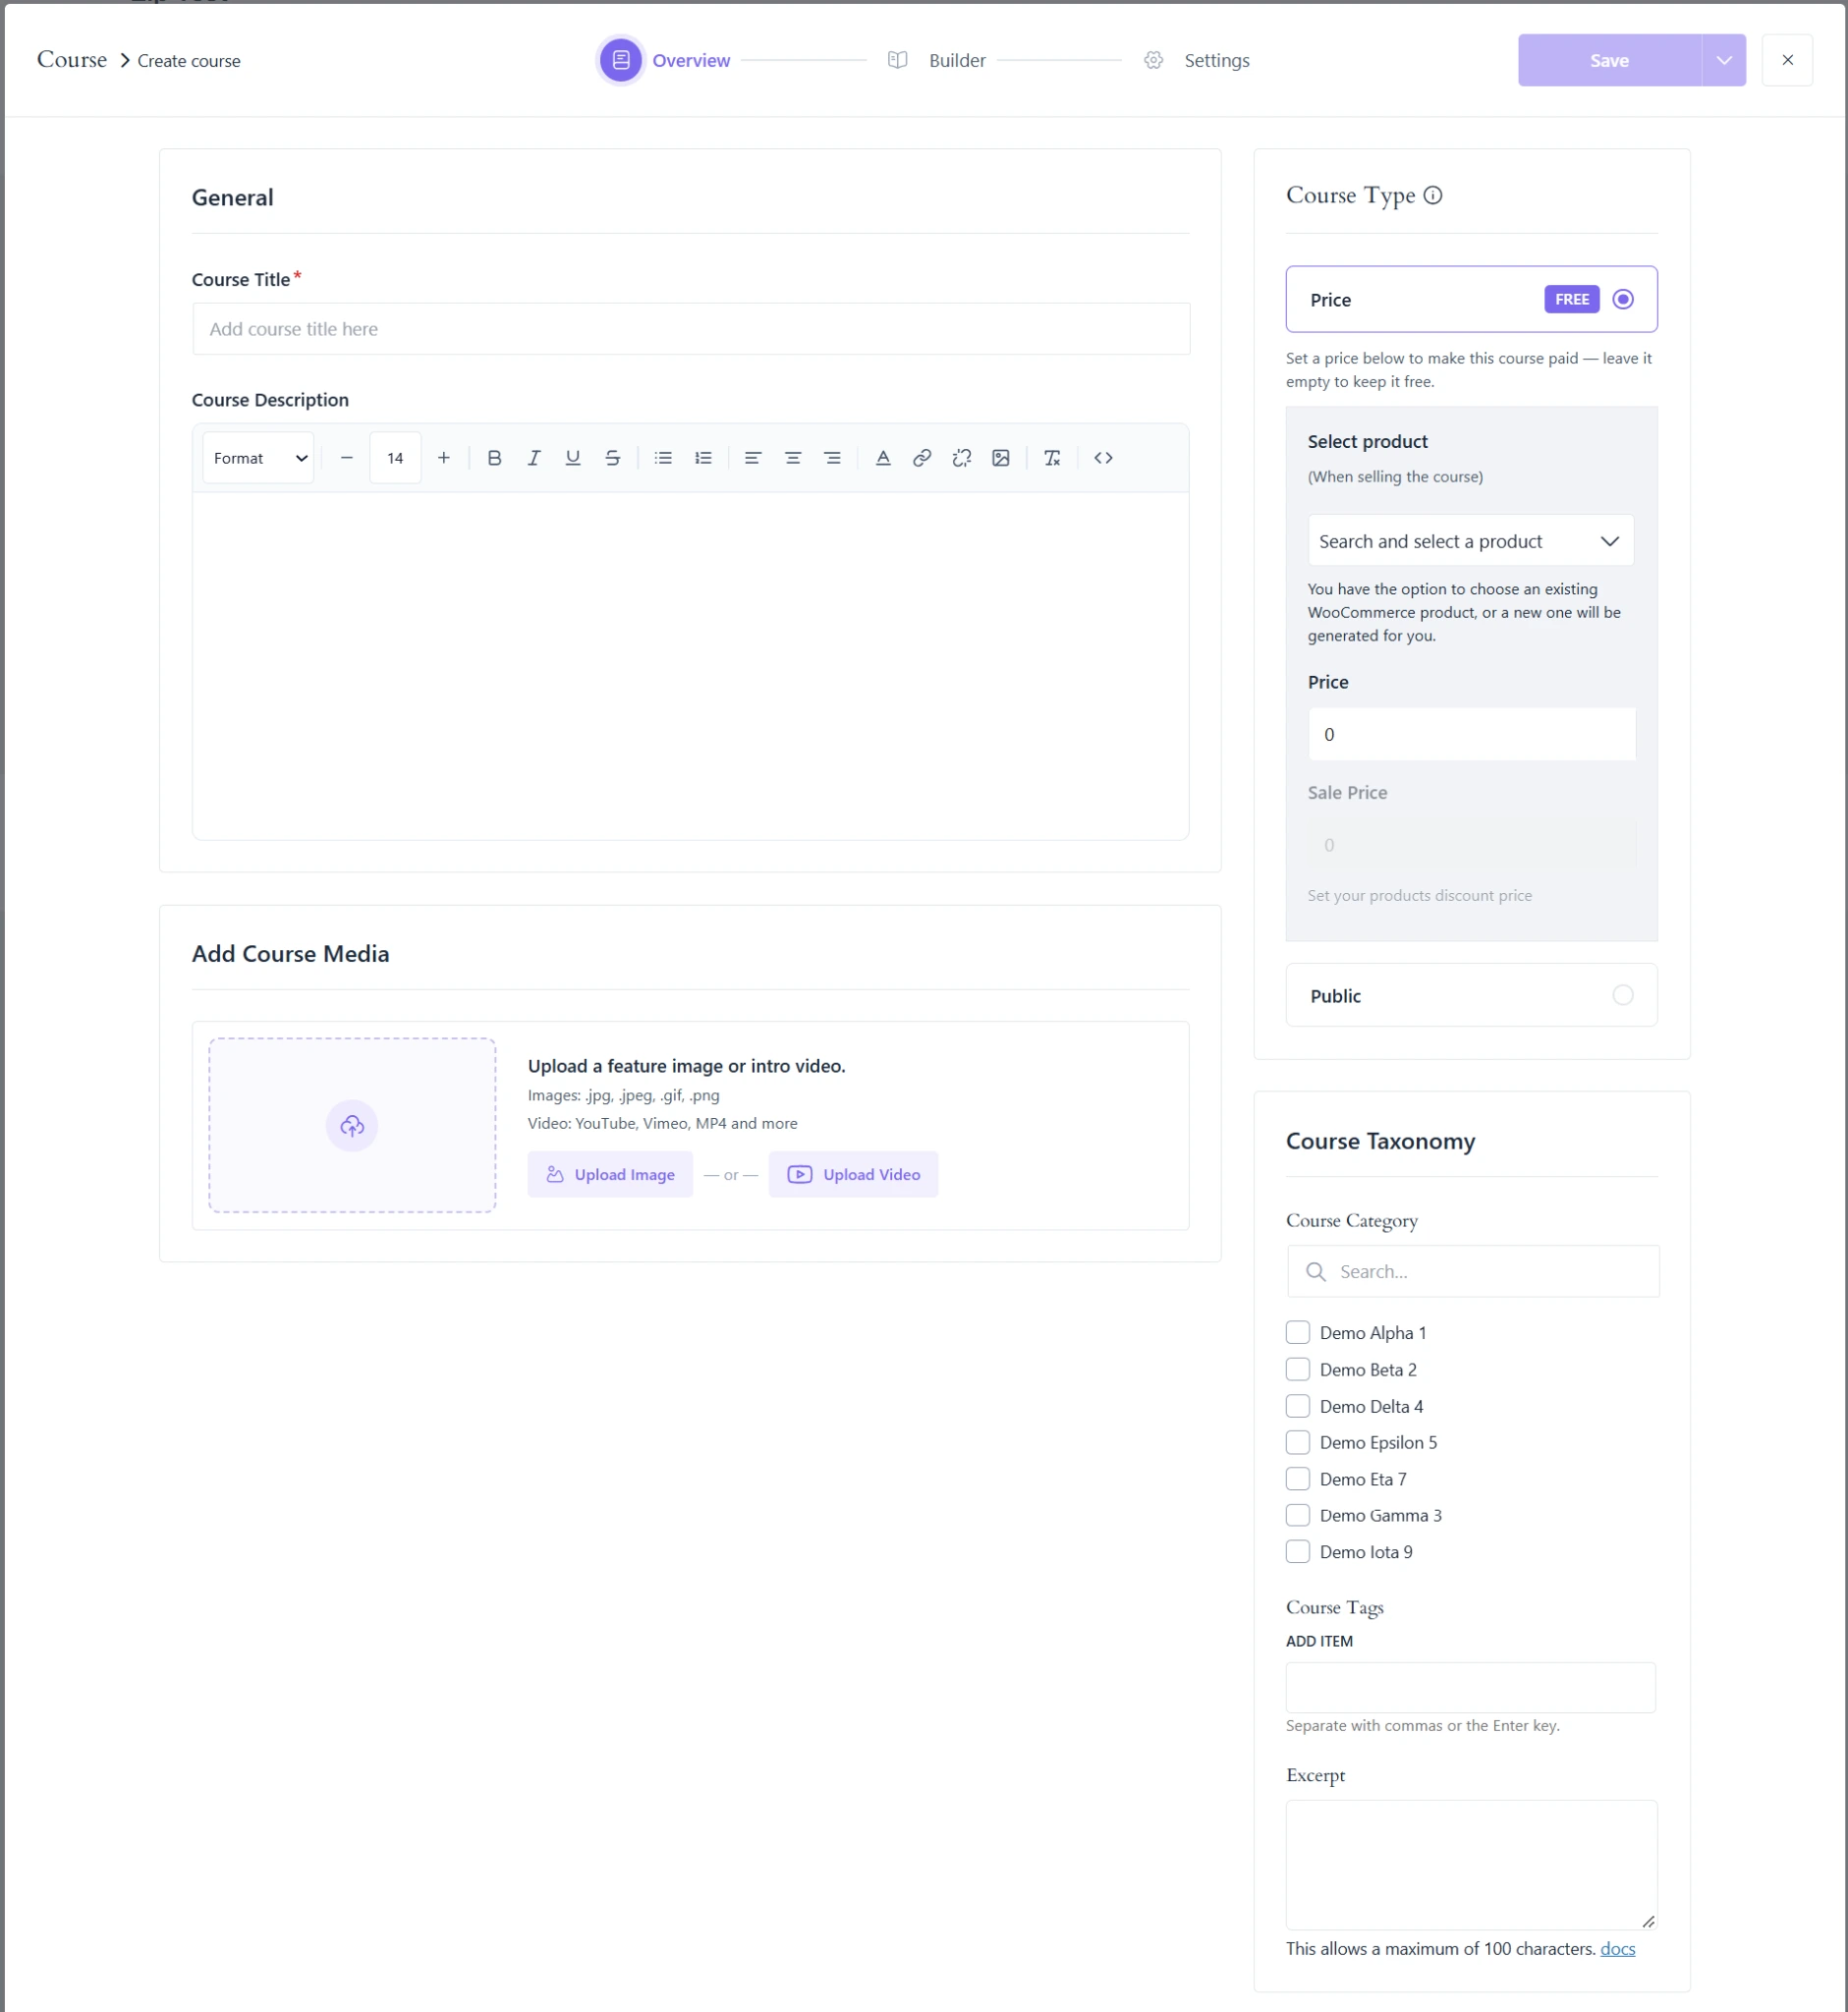
3. Fill in the Overview

1.Type a Course Title. Academy LMS saves a draft right away.
2.Write the description.
3.Leave Price at 0 for a free course. To sell it, enter an amount. Academy LMS then asks you to choose an eCommerce engine in Academy LMS → Settings → Payments.
4.Add a feature image or intro video.
5.Add a category, tags and a short excerpt.
fill in the

4. Build the curriculum

1.Open the Builder step.
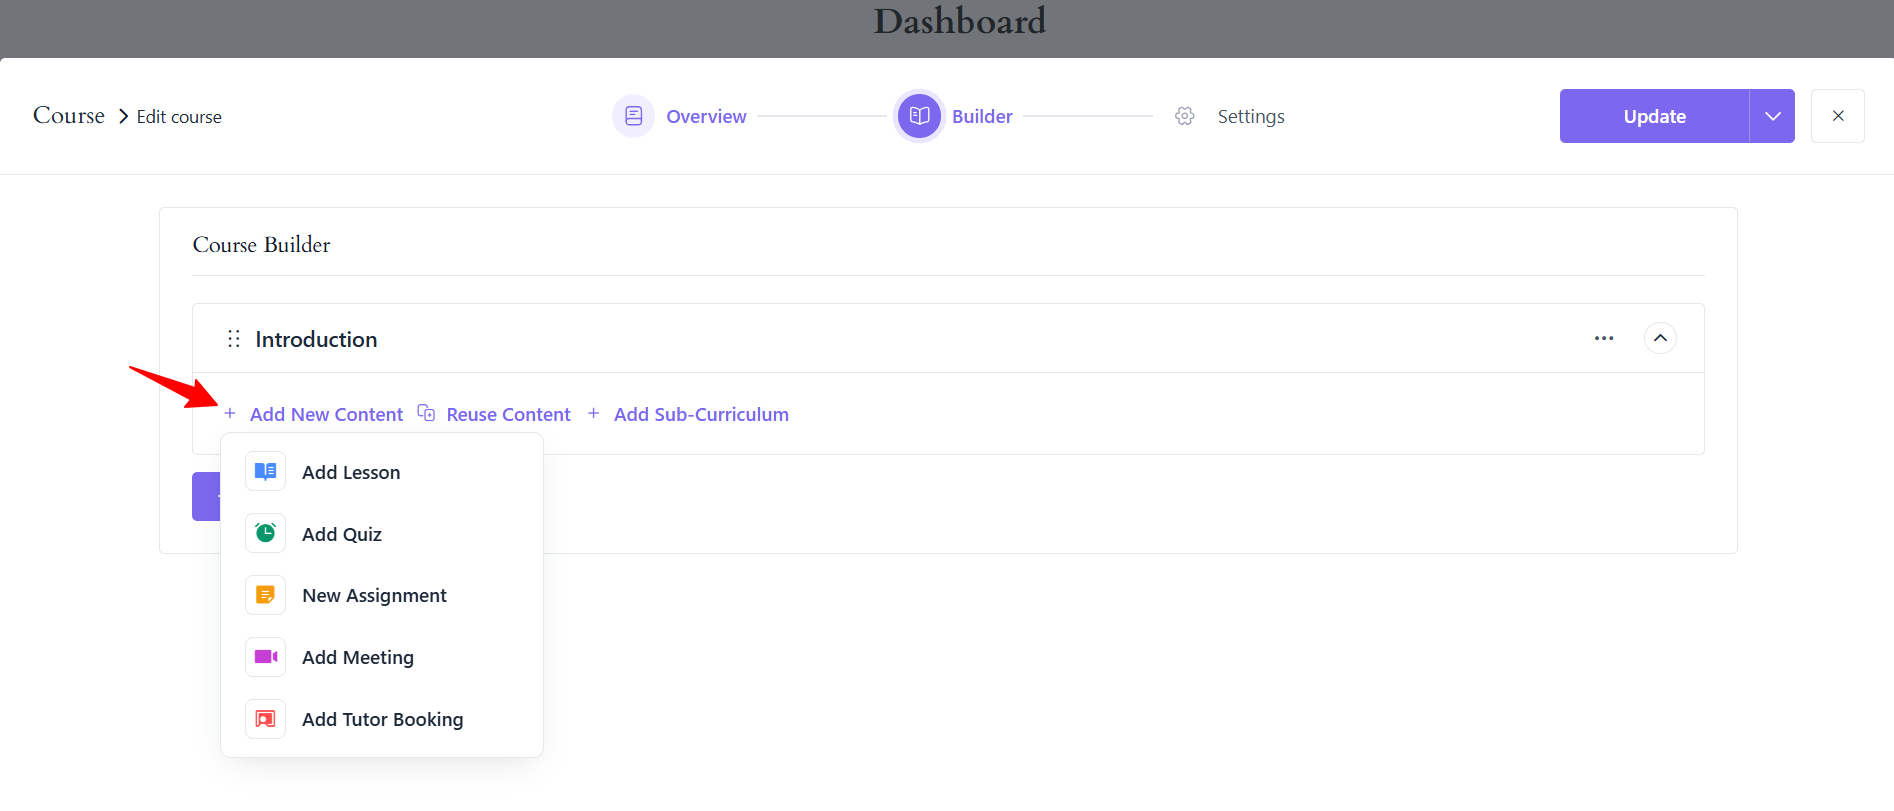
2.Click Add New Curriculum, type a title and click Add Curriculum.
3.Click Add New Content and choose a type. Instructors only see the types whose add-ons are on.
build the curriculum

Add a lesson

Fill in the lesson fields and click Add Lesson:

Lesson Title and Lesson Content
Preview Lesson: lets students view it before they enroll. Needs the Course Preview add-on.
Feature Image
Attachment: slides, PDFs or worksheets
Video Source and Video Playback Time

A “Lesson Created” message confirms it, and the lesson appears in the curriculum.

To use items you already made, click Reuse Content and pick them.

5. Set course settings

Open the Settings step.
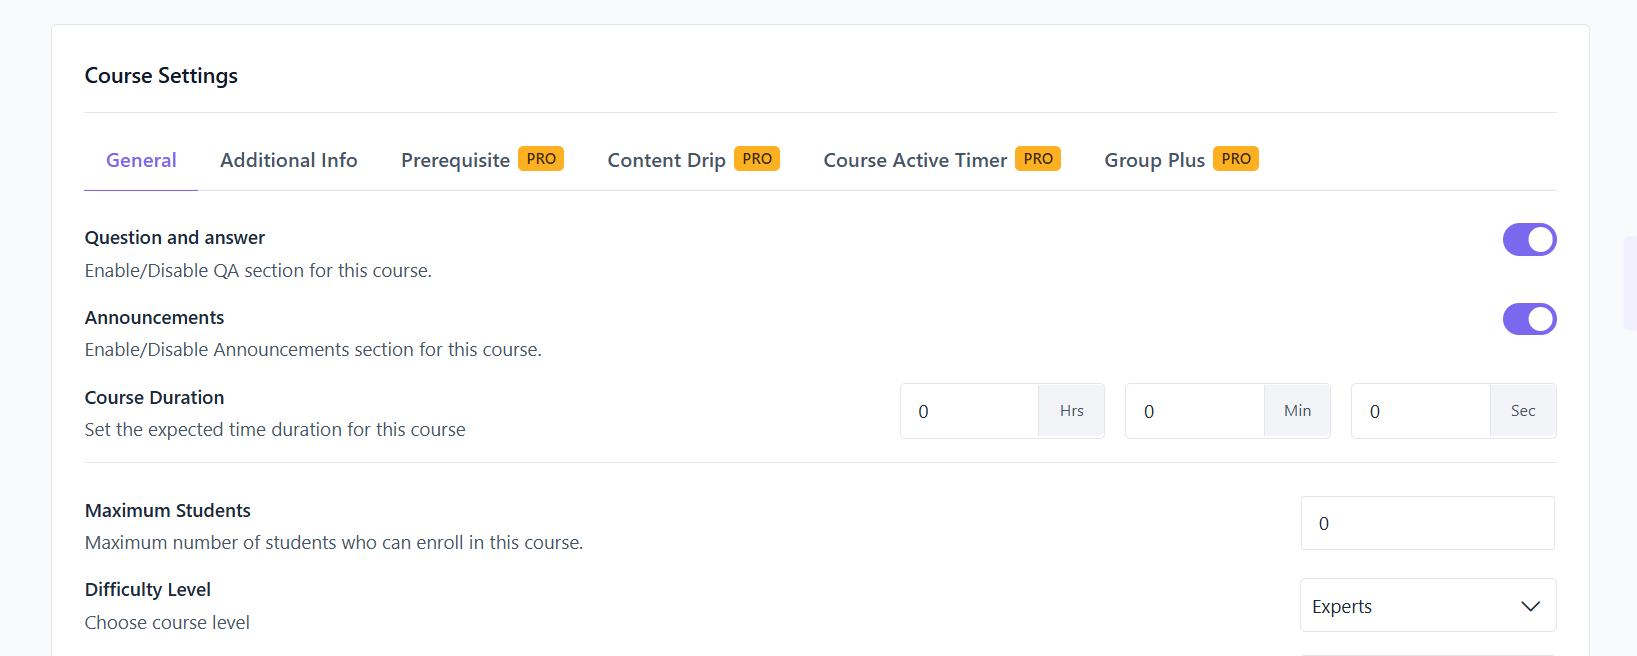
set course settings
Tabs: General, Additional Info, Prerequisite (Pro), Content Drip (Pro), Course Active Timer (Pro), Group Seat Validity (Pro), Volume Pricing (Pro).
General: turn Question and answer and Announcements on or off, and set Course Duration, Maximum Students, Difficulty Level and Language. Disable Review turns off ratings for this course.
Additional Info: list Benefits of the course, Targeted Audience, Requirements and Materials Included, one item per line.
Certificate: pick the certificate students get when they finish.

For Content Drip and Course Active Timer, see Content Drip and Course Active Timer.

6. Publish the course

Click the arrow next to Update (or Save) and choose a status:

Publish: visible to everyone
Draft: not published yet
Private: admins and editors only
Scheduled: publishes on a date you set

You can also tick Feature in catalog or Password protect. Choose Publish, then click Update.

7. Manage your courses

Go to Courses → All Courses in the instructor dashboard to edit, preview or delete any course you created.

Need more than one site?

The 100-site lifetime bundle covers every premium Kodezen plugin.

Still Stuck?

Our support team replies fast. You can also ask other course creators in the community.