







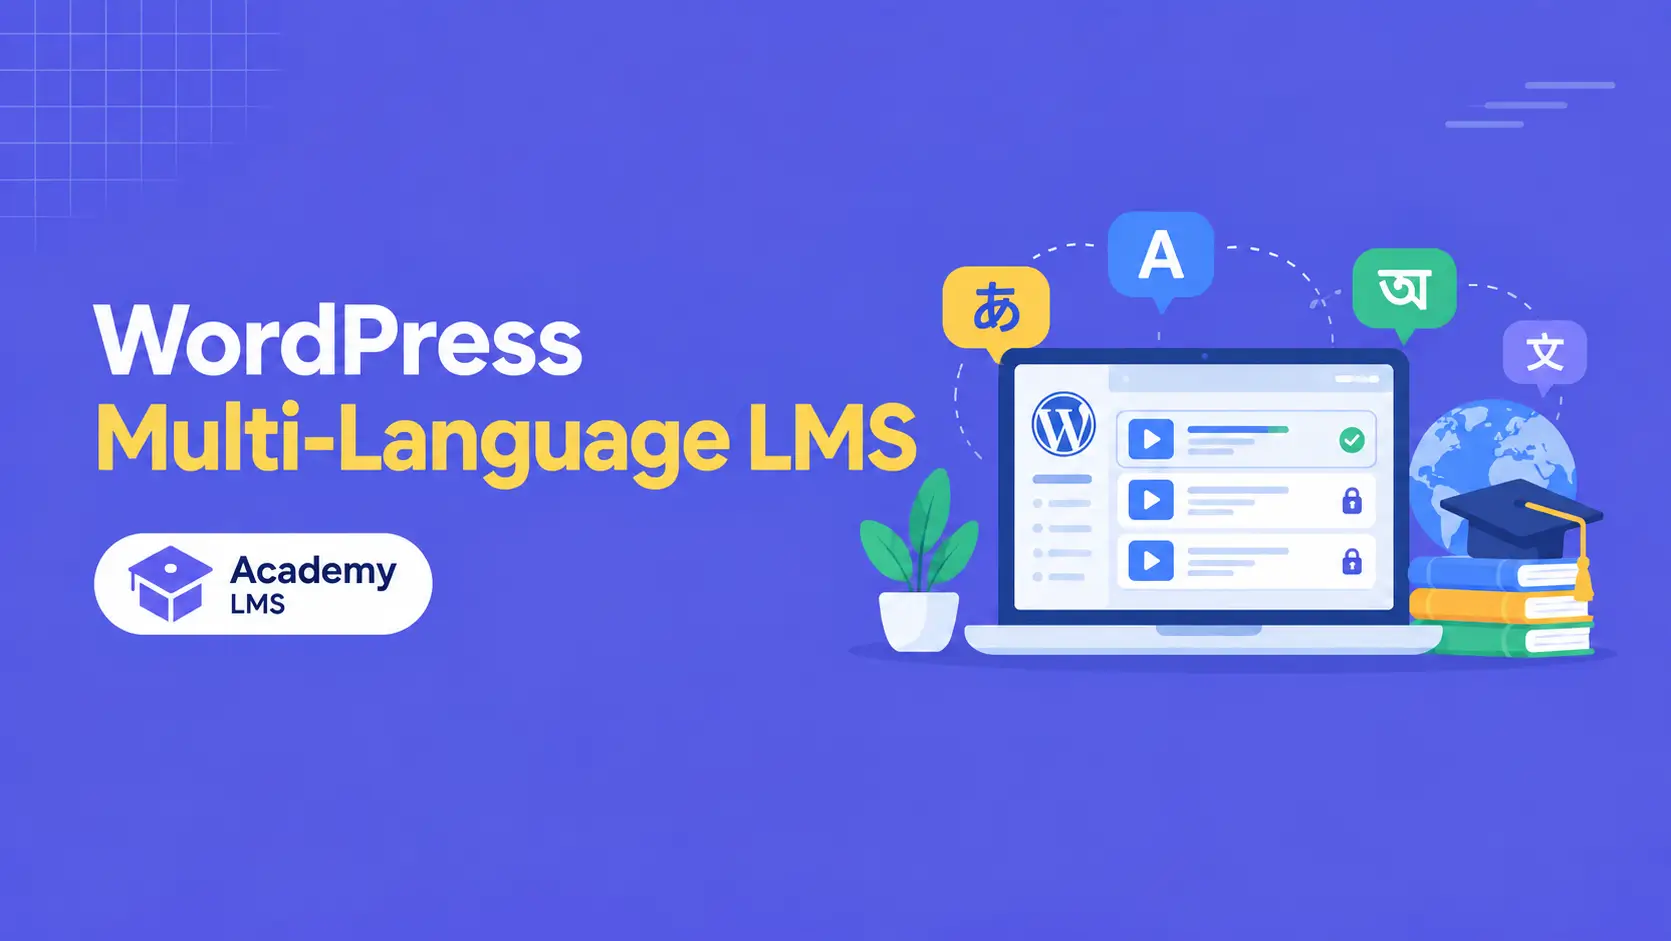

If you run online courses on WordPress and want to reach learners in more than one language, a multi-language LMS is the way to do it. With WPML and Academy LMS, you can offer each course in the languages your students actually speak.
But a WordPress multi-language course site needs more than translated course titles. Students must be able to understand the lessons, quizzes, buttons, and account pages they use from start to finish.
This guide shows you how to connect WPML with your LMS, translate a course, add a WordPress language switcher, and check WordPress hreflang before students arrive.
Why build a multi-language LMS?
What WPML does in a multi-language LMS
WPML is a WordPress plugin that lets you create and manage content in multiple languages. Combined with Academy LMS’s WPML integration, it lets you build translated versions of courses, and show each learner the courses that match the language they choose.
Before you begin: plan the learner’s journey
List everything a student reads or uses, from finding a course to completing it:
You don’t have to translate everything at once. Start with one course and one language. Once that complete experience works, repeat the same process for other courses.
Step 1: Install the required plugins
According to Academy LMS’s WPML documentation, you need:
Install and activate all three before you start translating.
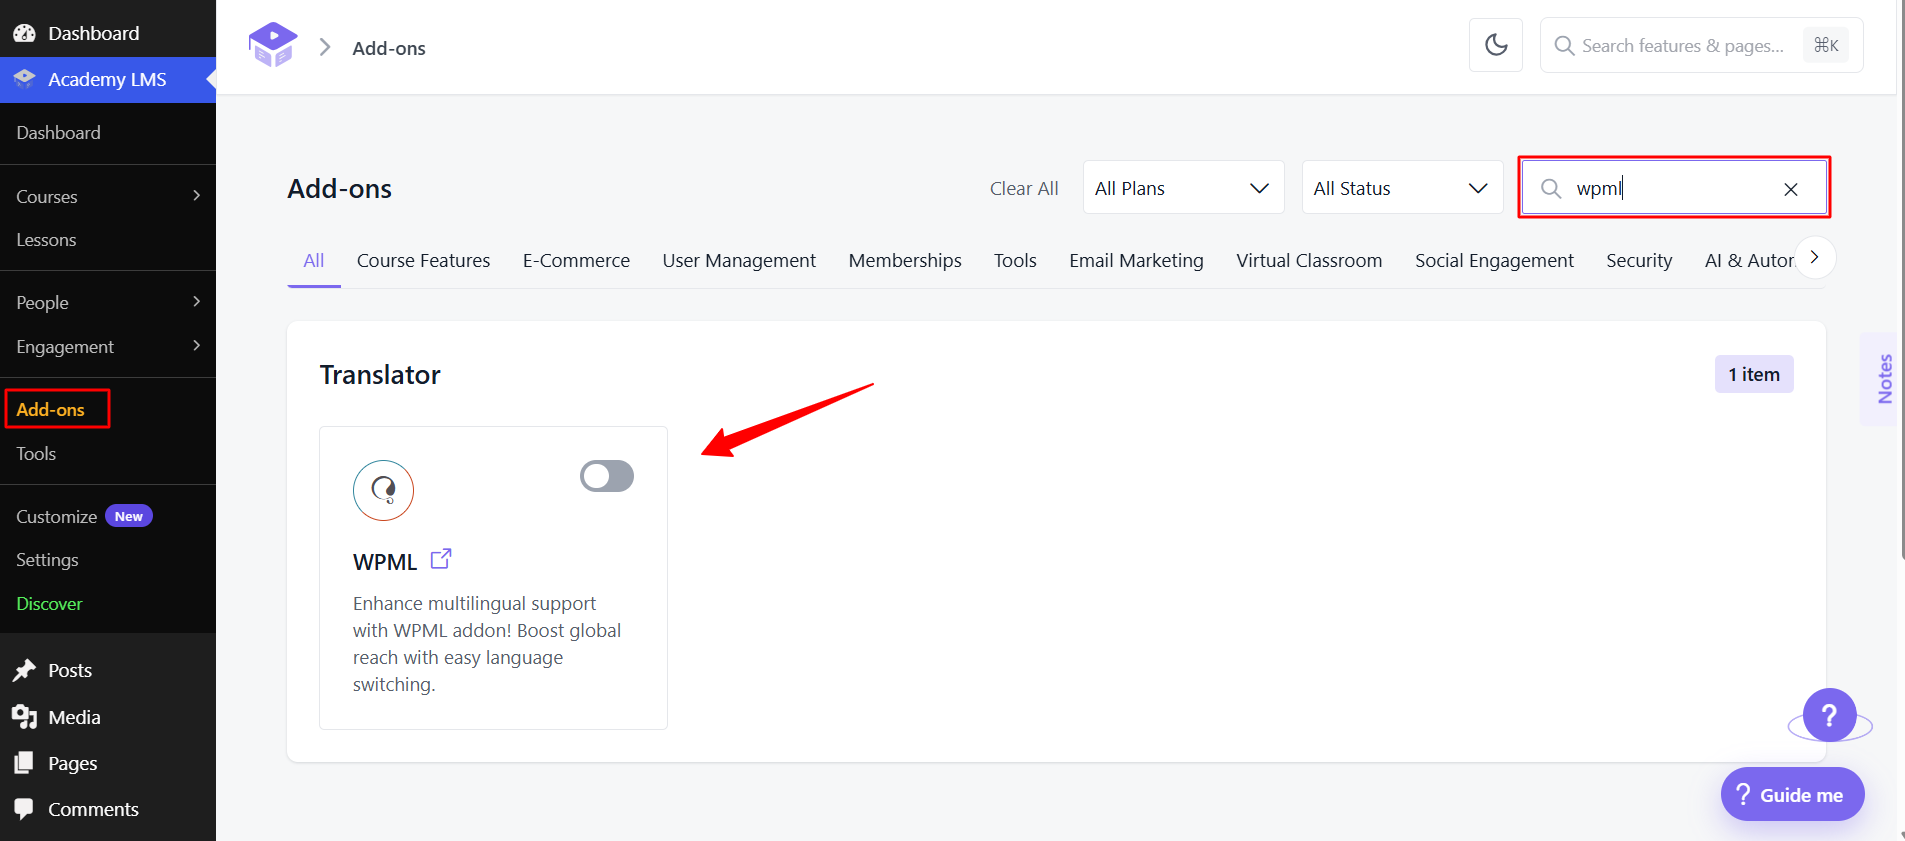
Step 2: Activate the WPML Integration addon
Go to Academy LMS → Addons, find WPML Integration, and activate it. Activating WPML alone doesn’t complete the setup. This add-on is what makes Academy LMS course pages and course components work in multiple languages.
Step 3: Set your languages and URL format
In WPML, select your site’s current language and the additional languages you want to offer. Start with a language you can fully prepare and review.
Then open WPML’s Language URL format setting, select “Language name added as a parameter,” and save. Academy LMS specifies this option for its dynamic pages.
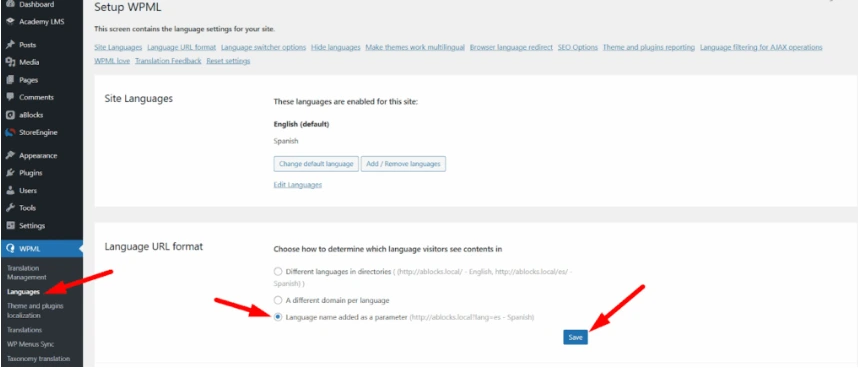
If your site is already multilingual, check your current URL structure first, and review existing translated links after changing this setting.
Step 4: Create a translated course
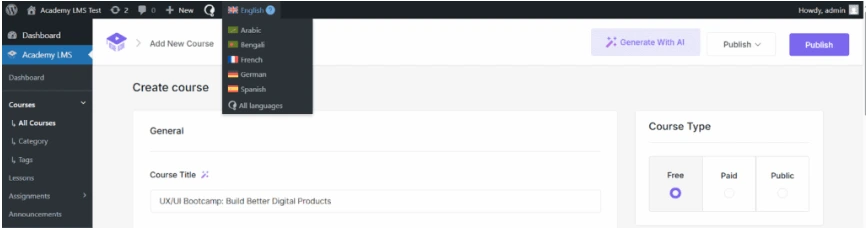
Go to Academy LMS → Courses. Language icons appear beside each course title. Click the icon for the language you want to add, and a course editor opens for that language.
Work in this order:
Aim for the same learning outcome in every language, but adjust examples and terminology for the new audience. A word-for-word translation can be accurate and still feel unfamiliar.
Step 5: Translate lessons, quizzes, and assignments
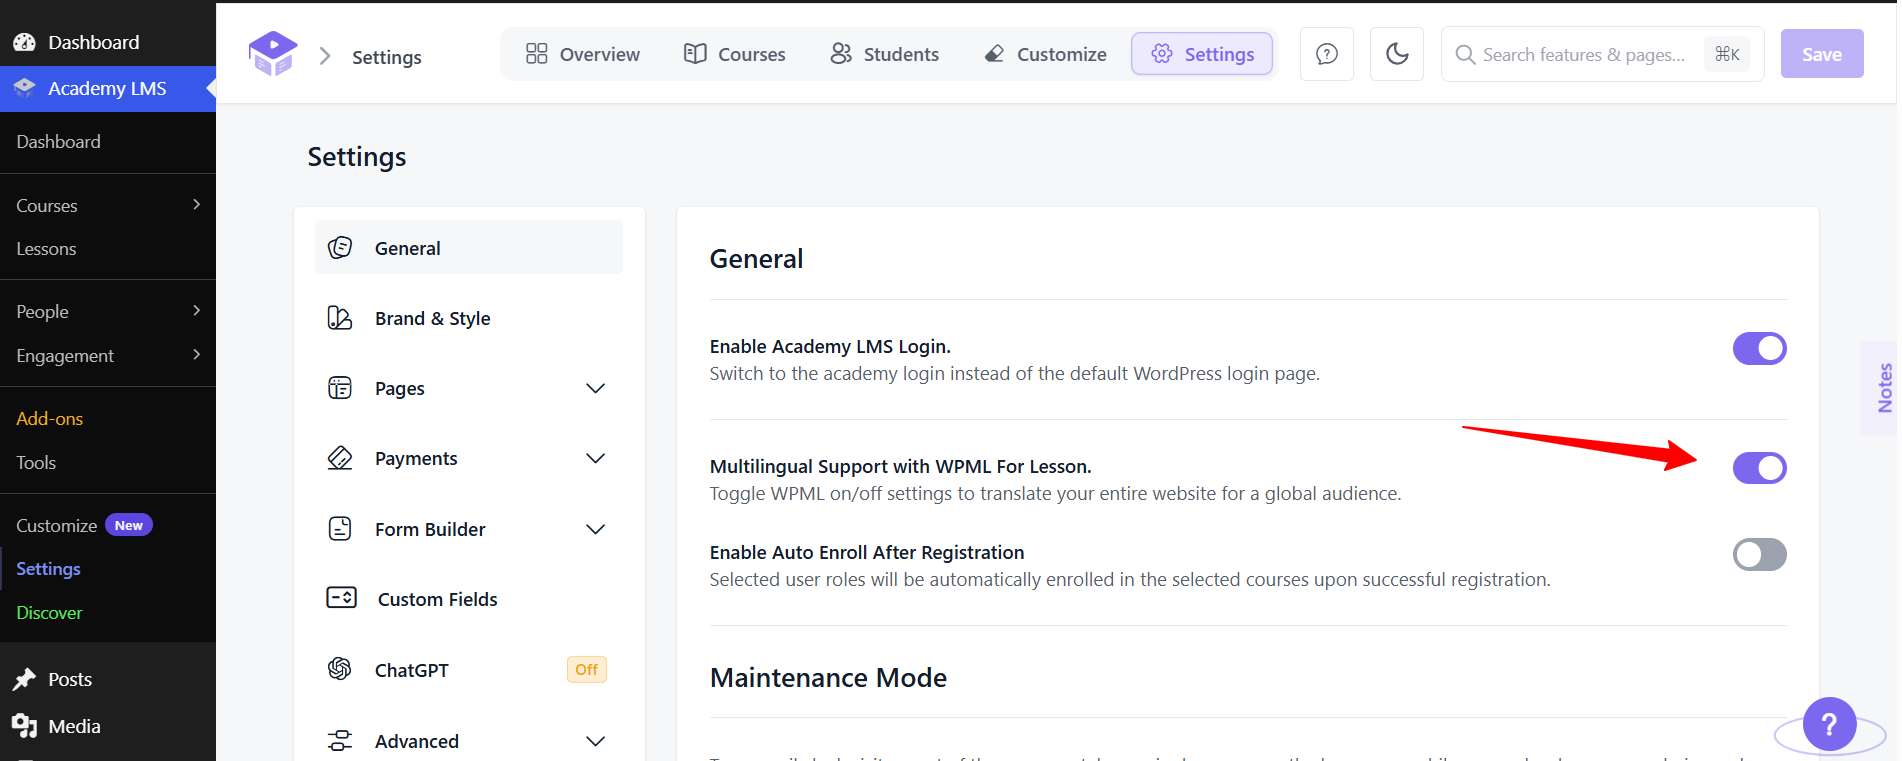
Before translating lessons, open Academy LMS → Settings and enable “Multilingual Support with WPML for Lessons.”
Plan time for manual work. Academy LMS states that lessons, quizzes, and assignments must be translated manually. Automatic translation and WPML’s Advanced Translation Editor aren’t supported for these content types in this integration.
As you translate, check:
For example, if a quiz asks for the “best” answer, make sure your translation doesn’t make two answers seem equally correct.
Step 6: Add a WordPress language switcher
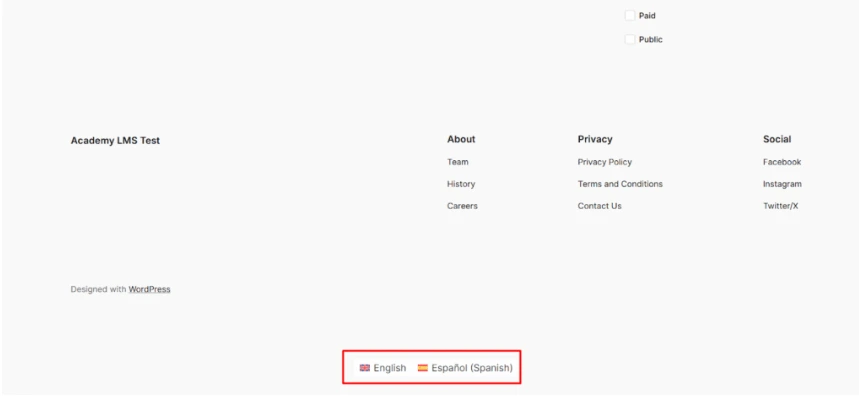
A WordPress language switcher lets students choose their language. WPML supports placing it in menus, widgets, footers, templates, and page content.
Put it where learners will see it while browsing courses, then test it on both the course listing and an individual course page. When a learner selects a language, Academy LMS shows the courses created in that language.
Check mobile too. A switcher that’s easy to spot in a desktop menu can be hard to find in a collapsed phone menu.
Check buttons and other short text
Look at buttons, forms, account pages, and messages like “Enroll” or “Start quiz.” WPML String Translation can handle many labels stored outside normal posts and pages. If a phrase stays in the original language, find where it comes from first. It may be course content, a theme label, or a plugin string.
Step 7: Check WordPress hreflang and SEO details
Translated courses need their own search-friendly details, because people searching in another language may use different words than a direct translation of your original keyword.
For each published course version, review:
What is WordPress hreflang?
WordPress hreflang tells search engines which URLs are language versions of the same page. Google recommends hreflang annotations when you have separate URLs for different languages.
After publishing a translated course, check that:
Remember the difference: the switcher is for visitors, hreflang is for search engines.
Whichever SEO plugin you use, read the published title and description in every language, and make sure they’re clear, accurate, and right for that audience.
Step 8: Test the full course before launch
Test as a student in each language:
Keep a list of anything untranslated or unclear and fix it before inviting learners.
Common problems in a WordPress multi-language LMS
Quick launch checklist
Final thoughts
The easiest way to build a multi-language LMS is to perfect the process with one course first. Set up WPML, translate the course, translate its learning activities, and test the whole student journey. Once it works in each language, use the same steps for the rest of your catalog.
Frequently asked questions
Can WPML automatically translate every part of an Academy LMS course?
No. Lessons, quizzes, and assignments require manual translation. Automatic translation and WPML’s Advanced Translation Editor aren’t supported for them in this integration.
Do I need Academy LMS Pro for a WordPress multi-language LMS?
Yes. Academy LMS lists Free, Pro, and WPML Multilingual CMS as requirements.
Is a WordPress language switcher enough for a multilingual LMS?
No. The switcher helps learners navigate. You should also review each version’s content, SEO metadata, URL, and WordPress hreflang information.